So, you wanna learn how to use a double action airbrush? Well, buckle up my friend, because you’re in for a wild ride! I remember when I first started using airbrushes, I was so intimidated by the idea of controlling both the airflow and the paint release. But trust me, it’s a lot easier than it sounds. In fact, I bet if you had a few drinks in you, you’d be a pro in no time! (Just kidding, please don’t drink and airbrush).
Anyways, let me tell you a personal anecdote. I once tried to create a gradient effect on a painting and ended up making a huge mess. It looked like I had thrown a handful of paint at the canvas. But, after a few practice runs, I finally got the hang of it and now I can create some pretty cool effects. So, my advice to you is to stick with it and don’t get discouraged if your first attempts don’t turn out as you envisioned.
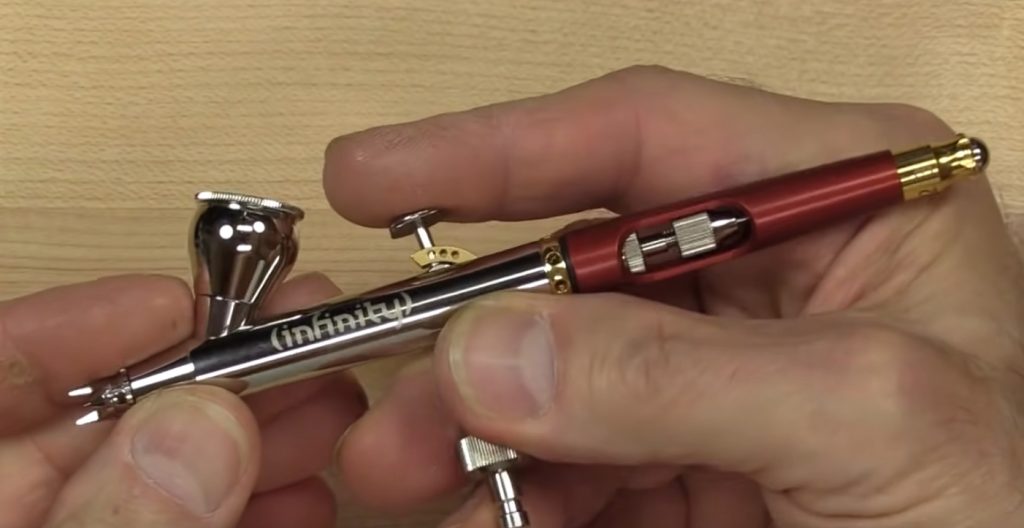
What Is A Double Action Airbrush?
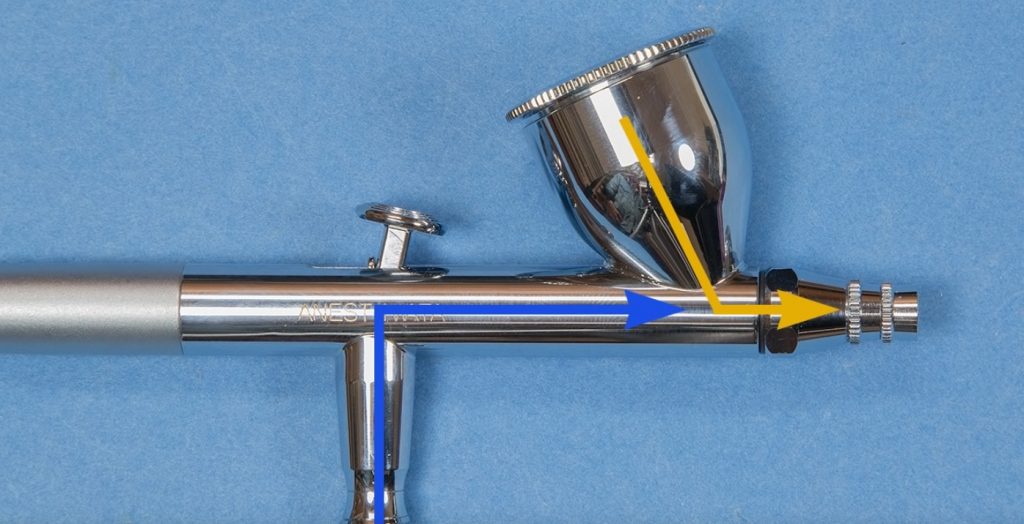
A double-action airbrush is a type of airbrush that uses two motions to control the amount of paint that is released. The first motion, pressing down on the trigger, releases air from the brush. Pulling back on the trigger in the second motion releases paint from the brush. This allows for more accuracy and control when painting.
In other words, a double-action airbrush is an airbrush that you can use to create different effects by controlling the amount of paint released.
This article will help you choose an airbrush if you don’t have one.
How To Use A Dual Action Airbrush
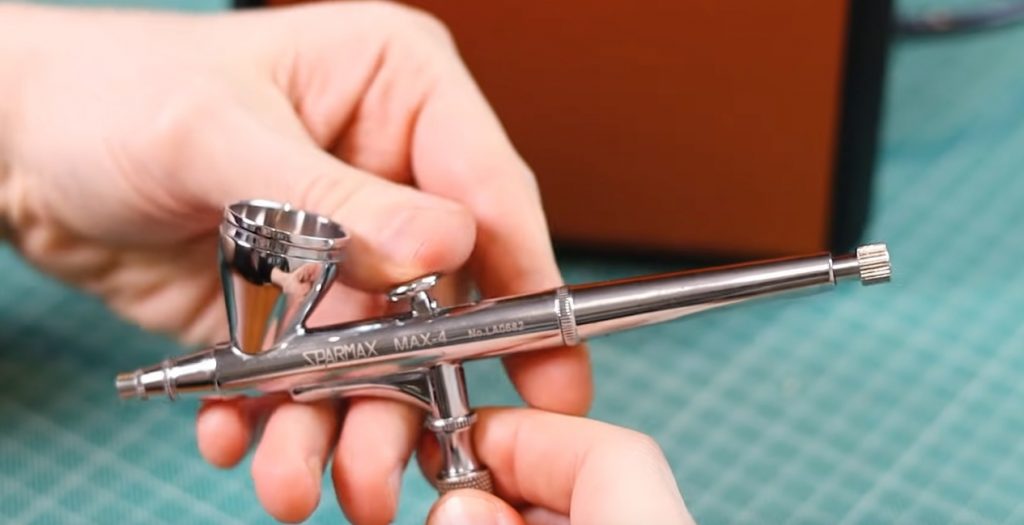
A double-action, or dual-action, airbrush requires user control on a two-direction trigger to change the air and paint flow separately.
I will look at each movement of the trigger in detail to understand how it can improve your airbrushing.
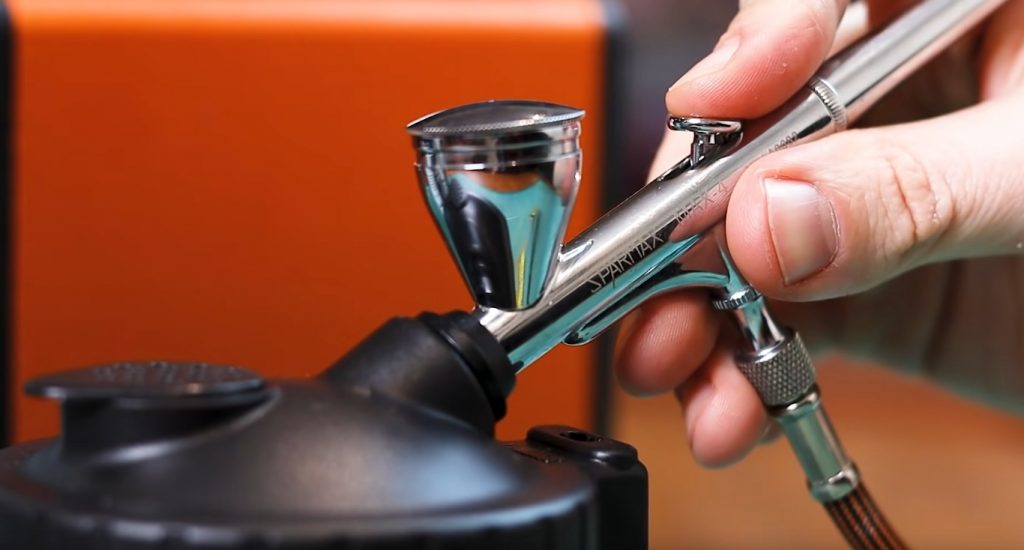
Trigger Movement: Airflow Control
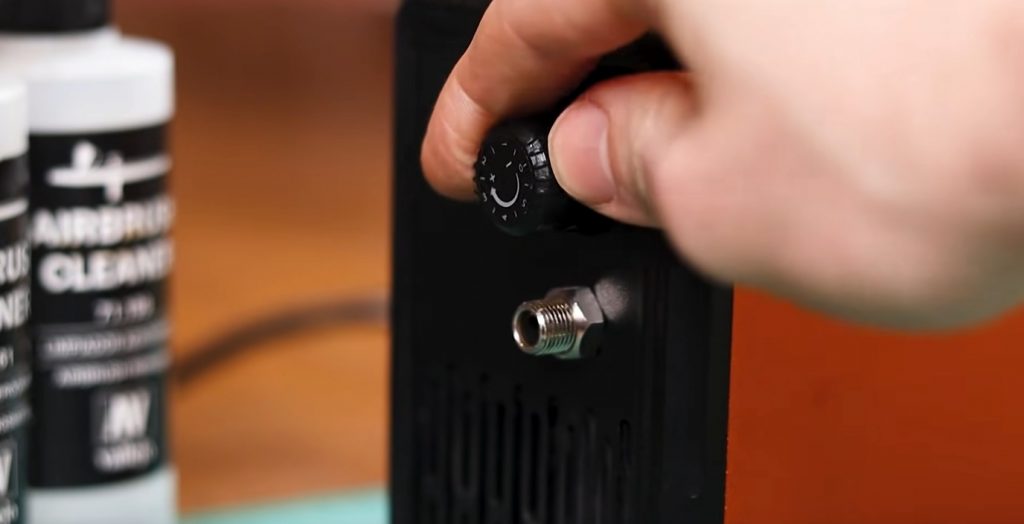
To start the airbrush, press down on the trigger. This will allow the high-pressure air from the compressor to flow through the airbrush and out of the nozzle.
You should know that the air pressure and flow rate are not regulated by how far down you push the trigger but by the air pressure on your compressor.
If you want to put less pressure on the airbrush, do not try to push the trigger down less. Instead, turn down the pressure on the regulator attached to your compressor.
If your airbrush compressor doesn’t have a regulator, you need to upgrade it. A regulator controls how much pressure the compressor delivers. Here, you can learn more about what to look for when buying a new airbrush compressor.
To use your compressor to get the high-pressure air you need for a double-action airbrush, you’ll need to set the air pressure you want. For most people, this will be around 60-80PSI. Simply push the trigger down every time to get the high-pressure air flowing.
Now it’s time to learn a little more about how to use the paint gun. You’ll need to use the second trigger action to adjust the flow of paint.
Trigger Movement: Paintflow Control
The further you pull the trigger on a double-action airbrush, the more paint will flow. The distance you pull the trigger will determine how much paint is allowed to flow.
Pulling the trigger back a little bit will let out a small amount of paint which can help you get close to your work and paint very finely.
If you pull back on the trigger, the airbrush will let more paint flow into the high-pressure airstream. This is great for airbrushing bigger areas easily.
However, in the real world, you often want to change how much paint you spray while working.
If you want to get a special paint effect or paint an oddly shaped object, it can be helpful to switch easily between a small and large amount of paint flow. Not every part of the object will need the same amount of paint, which will help you control the painting process better.
The double-action airbrush is very versatile and can help you finish jobs that are a bit more complex with much more ease than you could with a single-action airbrush.
The double-action airbrush can control the amount of paint by how much you press the trigger. The single-action airbrush can only control the amount of paint by how hard you squeeze the trigger on the gun if your compressor has a regulator that allows pressure adjustments.
Now that you understand how a double-action airbrush works, let’s consider how to practice using one. To do this, you need to find a way to create a smooth and even flow of paint. You can do this by practicing on a surface that is covered in plastic or foam.
How To Practise Using A Double Action Airbrush (In 13 Simple Steps)
It is better to practice and learn how to use a double-action airbrush by playing around with the trigger mechanism on something cheap and disposable, like a plastic container lid, a plastic spoon, or an old scrap model kit. This way, you can make mistakes without ruining something valuable.
I will use a piece of paper attached to a clipboard because it is something most people will have access to.
NOTE: If you plan to paint something like a scale model, be aware that the finish on paper will be different from the finish on non-porous plastic. If you can, practice on something like a plastic lid or container to get the hang of it.
You need to do a few basic things to get started using a double-action airbrush.
It is impossible to cover everything about airbrushing in a single article. However, the steps below will give you a basic understanding of how the airbrush works and how to get started.
Step 1: Take the Airbrush in Your Hand and Squeeze the Trigger
The first thing you need to do is take the airbrush in your hand and squeeze the trigger. This will allow you to get a feel for how the airbrush works and how much pressure you need to apply to the trigger to get the paint flowing.
Step 2: Is All about Finding Your Sweet Spot
By this, we mean finding the perfect distance between your airbrush and the surface you’re painting on. If you hold the airbrush too close to the surface, the paint will be splattered and won’t go on evenly. If you hold it too far away, the paint will dry before it reaches the surface. So, play around with different distances until you find one that works best.
Step 3: Different Ways to Adjust the Spray Pattern
There are three ways to adjust the spray pattern on a double-action airbrush:
- Changing the distance between the airbrush and the surface being sprayed
- Adjusting the trigger position
- Adjusting the air pressure
This step will explore how each method affects the spray pattern.
- Angle the airbrush nozzle: This is the most common way to change the spray pattern. Simply hold the airbrush so that the needle is at a different angle to the surface you’re painting.
- Change air pressure: By increasing or decreasing the air pressure, you can also change the size of your spray pattern.
- Moving the airbrush closer or further away from your project will also affect how big or small your paint job will be. So if you want something more detailed, move it closer!
- Change the size of the opening on the airbrush tip: This will also affect the size of your paint job. A smaller opening will give you a more detailed paint job, while a larger opening will give you wider coverage.
Now that you know how to change the spray pattern, you can start experimenting with different techniques to create different effects.
Step 4: Load Suitably Thinned Paint into Your Airbrush
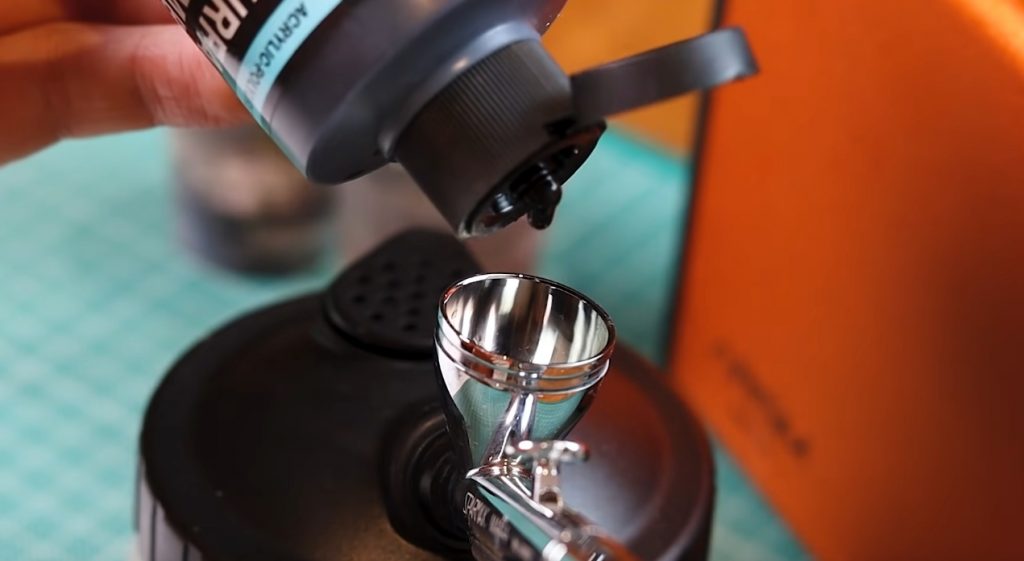
Now that your airbrush is set up, it’s time to load some paint into it. But not just any old paint! You need to use paint that has been properly thinned for airbrushing. This can be done with water or a special thinner for airbrush paint. Just follow the manufacturer’s instructions on how much thinner to add.
Once your paint is nice and thin, it’s time to load it into the airbrush. Most double-action airbrushes have a cup on top that you can unscrew and fill with your paint. Ensure not to overfill it, or the excess paint will start dripping out of the airbrush.
Step 5: Press The Trigger For Air Only
This might seem like a no-brainer, but getting a feel for how much pressure you’re putting on the trigger is important. Too much pressure can result in an uneven spray pattern, while too little pressure will give you an inconsistent line.
Start by holding the airbrush about six inches away from your practice surface. Press down on the trigger until you hear the compressor start running, then release it immediately. You should see a small stream of air coming out of the nozzle. If not, check to ensure that your airbrush is properly set up and that there’s no blockage in the nozzle.
Once you’re comfortable pressing the trigger, it’s time to start practicing your spraying technique!
Step 6: Hold The Airbrush Steady
The key to a good spray pattern is a steady hand. If you move the airbrush too much, you’ll end up with an uneven line. Practice holding the airbrush steady by moving it back and forth across your practice surface. Start with long, slow strokes and gradually increase your speed as you get more comfortable. Remember to keep the airbrush perpendicular to the surface for best results.
If your hand is shaking or you’re having trouble keeping a steady line, try using your other hand to support the airbrush. Alternatively, you can rest your elbow on a table or other surface to help keep your hand steady.
With a little practice, you’ll be able to produce nice, even lines with your double-action airbrush!
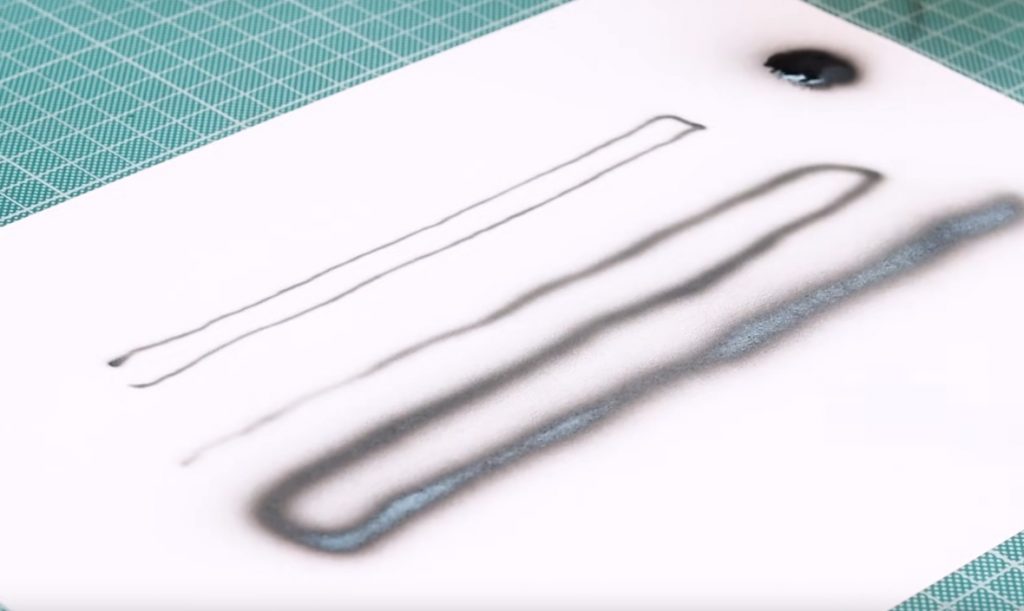
Step 7: Test Close To The Surface With Minimal Paint
Now hold your airbrush close to the surface of what you are painting. Press the trigger down to get air flowing.
Slowly pull the trigger back when using the air compressor to spray paint. This will help you to get the smallest amount of paint possible mixed with the air.
When you see the paint hit the surface, start moving the airbrush sideways or down to draw a thin line.
You should try moving the airbrush closer and further away to see how the distance affects the line you’re painting.
As you keep going, you will see that the line becomes finer and crisper. Do this for as long as you want to see how fine the line can be. When you are done, move on to Step 8.
Step 8: Test Further Away With Medium Paint
Now move the airbrush about 3-4 inches away from the surface and press the trigger to start the airflow.
Move your hand from side to side while pulling the trigger back. This will let out a medium amount of paint.
Move your hand at a speed that will allow you to cover the surface with paint, but not so quickly that the paint starts to run or pool.
Step 9: Intentionally Make The Paint Run
In this step, you will learn how to get paint runs and pools in your work. This will help you to avoid them in your important projects. Practice on a surface that doesn’t matter first to learn how to identify when it is happening and fix it.
Hold the airbrush an inch away from the surface you want to paint. Then press the trigger to let out the air.
Slowly move your hand sideways and pull the trigger back to get a lot of paint flowing.
The paint will build up quickly on the surface and run down the page. You might also get spidering when the paint pools and spreads like spider legs.
NOTE: If you are using paper, which is reasonably absorbent, it will take more paint to make it run. Unless your paint is thin, it might not run at all. Instead, you will see the paint pooling and starting to form waves as the air pressure pushes on the pooled paint.
The paint will run much more easily using a hard, non-porous surface like a plastic lid. If you can’t get the paint to run, slow down the airbrush’s movement or even stop it altogether to see what happens.
Step 10: Paint To The Point Of An ‘Almost-Run’
For example, when painting a top coat on a scale model, you want to airbrush it until the paint almost runs. This will give you the best and smoothest finish.
Start with your airbrush two to three inches from the surface and press the trigger down to get air flowing.
To start painting:
- Move your hand sideways and pull the trigger back halfway. This will allow the paint to flow.
- Adjust the speed of your hand so that the paint goes down smoothly and with good coverage.
- If you need more paint, pull the trigger back a little more.
Keep practicing until the paint starts to run a little bit. When you’re able to do this, you will know that you have gone too far. Continue practicing until you are good at it, which won’t take too long. Then move on to Step 11.
Step 11: Change Distance And Paint Flow On The Fly
You need to adjust how far away from the surface and how much paint you use. If you are close to the surface, use less paint. If you are far away, use more paint.
You want to ensure that the paint is applied evenly without any parts being too thin or too thick. This can take some practice, but once you get good at it, you can apply the paint evenly with a double-action airbrush.
To start, turn on the air and hold the airbrush 2-3 inches from the surface you’re painting on. Begin moving your hand sideways, backward, and forwards across the surface and successively down.
As you start the first pass, pull the trigger back as far as you did on the last step to get an ‘almost-run’ in your paint. Continue across the width of the page or surface.
To create a second horizontal line, let the trigger move forwards about half its distance and shift the airbrush to around an inch from the surface. While you continue to move it sideways, aim to paint a thinner line but achieve the ‘almost-run’ effect again.
When you get to the next line, pull the trigger back further and move the airbrush 2-3 inches away from the surface. Repeat this process all the way down the page until it’s full. You will then be ready to move on to Step 12.
Step 12: Practise On A Colouring-In Print-out
To control the position of your airbrush, you will need to practice using different amounts of paint at different distances from the surface. This will help you quickly and accurately cover certain areas.
To color in kids drawing using an airbrush, first, click on the image to access a larger version of it that you can save or download. Then print it out.
You can paint every image section the same color if you want. Still, it might be better to alternate colors between adjacent sections.
When you start on a section, start by having your airbrush very close to the surface and using a small amount of paint to get a crisp, fine line around the edges of the section.
Once you have good coverage on the section edges, move the airbrush back and increase the paint flow to cover the larger area in the middle without taking forever.
Colour in the entire image, and you’re done!
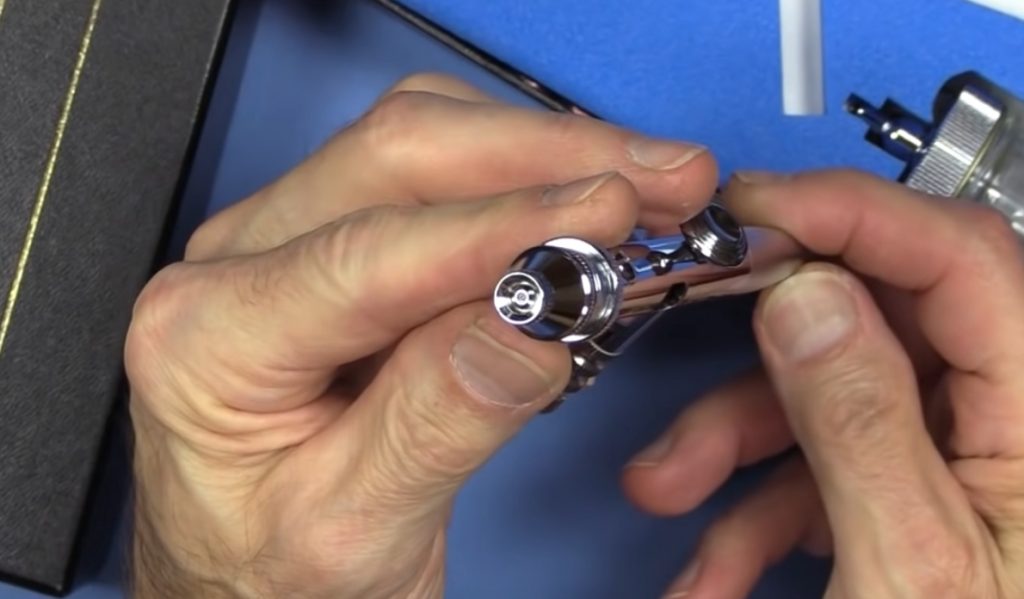
Step 13: Clean the Airbrush Regularly
Regular cleaning is essential for keeping your airbrush running smoothly and preventing malfunctions. Here are the basic steps to clean your airbrush:
- Disassemble the airbrush and clean all the parts with warm water
- Soak the needle in a solvent such as alcohol or acetone for 10 minutes
- Rinse all the parts with water and dry them off
- Reassemble the airbrush
The Different Types of Nozzles That are Available
Nozzles come in a variety of shapes and sizes, each with its own unique benefits and drawbacks.
Here’s a look at some of the most common types of nozzles:
- Round Nozzle: The round nozzle is the most common type used in airbrushes. It’s designed to provide a wide, even spray pattern perfect for general purpose applications.
- Flat Nozzle: The flat nozzle is designed to provide a more concentrated spray pattern than the round nozzle. It’s ideal for detailed work or for spraying thicker liquids.
- Needle Nozzle: The needle nozzle is the smallest type of nozzle available. It’s designed to provide a fine, concentrated spray pattern that’s perfect for detailed work or for spraying very thin liquids.
- Pointed Nozzle: The pointed nozzle is a variation of the needle nozzle. It’s designed to provide a fine, concentrated spray pattern but with a slightly wider spray area than the needle nozzle.
- Fan Tip Nozzle: The fan tip nozzle is designed to provide a wide, evenly dispersed spray pattern. It’s perfect for general purpose applications or for spraying large areas.
- Flat Bottom Nozzle: The flat bottom nozzle is similar to the flat nozzle but has a slightly wider spray area. It’s perfect for spraying large areas or projects requiring a wide spray pattern.
- Shaped Nozzle: The shaped nozzle is a specialized nozzle designed to provide a specific spray pattern. Shaped nozzles are available in various shapes, including oval, heart, and star.
Choosing the right nozzle for your project is important. The wrong nozzle can make your airbrush difficult to use or can produce poor results. Be sure to experiment with different nozzles to find the one that’s right for you.
Tips for Using a Double Action Airbrush
- Always read the instructions first
- Practice on a piece of paper before you start painting
- Hold the airbrush close to the surface for more accurate spraying
- Use light pressure for thin lines and harder pressure for thicker lines
- Keep your hand steady and move the airbrush in the direction you want the paint to go
- Practice making different types of lines and shapes before you start painting on your project
- Clean the airbrush thoroughly after each use to prevent paint from drying inside the nozzle
Conclusion
The mastery of the double-action airbrush is not an insurmountable task, as some may lead you to believe. The key to unlocking this versatile tool is repetition – and plenty of it. Indeed, the three most pivotal pillars that support your journey to airbrush proficiency are all centered around practice. Repeating the motions of the double-action airbrush ad nauseam is not merely a suggestion; it is a requirement for success. The endurance to persevere through this seemingly endless repetition may cause one to falter. But, if one can weather the storm of monotony and maintain the patience required to achieve mastery, the results will undoubtedly be worth the toil. Indeed, in time, one may even find themselves relishing the very act of wielding this powerful instrument.
FAQ
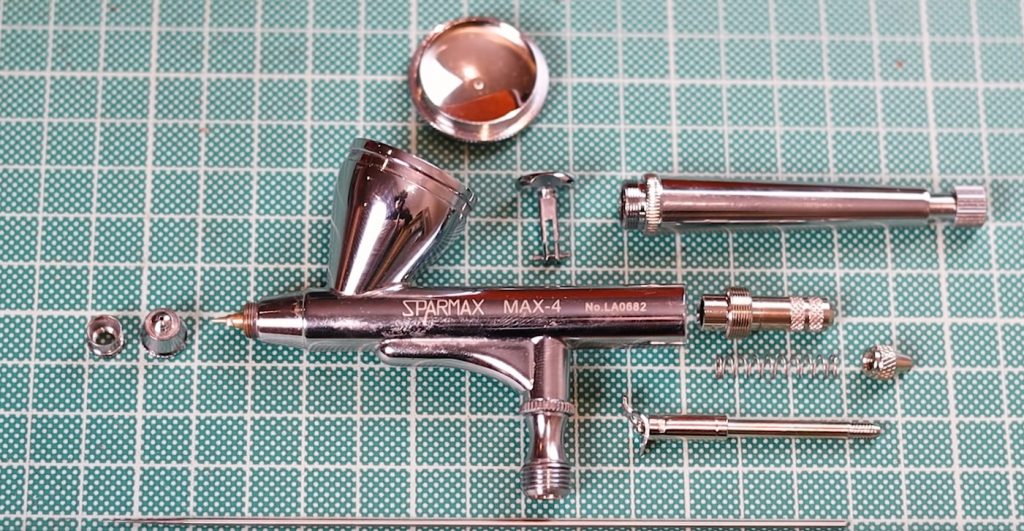
What are the different parts of a double action airbrush?
The parts of a double action airbrush are the body, the needle cap, the needle, the nozzle, and the cup. The body is where you hold the airbrush and has a trigger that you use to start and stop the paint flow. The needle cap keeps the needle clean and protects you from getting stabbed by it. The needle is what goes into the paint and draws it up into the airbrush. The nozzle determines how wide the paint spray will be. The cup holds the paint.
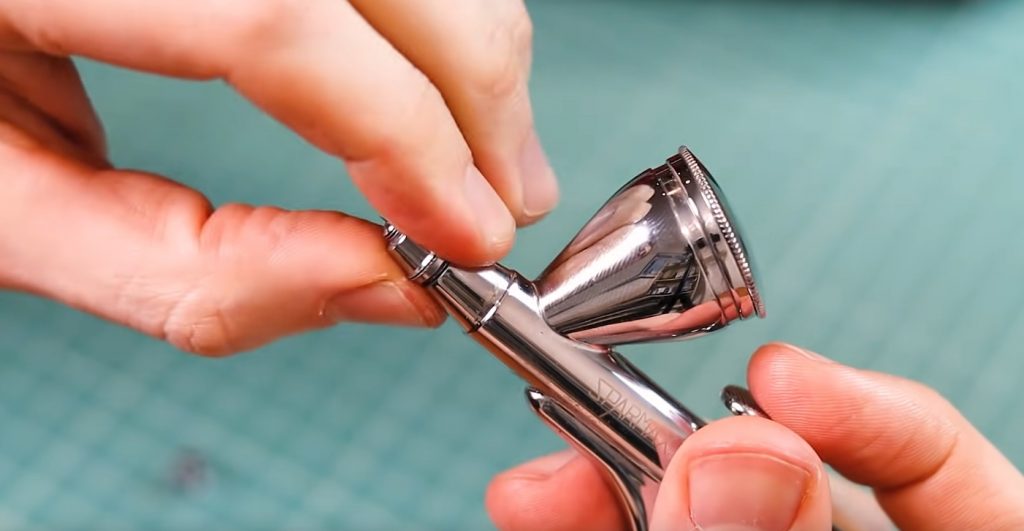
How do you assemble a double action airbrush?
Double action airbrushes are easy to assemble. The first step is to attach the airbrush holder to the stand or work surface. Next, connect the air hose to the airbrush and tighten it by hand. Then, screw on the paint bottle and attach the needle cap. Finally, hold the airbrush in your hand and pull back on the trigger to prime it.
How do you prime a double-action airbrush?
To prime a double-action airbrush, you need to hold the airbrush upright with the needle pointing down. Next, pump the black primer bulb at the bottom of the airbrush 10-15 times until some primer comes out of the nozzle. You’re now ready to start spraying!
What kinds of paint to use with an airbrush
Water-based paints are the best type of paint to use with an airbrush. They are easy to clean and come in a variety of colors. Water-based acrylic paints are the best type of paint to use with an airbrush because they are easy to clean and come in various colors.

Hey there! I’m Richard Baker, a miniature painter who’s been in the game for a solid decade now. I’ve been painting miniatures for ten years and I’ve got a ton of tips and tricks to share with you all. My website is a treasure trove of knowledge that I’ve gathered from both my own personal experiences and from reading all sorts of books.


Leave a Reply