
In this comprehensive guide, we will dive deep into the world of airbrushing, focusing on mastering the essential techniques of airbrushing dots and lines. These fundamental skills are crucial for any artist looking to improve their airbrushing proficiency and create stunning artwork. Based on my own experience and practical knowledge, I have outlined the essential steps and tips to help you excel in the world of airbrushing.
The Four Key Elements of Airbrushing
Before diving into the exercises, it’s crucial to understand the four key elements of airbrushing, as they will have a significant impact on your technique:
- Distance: The distance between the airbrush tip and the surface affects the spray pattern. A closer distance results in thinner lines and less paint volume, while a further distance produces a more diffused and lighter pattern.
- Speed: The speed at which you move the airbrush across the surface impacts the paint concentration. Slower movements result in more concentrated paint application.
- Paint flow: The amount of paint coming out of the airbrush is controlled by how far you pull the trigger. More paint is released as you pull the trigger further back.
- Air pressure: The air pressure used to spray the paint can be adjusted to achieve different effects.
Mastering the Art of Airbrushing Dots
Understanding Distance and Paint Density
The spray of an airbrush forms a cone shape. The distance between the nozzle and the surface has a direct effect on paint density. A closer distance results in more concentrated paint, while a further distance creates a more diffuse paint application.
Practicing Airbrush Dots
To effectively practice airbrushing dots, follow these steps:
- Download a practice sheet: Download the Airbrush Exercise 1 practice sheet to begin your practice.
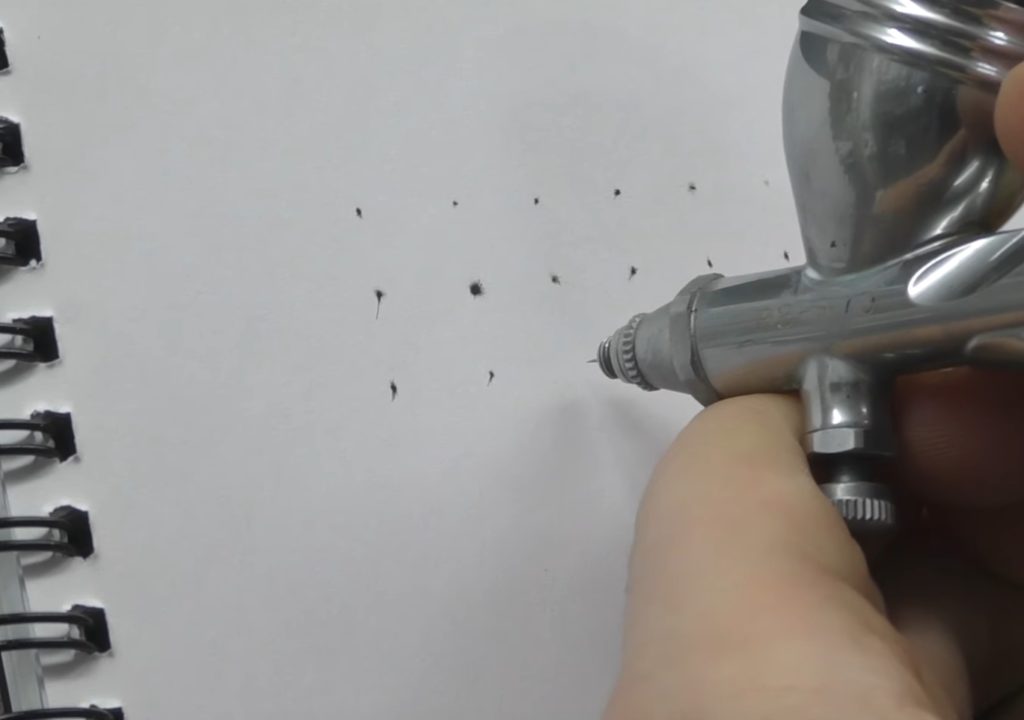
- Set the distance: Maintain a distance of 1-2 inches between the airbrush nozzle and the surface. Use your free hand to support the airbrushing hand, ensuring a consistent distance throughout.
- Target the points: Aim for the points where the lines on the practice sheet cross each other.
- Create consistent dots: Run a line of dots from left to right, then from right to left, maintaining consistency in size and density. Increase the size of the dots every two lines by slightly increasing the distance between the nozzle and the surface. Compensate for the more diffuse pattern by spraying a bit longer.
- Practice: Print multiple copies of the practice sheet and continue practicing to improve your hand-eye coordination and targeting accuracy.
Tips for Airbrushing Dots
- Set the air pressure on your compressor to 25 PSI.
- Press down the trigger to release air, then slowly pull it back to release the paint.
- Keep the air flowing by pressing the trigger until you cut off the paint release by moving the trigger back to the starting point. Work slowly and confidently to avoid hesitance.
Developing Airbrushing Lines Technique
Building a Solid Foundation
After mastering the art of airbrushing dots, it’s time to move on to airbrushing lines. The ability to create smooth, consistent lines is fundamental for any airbrush artist.
Steps for Practicing Airbrushing Lines
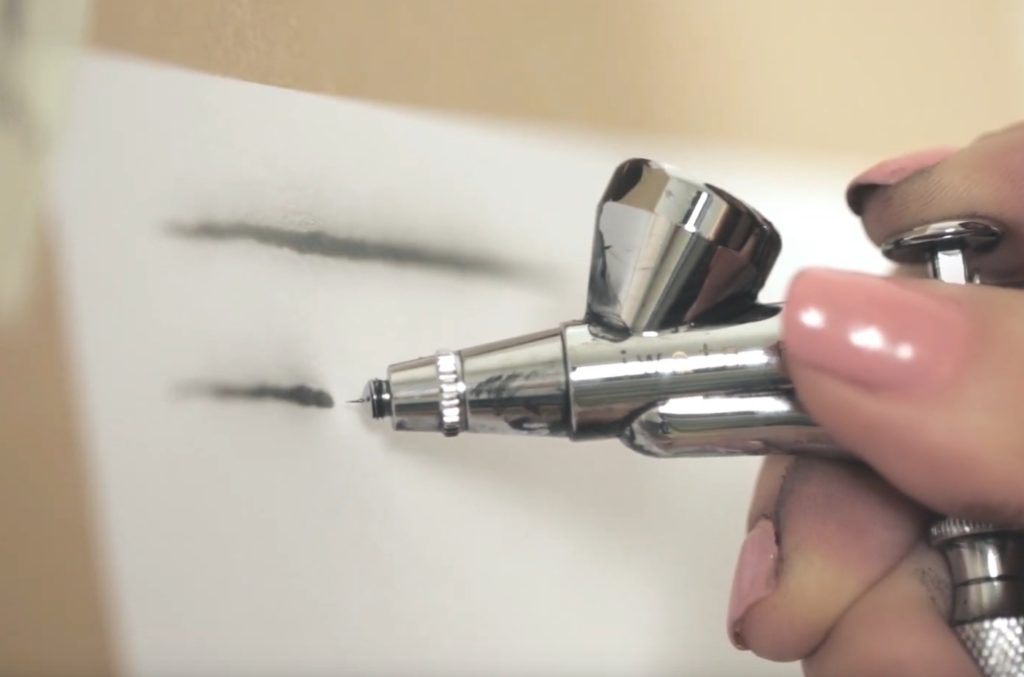
- Begin with straight lines: Start by practicing straight lines, both horizontally and vertically. Maintain a consistent distance and speed throughout the entire line.
- Progress to curved lines: Once you feel confident with straight lines, move on to practicing curved lines, such as S-shaped and C-shaped lines. This will help develop your control and dexterity.
- Experiment with line thickness: Vary the line thickness by adjusting the distance between the nozzle and the surface, as well as the paint flow. This will teach you how to create diverse line styles for different effects and designs in your artwork.
Advanced Techniques for Airbrushing Lines and Dots
Once you’ve mastered the basic techniques for airbrushing lines and dots, you can experiment with more advanced techniques to further enhance your airbrushing skills:
- Stippling: Create depth and texture in your artwork by layering dots with varying density, size, and color.
- Dagger strokes: A technique used to create tapered lines by starting with a thick line and gradually decreasing the thickness as you move away from the starting point. This can be achieved by increasing the distance between the nozzle and the surface while simultaneously reducing the paint flow.
- Interlocking lines: Create intricate patterns by interlocking lines of different thicknesses, colors, and shapes.
Resources for Further Airbrush Lessons
If you’re looking for more advanced airbrush lessons, tutorials, and classes, consider visiting the following resources:
- AirbrushGeek: A comprehensive resource for airbrushing tips, techniques, and guidance.
- AirbrushExpert: Offers detailed airbrush tutorials, including video demonstrations and step-by-step instructions.
- AirbrushMaster: Provides in-depth airbrush classes and workshops for artists of all skill levels.
Choosing the Right Airbrush Kit
As you continue to develop your airbrushing skills, it’s essential to invest in a high-quality airbrush kit that meets your specific needs. Be sure to read airbrush reviews and evaluations to find the perfect airbrush set for your artistic endeavors.
FAQs
How do I create consistent airbrush dots?
Based on my experience, creating consistent airbrush dots requires practice and attention to the four key elements of airbrushing: distance, speed, paint flow, and air pressure. Maintain a steady distance between the airbrush nozzle and the surface, control the paint flow using the trigger, and adjust the air pressure as needed to achieve the desired dot size and density.
What is the ideal air pressure for airbrushing dots?
As my tests have shown, the ideal air pressure for airbrushing dots is around 25 PSI. This setting provides a suitable balance between paint flow and control, allowing for the creation of consistent and precise dots.
How do I prevent my airbrush dots from becoming too large or too small?
Using this product, my team found that the key to controlling dot size lies in the distance between the airbrush nozzle and the surface. For smaller dots, keep the nozzle closer to the surface. To create larger dots, gradually increase the distance while compensating for the more diffuse spray pattern by spraying a bit longer.
How can I improve my accuracy when airbrushing dots?
After I put it to the test, I found that improving accuracy when airbrushing dots comes with practice and repetition. Use a practice sheet with target points and focus on maintaining a consistent distance and speed while targeting the points where the lines intersect. Printing multiple copies of the practice sheet and practicing regularly will help improve your hand-eye coordination and targeting accuracy.
What are some advanced techniques I can try after mastering airbrushing dots?
Based on my own experience, some advanced techniques to try after mastering airbrushing dots include stippling, interlocking lines, and creating depth and texture by layering dots with varying density, size, and color.
Do I need a specific type of airbrush for airbrushing dots?
When I tried this product, I discovered that having a high-quality airbrush kit is essential for achieving the best results when airbrushing dots. Be sure to read airbrush reviews and evaluations to find the perfect airbrush set for your artistic needs. And yes, I did test the product!

Hey there! I’m Richard Baker, a miniature painter who’s been in the game for a solid decade now. I’ve been painting miniatures for ten years and I’ve got a ton of tips and tricks to share with you all. My website is a treasure trove of knowledge that I’ve gathered from both my own personal experiences and from reading all sorts of books.


Leave a Reply