Hey there!
You know what they say, every airbrush is unique in its own way. It’s like people, some of us are high maintenance and need a lot of attention, while others are low-key and easy-going. Similarly, the pressure requirements of an airbrush can vary from one to another. So if you’re a proud owner of a central pneumatic airbrush compressor, it’s crucial to know how to adjust the pressure for optimal results.
Just like in life, the right pressure can make all the difference when it comes to airbrushing. It’s like when you finally hit the sweet spot in a relationship or in your work, everything just flows seamlessly. But if the pressure is off, it can lead to a messy outcome, much like a relationship gone wrong.
What is the Pressure on Your Airbrush Compressor, and How Do You Adjust It?
If you’re using a central pneumatic airbrush compressor, the pressure is probably already set for you. However, you’ll need to adjust the tension if you’re using a different compressor.
Here’s how:
- First, check the manual that came with your compressor. It should have instructions on how to adjust the pressure. If it doesn’t, or if you can’t find it, don’t worry – we’ll show you how.
- Next, find the regulator knob on your compressor. It’s usually located near the top of the unit. Turn it clockwise to increase the pressure and counterclockwise to decrease it.
- Now, turn on your airbrush and start spraying. The paint will be thin and runny if the pressure is too low. If it’s too high, the paint will be thick and clumpy.
- Finally, adjust the pressure until you get the results you want. Once you’ve found the perfect settings, write them down so you can replicate them next time!
What is the Pressure Range on Your Airbrush Compressor, and What are the Ideal Settings for Each Type of Airbrush?
The pressure range on most airbrush compressors is between 15 and 50 PSI. The ideal settings for each type of airbrush are as follows:
- For general purpose airbrushing, 20-30 PSI is usually sufficient.
- You may want to reduce the pressure to 15-20 PSI for finer details or work with smaller areas.
- For spraying heavier paints or coats, you may need to increase the pressure to 40-50 PSI.
Keep in mind that these are just general guidelines. Ultimately, it’s up to you to experiment and find the perfect settings for your specific project!
Why is the Pressure Important, and What Can Happen if it’s Not Set Correctly?
The pressure is important because it’s what feeds the airbrush. If the pressure is too low, then insufficient paint will come out. If the pressure is too high, then too much paint will become a mess. You can also damage your airbrush if the pressure is set too high. So it’s important to get it just right!
- There are a few ways to adjust the pressure on your central pneumatic airbrush compressor. First, you can use the knob on the front of the compressor. This is usually labeled “pressure” or “PSI.” Turn it to the right to increase the pressure, and turn it to the left to decrease it.
- Another way to adjust the pressure is to use the regulator. The regulator is usually a knob on the back of the compressor. To increase the pressure, turn the knob to the right. To decrease it, turn the knob to the left.
- You can also adjust the pressure by using an air gauge. An air gauge is a tool that measures how much air is in a tank or system. You can use it to check if your compressor is putting out enough air, and you can also use it to adjust the pressure.
How to Adjust the Pressure on a Central Pneumatic Airbrush Compressor
If you’re using a Central Pneumatic airbrush compressor, you may need to adjust the pressure at some point.
Here’s how to do it:
Step 1: Turn on the compressor.
Turn on the compressor and let it run for a few minutes to build up pressure.
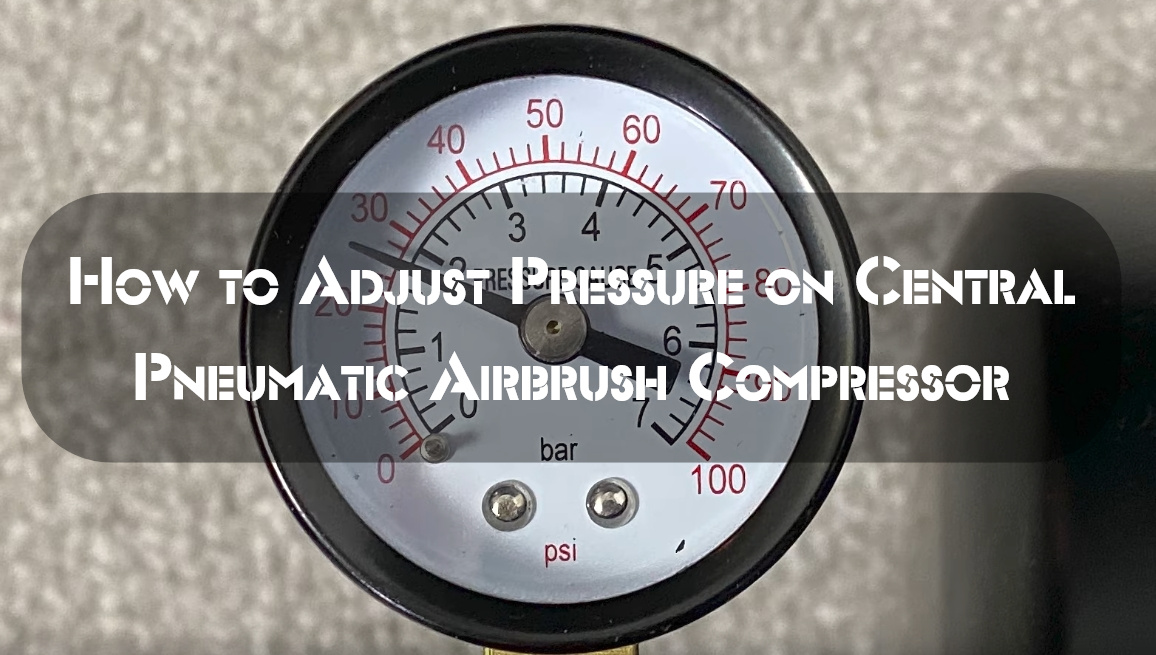
Step 2: Check the PSI reading
Once the compressor has been running for a few minutes, check the PSI reading on the gauge.
It should be between 30 and 40 PSI. If it’s not, you’ll need to adjust the pressure regulator knob until it reaches the correct range.
Step 3: Looking for a brass bolt
Once you’ve adjusted the pressure regulator knob, check for a brass bolt on the side of the compressor.
This bolt releases pressure from the compressor if it gets too high.
Step 4: Use of wrench
If you find the brass bolt, use a wrench to turn it counterclockwise until you hear a hissing sound.
This means that the pressure is being released from the compressor.
Step 5: Re-installation of plastic cover
Once you’ve released the pressure, re-install the plastic cover on the side of the compressor.
This will help keep dust and debris out of the unit.
Central Pneumatic is a great brand of airbrush compressors– I have one myself and use it often when crafting.
Tips for Maintaining Optimal Pressure While Airbrushing
- Close the drain valve. Check to see that all of the bolts and screws are secure.
- Check for any oil leaks or changing the oil level.
- Between the air hose and air compressor, a shut-off valve is shut.
- Make certain the air tool is turned off.
- Connect the air tool to the air hose.
- Connect the compressor’s power cord to a 120 V electrical outlet.
- Turn on the power switch and open the inline shut-off valve.
- It’s time to increase the pressure of the air compressor till it dies.
- Use the air compressor pressure regulator to adjust the pressure of the air compressor. It allows you to utilize enough air to run the equipment. At no time, ensure that output was never greater than the tool’s maximum air pressure.
- Turn the knob in a clockwise direction to increase pressure and in an anti-clockwise motion to decrease it.
- Turn off the electricity before using any air tools. Switch off the power first.
- Disconnect the air compressor from the wall.
- Turn off the inside shut-off valve.
- Disconnect your tool and then blow out any air that has been trapped in it.
- Turn the drain valve on the bottom of the tan. You can relieve all sorts of internal tank pressure and moisture by rotating it 2-turn clockwise. After draining off the moisturizer, close the drain valve. Never remove the drain valve.
- In the long run, you’ll need to clean and store your home’s air compressor.
Troubleshooting Common Problems with Pressure Adjustments
- There is a danger of fire or explosion. Never point a flammable liquid at combustible materials. It’s not advised to smoke while working with the spray. Keep the air compressor 20 feet away from any form of explosives.
- There are a lot of risks involved. Never aim an air stream at animals or people since it may harm them.
- The risk of bursting is greatest when the regulator is adjusted too high. Never adjust the regulator higher than before for a maximum pressure of connection.
- When the air compressor is exposed to rain, water may enter. To avoid electric shock, don’t put it in the rain.
- Make sure you’re wearing ANSI-approved goggles.
- Do not utilize the compressed air from an air compressor as your breathing air supply.
- Drain your tank regularly.
- Corrosion built up over years of sitting in the unsaturated ground can cause a tank to explode and fail.
- Keep the goods out of the reach of children.
- Try to utilize a genuine air hose. Never use a plastic or PVC pipe air hose. It’s because these pipes might burst when subjected to pressure.
Perhaps this post will help you solve your “How to Prevent Airbrush Tip Dry” conundrum.
Conclusion
I’m confident you’ll enjoy this informative article about how to adjust the central pneumatic air compressor. This air compressor may be used for a variety of airbrushing applications.
FAQ
How do you control airbrush pressure?
The first thing you’ll need to do is identify the pressure adjustment knob on your compressor. It’s usually located near the airbrush and will have a gauge that displays how much pressure is currently being delivered. Once you’ve found it, simply turn the knob to increase or decrease the pressure from the compressor.
What is the best air pressure for airbrushing?
This is a question that gets asked a lot. And the answer is… it depends! It depends on what you’re airbrushing, your project’s size, and what kind of airbrush you’re using.
For example, if you’re using a small airbrush for detailed work, you’ll want to use lower pressure so you don’t blow away your work. On the other hand, if you’re painting a large surface, you might need to increase the pressure to get good coverage.
Why does my airbrush lose pressure?
One of the most common issues with airbrushes is that they lose pressure. This can be caused by a variety of factors. Still, the most common culprit is an incorrect setting on the compressor.
How can I make my airbrush more precise?
One is to adjust the pressure on your central pneumatic airbrush compressor.
To do this, first set the dial on the compressor to “0.” Then, turn the knob on the airbrush counterclockwise until you hear a click. This means the trigger is released, and there is no pressure on the needle. Next, slowly turn the knob clockwise until you feel resistance. At this point, stop and do not turn it any further.
How to choosing the airbrush compressor?
There are a few things to consider when choosing an airbrush compressor. You want to make sure that the compressor is powerful enough to run your airbrush, but not so powerful that it blows away your paint job. You also want to make sure that the compressor is quiet enough to not disturb your neighbors.

Hey there! I’m Richard Baker, a miniature painter who’s been in the game for a solid decade now. I’ve been painting miniatures for ten years and I’ve got a ton of tips and tricks to share with you all. My website is a treasure trove of knowledge that I’ve gathered from both my own personal experiences and from reading all sorts of books.


Leave a Reply