Hey there, are you ready to become a master at using a single-action airbrush? Well, buckle up because this is going to be one wild ride!
First off, let’s talk about what a single-action airbrush is. Basically, it’s a tool that’s perfect for those who are just starting out in the airbrushing world. It’s simple to use and won’t require you to put in countless hours of practice just to get the hang of it.
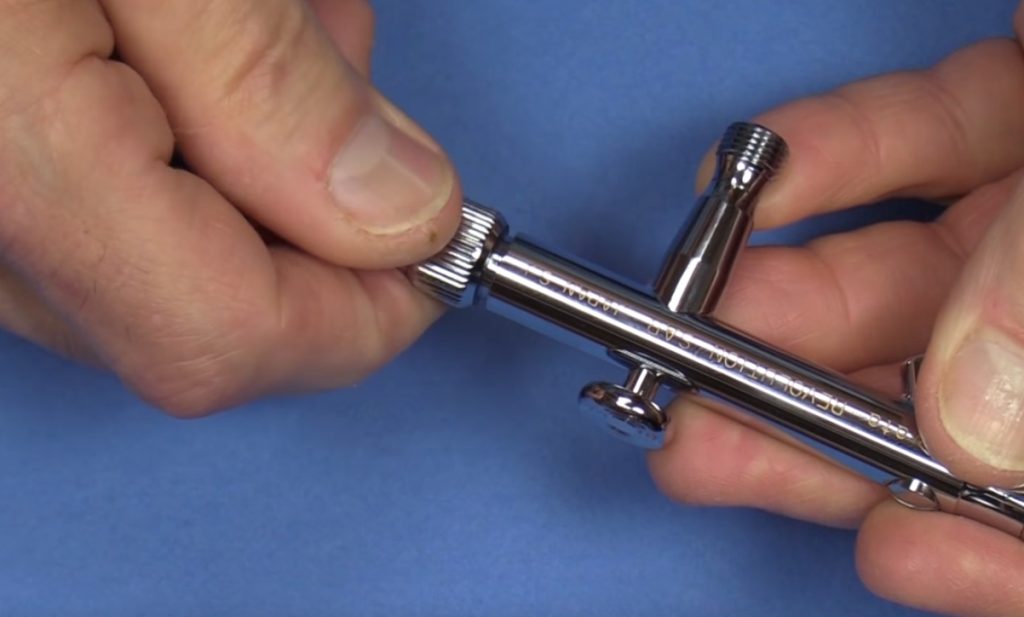
Now, let’s dive into the different parts of a single-action airbrush. I know, I know, it sounds boring, but bear with me! You’ve got the body, the nozzle, the paint cup, and the trigger. Put them all together and voila! You’ve got yourself a single-action airbrush.
Alright, now that we’ve got that out of the way, let’s talk about how to actually use it. I’ve got some tips for you that’ll make all the difference in your airbrushing adventures. Trust me, I’ve made my fair share of mistakes in the past, but I’ve learned from them and now I’m here to pass that knowledge onto you.
What Is a Single-Action Airbrush?
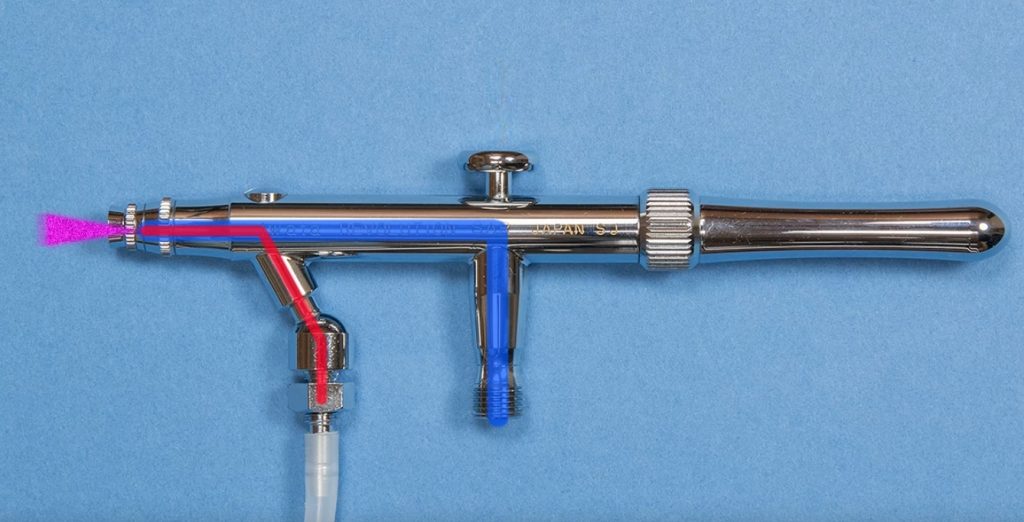
A single-action airbrush is a type of airbrush that uses one motion to release both the paint and the air. This motion is called a ‘single action.’ The trigger on a single action airbrush controls both the paint and the air, which means that you can’t adjust the airflow or the paint flow independently.
Single-action airbrushes are often seen as less versatile than dual-action airbrushes, but they’re simpler to use and can be more affordable.
The single-action airbrush is easy to use, as all you have to do is press down on the trigger. The paint will flow perfectly through the machine without your effort.
On the other hand, a gravity feed airbrush will always be a siphon feed type airbrush because it is ideal for the operation of an airbrush that handles paint delivery automatically, which cannot be said for a single action.
How To Use A Single Action Airbrush

To use a single action airbrush, all you have to do is press down on the trigger located on top of the gun – this will start the compressed air flowing. After that, the gun will handle getting paint to flow out evenly.
The spray volume of an airbrush may be varied. However, it must be done manually by turning a knob on the airbrush body rather than changing the trigger assembly as you would with a double-action airbrush.
I did a review of some cool airbrushes. If you’re interested in what I found, keep reading.
How To Practise Using A Single Action Airbrush (In 13 Simple Steps)
If you’re starting to use an airbrush, it’s best to practice on something that can be easily disposed of, such as the lid of a plastic container, a plastic spoon, or an old model kit.
Before using a single-action airbrush for the first time, it’s best to attempt it on something expendable to avoid making mistakes with your prized artwork or scale model creation. Just be aware that if you’re spraying onto a porous surface like wood or cardboard, the finish will be noticeably different than if you spray onto a non-porous surface.
Start your practice on a non-porous surface to see the challenges, get past them quickly, and learn how to airbrush more efficiently.
Step 1: Position the Airbrush in Your Hand
The first thing you need to do is get a feel for how the airbrush will fit in your hand. You will be holding it differently than you would a pencil or a paintbrush. The grip is similar to that of a pen. You will want to hold it between your thumb and first two fingers, with your index finger on top of the trigger.
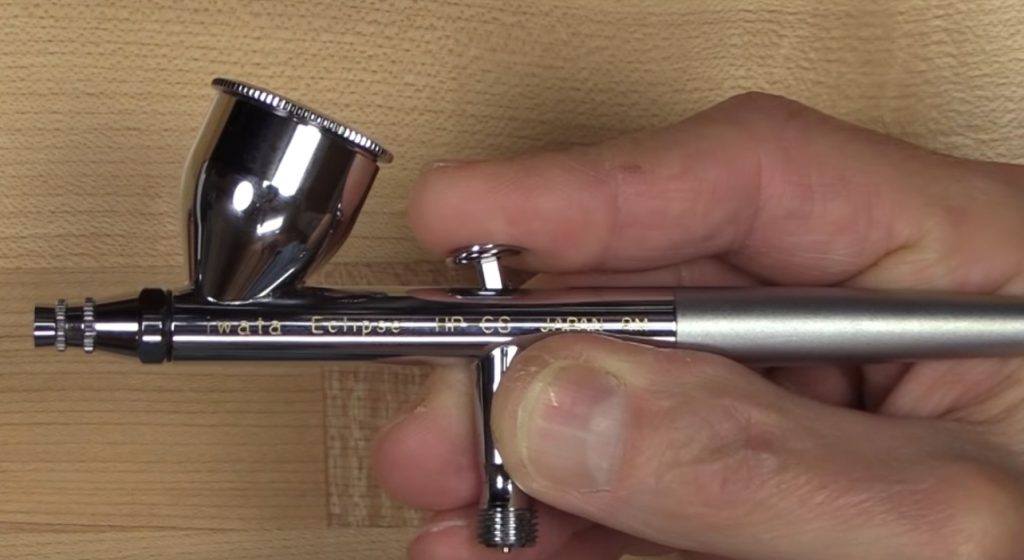
Your other hand should be cupped underneath the airbrush, providing support. This will help you keep a steady hand as you work.
Step 2: Adjust the Spray Pattern
Now that you have your airbrush loaded and the compressor turned on, it’s time to start adjusting the spray pattern. On a single-action airbrush, this is done by turning the knob at the top of the airbrush. Turning the knob clockwise will make the spray pattern smaller while turning it counterclockwise will make it larger.
Step 3: Adjust the Air Pressure
Now that you have your paint and airbrush, it’s time to start spraying! But before you do, you’ll need to adjust the air pressure.
The air pressure you use will depend on what kind of effect you’re trying to achieve. For example, if you want to create a fine mist, you’ll need to use less pressure than if you’re trying to create a solid line.
To adjust the air pressure, turn the knob on the compressor until it’s at the desired setting. If you’re unsure how much pressure to use, start with a lower setting and increase it until you get the desired results.
You might want to adjust the pressure on a central air compressor if you’re using an airbrush. I wrote a blog post about how to do that.
Step 4: Load Suitably Thinned Paint
Now that your airbrush is painted, it’s time to start spraying. But before you do, there are a few things to remember regarding paint consistency and loading the color cup.
First, your paint needs to be thinned down sufficiently, or it won’t flow properly through the airbrush and come out in a nice spray. This can be done with water for water-based paints or solvents for oil-based paints. How much thinning is necessary will depend on the paint you’re using and the specific airbrush model. Hence, it’s always best to consult your airbrush manual or the paint manufacturer’s instructions.
Step 5: Initial Test Spray
Now that you have your airbrush fully assembled, it’s time to do a test spray. This will help you get a feel for how the airbrush works and how much paint you need to use.
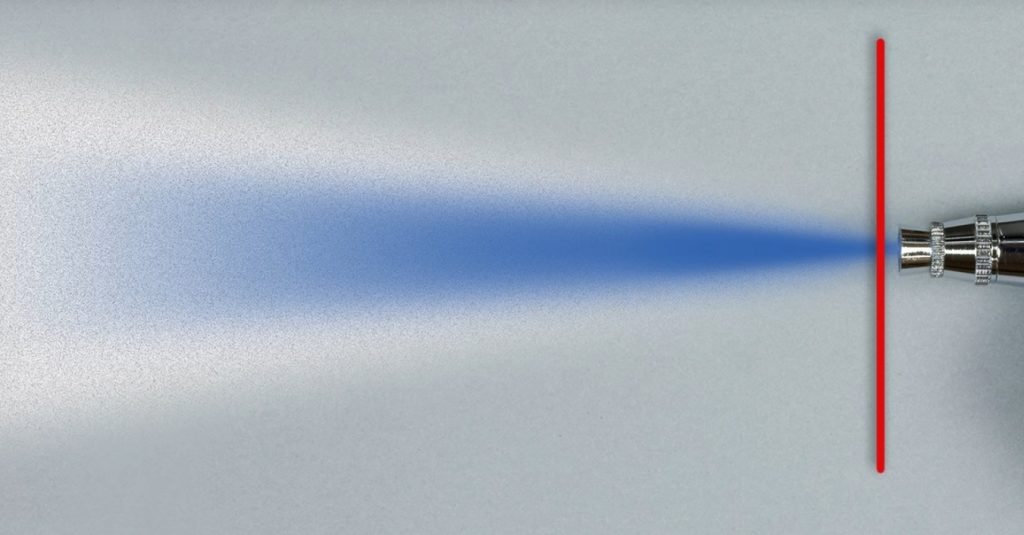
To do a test spray, hold the airbrush about six inches away from your surface and squeeze the trigger slowly. You should see a nice stream of paint coming out of the airbrush. If the paint is too light or too heavy, you can adjust the amount of paint by turning the knob on the side of the airbrush.
Step 6: Second Test Spray With Maximum Paint Flow
Now that you’ve done a test spray with a small amount of paint, it’s time to do another one with the maximum amount of paint flow. To do this, turn the knob on the side of the airbrush to the right until it stops.
Again, hold the airbrush about six inches away from your surface and squeeze the trigger slowly. You should see a much heavier stream of paint coming out this time. If the paint is still too light or too heavy, you can adjust the amount of air pressure by turning the knob on the compressor.
If you have a problem with your airbrush compressor, then I recommend that you read my blog post on how to fix it.
Step 7: Third Test Spray To Intentionally Make The Paint Run
Now that you’ve done two test sprays, it’s time for a third one. This time, you’re going to make the paint run intentionally. To do this, turn the knob on the side of the airbrush to the left until it stops.
Again, hold the airbrush about six inches away from your surface and squeeze the trigger slowly. You should see a stream of paint coming out that is much lighter than before. If the paint is still too light or too heavy, you can adjust the amount of air pressure by turning the knob on the compressor.
I have reviewed some airbrush compressors and you may be interested in what I found.
Step 8: Fourth Test Spray To The Point Of An ‘Almost Run’
Now that you’ve done three test sprays, it’s time for a fourth one. This time, you’re going to spray to the point of an ‘almost run.’ To do this, turn the knob on the side of the airbrush to the second-to-last setting.
To achieve the thickest layer of paint possible and get it ‘nearly’ to the point of running, but not quite. This does take some getting used to, but with practice, you’ll be able to do it effortlessly. Note that to get excellent results, you may need to modify the distance from the surface you hold your airbrush. Everyone’s technique will vary based on their skill level and equipment.
Step 9: Fifth Test Spray With Minimum Paint Flow
It’s time to turn things around and use your airbrush at its lowest paint flow setting to see how the paint job changes.
Put the airbrush on its lowest paint flow setting and hold it about an inch from the surface you want to paint.
Keep pressing the trigger down as you move your hand from side to side until you’ve moved downwards across the entire surface.
The line you paint will likely be thinner and fainter than before, which is normal. You’re just getting a feel for how the paintwork looks compared to using the most paint possible.
Once you’ve made a few passes, move on to the next step, where you’ll try to paint some finer details with more precision…
Step 10: Sixth Test Spray For Fine Lines And Detail
In the previous step, you may have discovered that the line was faint, which is easily fixed. Move the airbrush closer to the surface to produce a clearer and stronger line, and play around holding it at different distances on each sideways pass to see how your paint job turns out.

The paint will lay down more evenly, and with less mess the closer you are to the painting surface. This is expected and normal. Find a comfortable distance from the canvas that allows you to put down thick layers of paint without running, then practice making thinner lines on top of those strokes.
Step 11: Practise On A Colouring-In Print-Out
Now that you’ve got the hang of using a single action airbrush with various amounts of paint flow, it’s time to put your abilities to the test! You’ll work on improving your positioning skills when painting within the lines of a basic drawing, similar to how children do when they’re learning how to use crayons or markers.
I recommend painting different colors on adjacent sections to get a better feel of your progression and Skill level.
Start each section by turning the paint flow down, getting close with the airbrush, and painting a crisp, fine line right on the edges of that section. Then adjust the paint flow, so it’s larger when you start filling in that section entirely. You can color in your entire image this way!
Step 12: Control the Amount of Paint Being Sprayed
One thing to keep in mind is that holding the airbrush too close to your work surface can cause problems with paint buildup and clog. So, if you find that your airbrush is starting to sputter or spit when you hold it close to your work surface, back off a bit until the problem goes away.
Finally, don’t forget that air pressure also influences how much paint comes out of the airbrush. So, if you need to apply a very light coat of paint, turn down the pressure on your compressor until only a small amount of paint is coming out of the airbrush.
Step 13: Cleaning Your Airbrush
Cleaning your airbrush is important to keep it working properly. Here are some tips on how to clean your airbrush:
- Use a cleaning solution designed for airbrushes. You can find these at most art supply stores.
- Disassemble the airbrush and soak all of the parts in the cleaning solution.
- Scrub all parts with a soft brush to remove any dried paint or other debris.
- Rinse the parts with water and dry them thoroughly before reassembling the airbrush.
If you have a problem with your airbrush tip drying out, I recommend that you read my blog post on how to fix it.
Different Ways to Use the Airbrush for Different Effects
Now that you know the basics of how to set up and use a single-action airbrush, it’s time to start experimenting with different techniques to create different effects. Here are a few ideas to get you started:
- Use different colors of paint to create interesting color gradients and blends.
- Play around with the pressure settings on your compressor to see how it affects the amount of paint being sprayed.
- Experiment with spraying at different angles and distances from your subject to create different line thicknesses and shapes.
- Start by practicing on a scrap piece of paper or cardboard.
- Get a feel for how much paint to load into the airbrush and how far away from the surface you need to hold it.
- When you’re ready to start painting, begin with light pressure and build up gradually. Too much pressure can result in an uneven finish.
- To create different effects, experiment with different paint viscosities and spraying distances.
Now that you have practiced spraying paint from the airbrush, it is time to learn how to mix airbrush paint.
Final Thoughts
Upon the premise that you have adhered to the steps that were presented earlier, it is within your grasp to comprehend the means of wielding a single-action airbrush! The achievement of mastery is reached by means of diligence, therefore, one ought not to be daunted by the expectation of attaining dexterity instantaneously. In due course, with some perseverance and practice, one shall have the ability to implement the airbrush as an expert!

Hey there! I’m Richard Baker, a miniature painter who’s been in the game for a solid decade now. I’ve been painting miniatures for ten years and I’ve got a ton of tips and tricks to share with you all. My website is a treasure trove of knowledge that I’ve gathered from both my own personal experiences and from reading all sorts of books.


Leave a Reply