Many people have been asking, “What airbrush to paint a tank with?” more and more lately. This blog post will answer that question and give you some pointers on what types of airbrushes are best for certain tasks.
How To Get Started With Airbrushing
- First, you’ll want to find the right paint for your tank. Different paints are depending on what kind of surface they will be going onto.
- Next, you’ll want to find the right airbrush for your paint. Different paints require different sizes of airbrushes, so be sure to choose one that’s appropriate.
- To start painting a tank, first, spray out some clean water onto it and then wipe off any excess moisture on the surface. This will help prevent overspray or drips from happening while you’re spraying on the paint!
- Next, begin spraying the paint onto your tank. Be sure to work in long strokes, so you don’t get any drips or unwanted lines of paint!
- Keep an even distance from the surface and move back as needed when painting a large area. You can also mask off certain areas if they need to be left untouched for some reason. This will help with overspray, too, because it will limit how far out the airbrush is spraying paint into other parts of your project (or outside).
- When spraying the surface, keep a light touch. You don’t want to put too much pressure on the trigger because this will cause more paint and overspray than desired.
- Practice with some paper or your hands before even touching up your tank! This is important for beginners as it can help you get a feel of what controlling an airbrush feels like while getting used to how different types of paints behave when sprayed onto surfaces so that by the time you’re ready to paint something big like a car’s exterior, most everything should be familiar territory!
What Airbrush To Paint A Plastic Model Tank With?
Painting large model tanks can be time-consuming and difficult with hand painting, but an airbrush provides a quick and efficient solution. Using an airbrush, you can achieve a smooth and precise finish that would be difficult with hand painting. There are two types of airbrushes to choose from: single-action and double-action.
Single-Action Airbrush:
- Price Range: $0 to $50.00 USD
- Features: Uses one control to control all the paint flow, simple and easy to use.
- Advantages: Good for beginners or those looking for a simple solution.
- Disadvantages: Limited control over the paint flow, not as precise as double-action airbrushes.
Double-Action Airbrush:
- Price Range: Varies based on quality and features.
- Features: Two controls for adjusting paint flow, comfortable and ergonomic handle grips, variable airflow control, etc.
- Advantages: Offers more control over the paint flow, great for advanced users who want to master the art.
- Disadvantages: Higher price compared to single-action airbrushes.
For more information, you can check out the article “The Best Airbrush for Miniatures & Models: A Beginner’s Guide.“
Thinning the paint is essential to ensure a smooth paint application with an airbrush. Use water or lacquer thinner to thin down the paint before using an airbrush to avoid clogging internal components. Properly thinning the paint helps ensure smooth lines and efficient performance.
How can I make sure my paint goes on smoothly?
Thinning the paint is essential to ensure a smooth paint application with an airbrush. Use water or lacquer thinner to thin down the paint before using an airbrush to avoid clogging internal components. Properly thinning the paint helps ensure smooth lines and efficient performance.
Airbrush Model Paints for Tanks
Are you working on a project that involves painting model tanks? Consider using acrylic paints for your base coats. These paints are easy to use and provide great results when airbrushed.
Acrylic Model Paints for Airbrushing Model Tanks and AFVs
When it comes to airbrushing scale models of tanks and AFVs, the choice is clear – Vallejo AFV Painting System. These sets of paints are specifically designed for military vehicles and come with an easy-to-use color chart for uniformity across projects.
Vallejo AFV paints are part of the Vallejo Model Air range of acrylic airbrush paint, specifically created for tank models. They offer excellent coverage and durability while being easy to use, with a wide range of colors suited for specific tanks.
You can choose six base color paints based on the type of tank you want to paint, and there are eight additional sets available for camouflage and weathering effects. Each one-ounce bottle also comes with two complimentary brushes, all packaged in a handy carrying case.
Acrylic Model Paints for Painting Tanks with a Brush
A crucial detail in miniature painting is the type of paintbrush to use. Vallejo Model Color and War Games Series Paint Kits have great options for tanks that will help you get started.
Metallic Model Paints for Tanks (Aluminum, Chrome, Steel, Burnt Metal…)
For a metallic finish, consider Vallejo Metal Color or Alclad II lacquer. These products are designed to create the look and feel of metal, such as aluminum, chrome, silver steel, and more.
Vallejo Metal Color is a water-soluble paint with excellent coverage and color density. It is environmentally friendly and will leave your model looking bright. Alclad II lacquer, however, contains toxic solvents. When airbrushing with these paints, it is important to have proper ventilation and be mindful of the solvents used to avoid inhaling fumes.
Choosing Colors & Box Size
Vallejo Model Color is a high-quality, water-based acrylic paint with great surface coverage and dense pigment. It dries quickly and can withstand tough painting environments. With a range of 166 colors, the possibilities for your model are endless!
Vallejo Model Color boxes come in packs of 8, 16, or 72 colors.
Paint jobs are critical in war games as they can determine whether a tank survives or crashes. To create an original design, we’ve compiled our favorite colors from reputable brands like Vallejo Model Color and Tamiya Acrylics. From vehicle-specific paints like British Tank Olive Drab Metallic (VMC) 2031 and German Armor Black (Tamiya), these 8 different tones will add versatility to your designs and make your model stand out.
Before buying an airbrush, be sure to check out our “Guide to Choosing the Right Airbrush Compressor.“
Table of Colors
In the following table, you can find a selection of colors from different paint companies that might be perfect for your World War II tank.
|
Firma/ Farba |
Vallejo Model Color |
Vallejo Model Air |
Vallejo Surface Primer |
Tamiya Enamel Tamiya Acrylic |
Tamiya TS (spray) |
Humbrol |
Revell |
Pactra |
|
Panzergrau [RAL 7021] |
German Grey (167) |
German Grey (52) |
German Panzer Grey (73.601) |
German Grey (XF-63) |
German Grey (TS-4) |
Matt Tank Grey (67) |
Tank Grey, Mat (78) |
Schwarzgrau (107) |
|
Dunkelgelb [RAL 7028] |
DarkYellow (116)
|
DarkYellow (25) |
German Dark Yellow (73.604) |
Dark Yellow (XF-60) |
Dark Yellow (TS-3) |
Matt Middle Stone (225) |
Sandy Yellow, Mat (16) |
Panzer Dunkelgelb (104) |
|
Rotbraun 1 [RAL 8017] |
Hull Red (146) |
Armour Brown (41) |
– |
Red Brown (XF-64) |
Red Brown (TS-1) |
Brown (186) |
Rust, Mat (83) |
Panzer Schokobraun (105) |
|
Olive Grün [RAL 6003] |
Retractive Green (90) |
Medium Olive (92) |
– |
Olive Green (XF-58) |
Olive Drab 2 (TS-28) |
Light Olive (86) |
Olive Green, Silk (361) |
Panzer Olive Grün (106) |
|
Rotbraun 2 [RAL 8012] |
Burnt Red (34) |
Brown (105) |
German Red Brown (73.605) |
Hull Red (XF-9) |
Hull Red (TS-33) |
Matt German Cam. Red (160) |
Reddish Brown, Mat (37) |
Rot Braun (103) |
|
Gelb Braun [RAL 8000] |
Green Brown (114) |
Khaki Brown (24) |
German Green Brown (73.606) |
Desert Yellow (XF-59) |
– |
Matt Light Earth (119) |
Dark Earth, Mat (82) |
Africa Yellow (20) |
|
Braun |
Brown Sand (132) |
Camouflage Brown (117) |
– |
Buff (XF-57) |
Light Sand (TS-46) |
Matt Desert Yellow (93) |
Ochre Brown, Mat (88) |
DAK Gelb Braun (102) |
|
Grau Grün [RAL 7008] |
Green Grey (101)
|
Grey Green (116)
|
–
|
Khaki Drab (XF-51)
|
–
|
Khaki Drab (159)
|
Olive Brown, Mat (86)
|
Field Drab, Mat (23)
|
Tools And Materials Needed For Painting Tanks
The list of tools and materials you will need for painting tanks with an airbrush is as follows:
- Airbrushes -Lacquer thinner or water (depending on the paint) -Paint in a color relevant to your project.
- Paper towels, cloths, or rags to clean off any splatters from mistakes during the process of painting.
- A mask that protects against inhaling particles such as dust and fumes, which can come from either lacquer thinner, is used frequently throughout this process. This could also be a respirator if you’re working with latex paints often too!
- An area where no objects nearby might get easily stained by the accidental flicking of paint over them when using an airbrush.
- You have the freedom to move around a clear work surface, such as a table or desk.
- An airbrush cleaning kit for when your tank is completed and ready to be stored away!
It’s worth noting here again that it’s best to know how an airbrush works before attempting any type of project with one! If not, then there are plenty of tutorials on YouTube which can help teach you all about them in detail – just make sure they’re recent ones so their recommendations will still apply today! Have fun painting tanks!
Selecting The Tank Camouflage Color
The first thing you need to do is select the correct color for your tank. This will have a big impact on what types of airbrush paint and supplies are needed. One thing’s for certain, if it’s not already obvious – selecting the right type of terrain or environment will be a giant factor when choosing the appropriate paint scheme as well! So keep that in mind when figuring out the color of your tank.
For example, if you want to paint your tank with a desert camouflage scheme, it would be appropriate to use an earth-tone color. The three most common colors are Olive Drab (OD), Tan or Desert Sand (browns/tans), and Dark Green or Medium Green (greys). Greys will sometimes mix better in rocky terrain, while browns contrast when blended against the sand.
Alternatively, if you want your tank to blend in with a forest environment, it would be better to use green or khaki colors. As always, keeping the terrain type in mind will have a big effect – for example, using Olive Drab for forests may not work because of its dark tints, while Desert Sand might not look as good on lighter greens.
When determining what color camouflage pattern is best suited for your needs, three things can affect this decision: the color scheme (scheme), the background, and existing patterns.
The first thing that should be considered is whether your forces wear similar uniforms; usually, matching uniform colors make sense when painting tanks, so they don’t stand out too much against each other.
The second thing to bear in mind is the type of terrain you intend to use your vehicle in; for instance, if your forces wear a dark green uniform with black boots while operating in an urban environment, then it may be better to paint all vehicles (including tanks) with light browns or khakis so they’ll blend into their surroundings and not stand out too much. This also applies when dealing with an open country as well – using similar camouflage patterns will make sense there as well.
Thirdly, any existing patterns should factor into this decision: what color would go best if the tank has stripes running down both sides (side-skirts)? The answer might depend on whether these are vertical or horizontal lines going across the vehicle.
Don’t forget to take the time and think about what’s best for your situation, without worrying that your choice may seem foolish. Don’t go with a camouflage paint scheme that doesn’t have any meaning or purpose – you’ll end up regretting this decision later.
Painting The Base Coat On Your Tank
The base coat is the first and most crucial paint you will apply. It acts as a primer, sealing cracks and crevices to prevent air bubbles or dirt from sneaking into any nooks and crannies later on. It’s important to use a high-quality acrylic latex house paint with an even color tone. Spending extra money on quality is well worth it at this stage. Quickly covering areas (multiple coats are even better) will ensure that no spots are missed. This step requires up to two days of drying time before applying the topcoat, so be patient!
Using a quality primer is key to achieving the best paint job possible. As mentioned before, it’s important to spend extra money on quality at this stage. Quickly covering areas (multiple coats are even better) with the primer will help ensure that no spots are missed. Remember that this step requires up to two days of drying time before applying the topcoat, so be patient!
A paint gun comes with a predetermined nozzle, and the hose attachment is always attached to the gun.
For the best airbrush effect using an air compressor, consider using a spray gun with interchangeable nozzles. This way, you can switch out nozzles as needed to achieve your desired effect. The mesh filter should never clog, thanks to the many holes for paint to pass through, ensuring that you can use this tool without any interruptions or degradation in work quality. Cleanup is also easier, as you simply remove the used part, clean both sides thoroughly, and reassemble.
A high-quality acrylic latex house paint with an even color tone (quickly covering large areas with multiple coats) will provide the best paint job possible.
Again, using a quality primer is crucial to avoiding missed spots in the base coat. Make sure to allow for at least two days of drying time before applying the topcoat.
The nozzle on a paint gun has predetermined spray patterns, such as horizontal and vertical lines. However, you can also find guns with interchangeable nozzles for different styles. If you plan on using a paint gun frequently, consider investing in one with interchangeable nozzles.
An airbrush requires an air compressor or another form of compressed gas, such as CO². The most important part of using an airbrush is having a mesh filter that won’t clog while spraying paint onto surfaces. This filter is also easy to clean, allowing for seamless use without any interruptions or degradation in work quality.
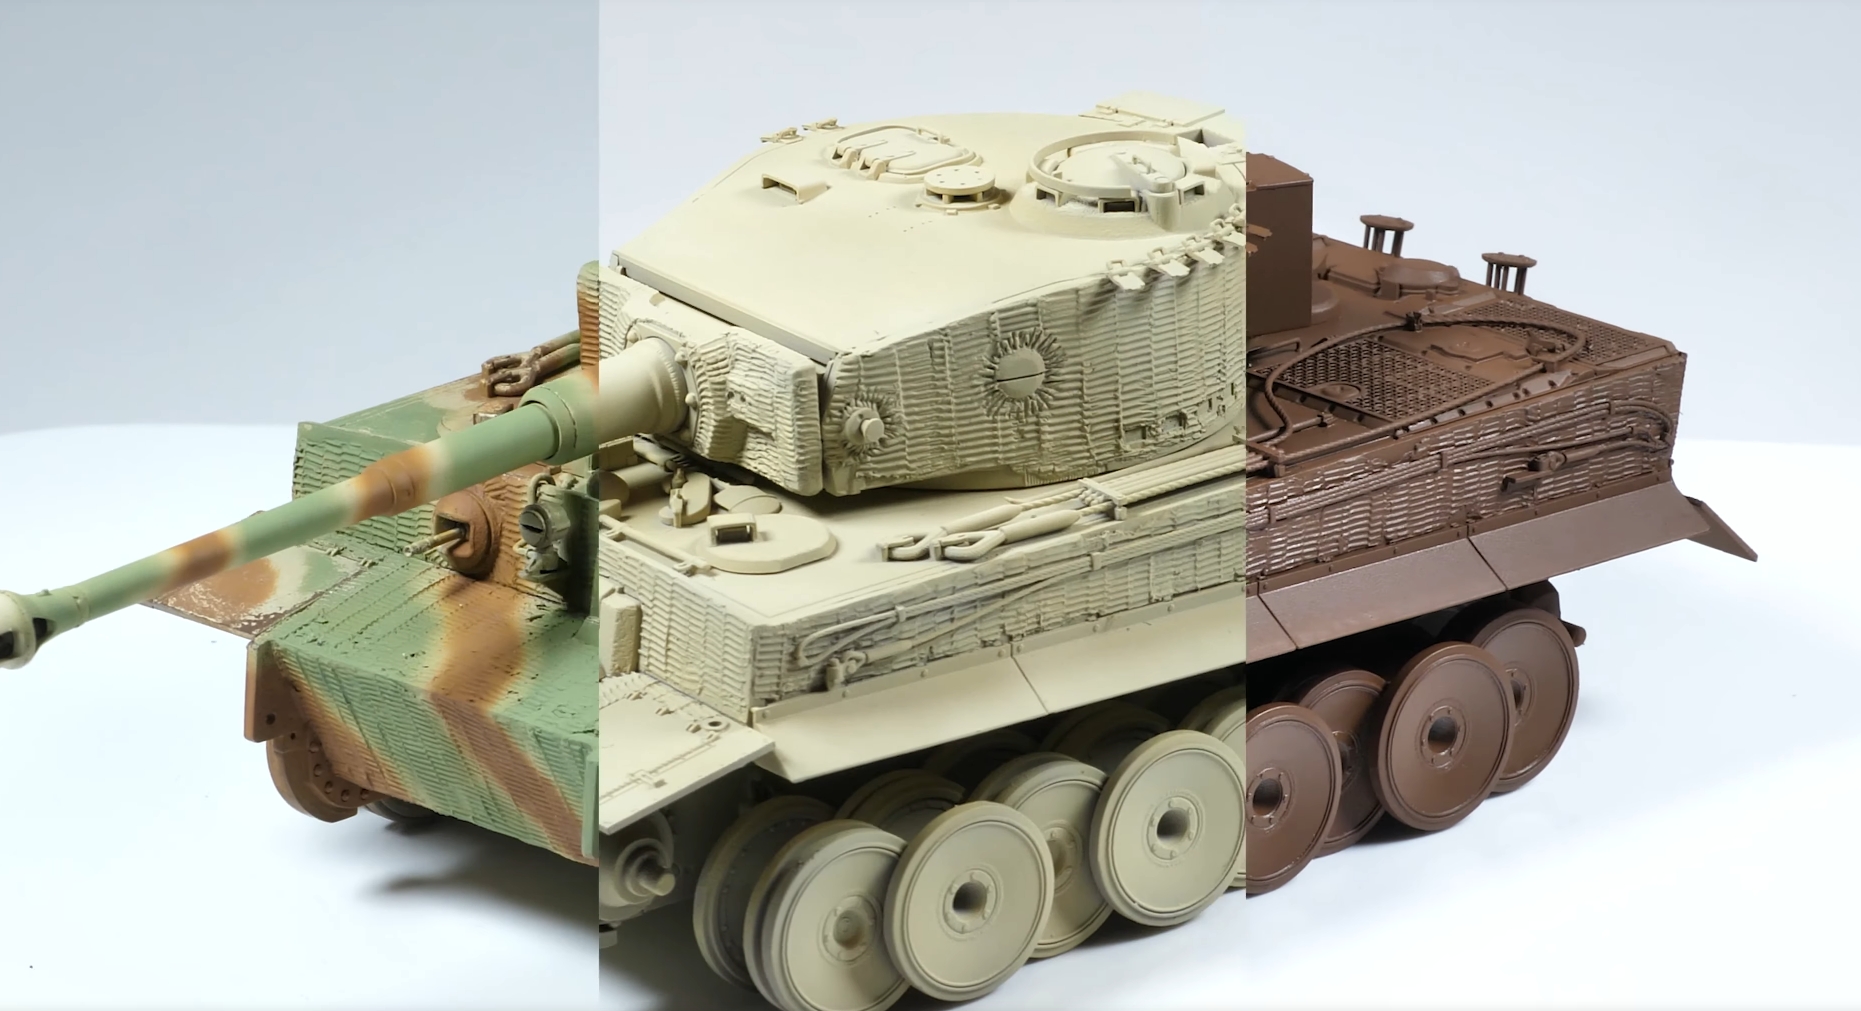
Painting The Camo Patterns Onto Your Tank
I, as a scale modeler, recommend using Gunze Sangyo’s Mr. Color line of model paint for beginners. This brand offers excellent coverage on plastic models with minimal need for masking, saving time in the painting process. Additionally, those who prefer acrylics may want to consider using Liquitex Basics Acrylic Paints for their vibrant and opaque colors that will not result in splotches or bleeding over the camouflage pattern when applied to your tank.
To ensure even coverage, it’s important to start by practicing with your airbrush on a piece of paper. Thin layers of paint should be applied with minimal pressure and paint amount, as using too much can result in unwanted runs or gaps. A good way to check for correct application is to look for an even coat without any visible brushstrokes.
Next, the black areas of the tank should be masked off before applying a layer of white paint. The exposed areas will then be painted with camo patterns in brown or any desired color. This way, the pattern will blend together and appear as a solid color from a distance.
For painting camo patterns onto smaller models, using a hobby knife or scissors with a metal blade is an effective method to achieve clean cuts. However, the steps may need to be adjusted for larger models, such as masking off as much space as possible before spraying white to minimize overlap between patterns.
Finally, if using an airbrush, the steps may vary depending on the type of tank being painted. For example, if painting a World War II or Russian T34, I recommend cutting off as much space as possible before masking with tape to achieve a more realistic look.
Finishing Touches On The Plastic Tank’s Paint Job
It’s finally time to add the finishing touches to the paint job. There are several methods to choose from, but here are two possibilities:
- Apply an overall coat of gloss clearcoat to the painted surface of your project, or spray a layer of matte clearcoat with some body filler in between coats for a smooth and polished appearance.
- First, spray several thin layers of plastic model primer evenly onto your workpiece, making sure to wet each section before applying more to avoid any dry patches where the airbrush can become clogged. Let it dry thoroughly, usually overnight, then sand down any rough spots and apply another light coating for final priming. The primed surface can now be painted with the desired color.
For a gloss finish, apply several thin coats of colored paint combined with a polyurethane clearcoat. Ensure each coat is applied evenly, wetting each section before applying more to avoid dry patches. Once dry, usually overnight, sand down any rough bits and apply another light coating for final priming. Remember to wash out your compressor’s airbrush between layers to prevent buildup by first spraying water, which removes any built-up residue.
Tips On How To Clean Up After Using Your Airbrush
Never use water to clean an airbrush. Instead, pump some rubbing alcohol into the airbrush and quickly turn it on for a few seconds to remove any paint or dust that may have clogged up the nozzle. If the spray doesn’t work well after doing this, you can try using acetone instead of rubbing alcohol.
- If there is dried paint inside the airbrush head, you can either take apart the headpiece by removing screws with an Allen wrench and gently scraping off what’s left with a plastic knife or toothpick. After taking it apart, put all parts into warm soapy water (no soap yet) and allow them to soak for about 30 minutes before washing again and rinsing thoroughly.
- If you want to remove any dried paint from the airbrush, use acetone. Acetone is a strong solvent that can be used safely on plastics and rubbers. After spraying the nozzle with some acetone, put it back together (without tightening too much) for about fifteen minutes before removing the parts again from warm soapy water. You’ll be able to see all of the old paint come off when washing this time!
- If there is still dried paint inside the airbrush head after soaking or using acetone, then try placing a small drop of dish soap onto one end of an eyedropper and squirting some into each part while they’re submerged in water… But don’t forget to remove the airbrush from the water source after you’ve done this.
- If the nozzle has gotten too dirty, use an Allen wrench to loosen it before removing any parts. Then take off all of the old paint by placing some acetone on a paper towel and holding it over every part for about thirty seconds each while gently turning them with your hands until they are clean again! Just make sure not to touch anything but the outside surface because oil can ruin electronics. You should also be careful when using these chemicals around children or pets – even if their noses are moist, that doesn’t mean they’re protected against inhaling toxic fumes… If you have sensitive skin (or suspect that you do), wear gloves and avoid getting these toxic chemicals on your skin.
- To remove dried paint from the nozzle, gently scrape it off with a plastic knife or toothpick while running hot water over it. If there is any leftover debris, use rubbing alcohol to clear out what remains before taking apart and washing as usual!
- To remove dried paint from the needle, take a clean cotton swab and soak it in acetone. You can also use rubbing alcohol if you want to avoid using acetones fumes – just make sure not to touch anything but the outside of the airbrush head while doing this!
When selecting a paint kit for your model airplane (or helicopter, or any other aircraft), the first thing you need to decide is whether you will paint with an airbrush or with a paintbrush.
Conclusion
It is time to paint your tank! Choose the airbrush that will work best for you and get started. After a few simple steps, you’ll be done in no time. If this has been helpful, or if you have other questions about painting tanks, let me know! I am always happy to help our customers out as they go through their painting process, and I love hearing feedback from others who have painted their own models. Let’s all make some awesome-looking tanks together!

Hey there! I’m Richard Baker, a miniature painter who’s been in the game for a solid decade now. I’ve been painting miniatures for ten years and I’ve got a ton of tips and tricks to share with you all. My website is a treasure trove of knowledge that I’ve gathered from both my own personal experiences and from reading all sorts of books.


Leave a Reply