Scale Model Tools are important to have on hand for any modeler. Whether you are building a kit or customizing an existing one, there is always something that needs to be done with your hands. The tricky thing about scale modeling tools is the sheer number of options available and the general lack of knowledge when it comes to them. There are so many different brands, types, shapes, sizes, etc., and each type has its own unique purpose! This article will cover all of the basics to help you decide before buying anything from this category.
What is Scale Model Tools?
Scale Model Tools, also known as SMT, are equipment used for hobbies and crafts. Many tools, including glue guns, painting brushes, clamps to hold items in place while they dry or harden (a process called “curing”), paint scrapers, and sanding blocks.
Basic Tools To Use For A Basic Model
A hobbyist can create a simple model using these basic tools: Scissors, a craft knife, a paintbrush or pen to draw lines and lettering, sandpaper (various grades), modeling putty. The modeling putty is used for filling gaps in the styrofoam base of the structure. Supplies for Scale Model:
White Glue
White glue is an essential supply for any scale model kit. A hobbyist can use white glue to attach larger items such as the wheels of a car or airplane, and it’s common to see glues in this type of project with different viscosities (thin vs. thick).
Super Glue
Super glue is another common adhesive used for scale models and is often thicker than white glue. Hobbyists can use superglue to assemble smaller pieces that may be difficult to fit with other glues, such as the delicate wings or propellers on an airplane model kit.
Super Glue Accelerator
Super glue accelerator is a chemical that can be added to superglue for faster drying. It’s important not to touch the part of the model where you’ve applied this type of adhesive, as it will make it difficult for paint or other materials to adhere in those areas.
Super Glue Debonder
A superglue debonder is a chemical that can dissolve (or “unstick”) the adhesive from surfaces and items. Using this type of product will help prevent damage or stains caused by dried adhesive.
Sanding Sticks
Hobbyists often use sanding sticks to smooth rough surfaces of wood or other materials. A sandpaper block can also be useful for this purpose and is a good addition to any tool kit, as it’s easier than using your fingers to grip the paper while you work.
Sprue Cutter
A sprue cutter is a tool for removing unwanted material from the back of model parts. To assemble these pieces, hobbyists need to cut out small tabs or “sprues” connected somehow and maybe hold the piece together.
Budget Brushes
A set of inexpensive brushes is a good starting point for scale model tools. If you plan to spend more time with the hobby, then it may be worth investing in higher-quality paintbrushes and other paints over time.
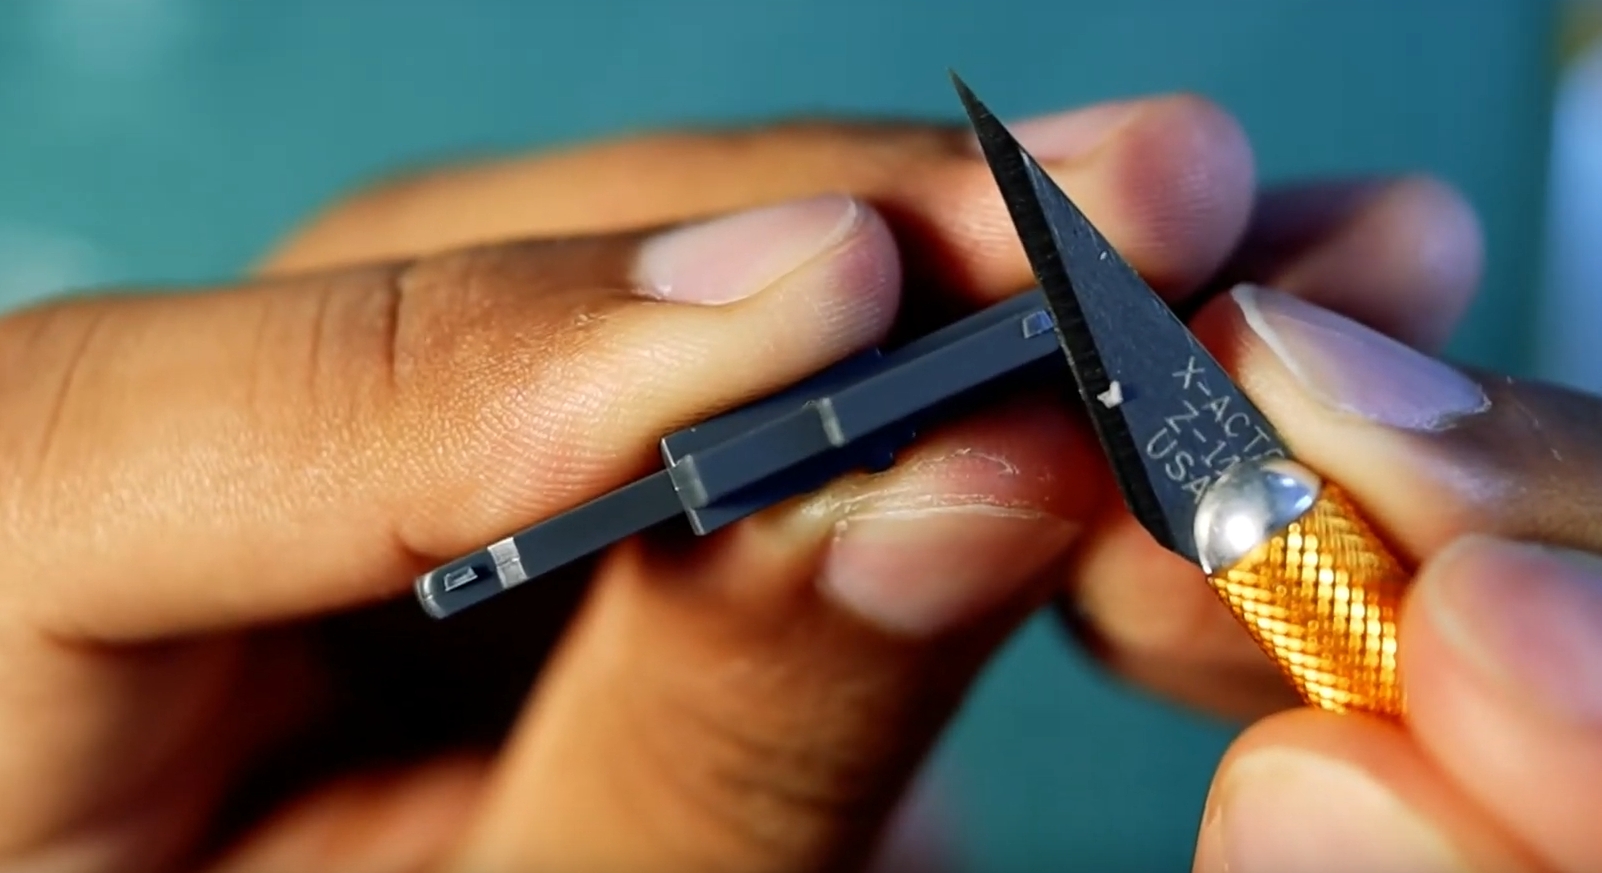
Hobby Knife
A hobby knife is a ubiquitous tool in any scale model kit. Hobbyists can use this blade type to cut out different shapes from various materials, such as the styrofoam base and plastic pieces in an airplane model.
Tweezers
Tweezers are also a good addition to any scale model kit. Hobbyists can use them for small projects such as gluing on pieces of decals or painting fine details like an airplane’s wings.
Assorted Sandpaper
Sandpaper is a good addition to any hobbyist’s tool kit, as it can be used for smoothing rough surfaces or sanding down painted pieces of the model.
Filler Putty
Filler putty is a good supply for hobbyists to have on hand as well. It can be used to fill cracks or gaps that may occur in the styrofoam base, but it should never be applied directly onto painted surfaces and must not come into contact with other parts of the model during the curing process.
Paint Set
A paint set is a good starting point for any hobbyist who wants to experiment with different paints. Hobbyists can use this type of kit to apply basic colors or shades, and it may be worth investing in other types of supplies as skill level progresses over time.
Masking Tape
Masking tape is handy for scale model projects, as hobbyists can use them to cover areas they don’t want to be painted or glued. Hobbyists must be careful not to allow the adhesive on this product to contact other parts of the project while applying it.
Thinner
Thinner is a chemical that can be used to clean paintbrushes or dissolve the glue. Hobbyists should never mix thinner with paints, as this will ruin the colors and texture over time.
Scissors
Scissors are one more common tool for hobbyists to have in their kit. They’re useful when cutting out pieces from the styrofoam base of a model or trimming decals, as well as other miscellaneous projects alike.
Decal Tweezers
Decal tweezers are a useful tool for hobbyists who want to use decals on their models. These metal tools can grip the decal and slowly peel away from paper backing while still in its original shape, which is important when applying them over other model parts.
Toothpicks
Toothpicks are also an inexpensive tool to keep on hand for hobbyists, as they can be used in various projects. For example, they may help with painting small details or adding additional texture to the surface of a model.
Clothespins
Clothespins are another handy supply for hobbyists to have in their kit, as they can be used with masking tape or other supplies. Hobbyists might use clothespins and various materials such as rubber bands to hold pieces together while the glue dries.
Rubber Bands
Rubber bands are another inexpensive supply for hobbyists to have in their tool kit. Hobbyists can use these materials to hold pieces together while the glue dries and other miscellaneous projects like attaching decals or filling gaps on a model.
Spray Paint
Spray paint is another important supply for hobbyists to have. It can be used to apply a base color or shade, and it will provide the best results when applied over an existing layer of acrylics paints to create different effects.
Respirator Mask
Hobbyists should always wear a respirator mask when applying spray paint or any other type of volatile chemical, as this will help protect their lungs and prevent inhalation.
Tools Needed For More Advanced Models
If you’re looking for a more complex and intricate model, some tools are required to build it. These include things like metal pliers with various shapes (to help make delicate bends), specialty wire cutters (for cutting wires small enough for tiny parts), or drill bits for drilling holes in the body of your model.
Circle Cutter
A circle cutter is a device that can be used to make circular cuts on paper. This tool must have a blade that will cut an arc out of the material and some type of handle for rotating it around to produce a hole with an even diameter. A common example would be the shape of doughnuts or bagels.
Bench Vise
A bench vise is a tool that can be used as an attachment for clamping and holding objects when bolted to the edge of a workbench or tabletop. It has two jaws (clamps) on either side, which are tightened by turning a lever handle on the right-hand side – this presses them together tightly.
The purpose of this device is usually to hold something steady to be worked on with other tools. For example, you could drill into metal using hand drills in woodworking without risking damaging both surfaces if they’re clamped securely enough between these devices first!
Large Soft Brush
This tool is designed to be used on a variety of surfaces. It’s usually made of bristles, cotton, or horsehair, which can be softened by boiling them in water before painting.
There are two types: those with long and short handles – the longer ones being better for reaching into tight spaces; and those where the brush head is mounted underneath an angled handle (for example). The latter type might have some rough edges that could scratch delicate finishes, so they should not generally be used as your primary paintbrush!
It’s worth noting also that this device would normally need to dry after use because it will retain moisture from any wet paints you’ve applied to it over time. However, there are various ways around this, including leaving it standing in a jar with the lid on so that air can circulate or drying them by hand and then using an iron to flatten out any bristles.
The large soft brush is typically used for applying paint onto surfaces quickly – either because you need to cover a larger area or want more detail than what’s possible from the other brushes we’ve looked at (such as those covered below). It has much softer bristles that don’t scratch delicate finishes but are less precise since they’re designed to be able to move across many types of surfaces smoothly without damaging them, as some stiffer materials might do.
Drawing Tools Including Steel Ruler
Steel ruler is a basic drawing tool often used by scale modelers to measure and draw lines. The metal edges are durable enough for light use, but the narrow size limits its usability for more demanding tasks such as cutting or sanding.-Where can I find steel rulers? A wide variety of sizes and shapes are available online at art supply stores or hobby shops.
What should I look for in a steel ruler? Consider tools with pointed ends that make it easier to position objects on paper, rather than blunt ones that could tear it; pencil holders if you work primarily on large sheets of paper; long lengths (over 12 inches) if your projects have many details requiring close attention.
Helping Hands
Helping hands are useful devices for holding small objects and assisting with delicate tasks such as needlepoint, soldering, or gluing. They’re designed to be clamped to a desk or table edge for stability.
What size should my helping hand have? The most popular sizes range from about six inches tall to 20 inches, but larger ones also exist. Short ones may not offer enough height; those over 24″ can’t usually get close enough without interfering with the worksurface below.
How many joints does it need? Two are standard: one that grips the object on top of its base plate, another at right angles to hold something else in place against the first joint (such as a ruler). Some models come with more joints, but this can make them less stable.
What should I look for in a helping hand? There are multiple styles of grip to accommodate different sizes and shapes:
- U-shaped clips provide the most versatility;
- jaw clamps with teeth that hold an object securely;
- finger or thumb holes to ensure secure gripping–critical if you work on smaller objects such as jewelry components.
Optivisor / Magnifier
Depending on the job at hand, a magnifier can provide enough magnification to make small details easier to see without having to resort to something like binoculars or microscope–the latter of which would be more expensive and typically less portable than an optivisor.
What should I look for in an optical device? The most important factor is lens quality: distortion-free glass (with no noticeable color tint) with a high level of clarity that provides a sharp focus from edge to edge. Other features may include adjusting eye cups for comfortable viewing distance; adjustable diopter correction (-/+). Optical devices range from pocket models costing $15 up to professional ones averaging around $150.
What should I avoid? Avoid models with a plastic lens–these tend to be less durable and may give an unpleasant viewing experience due to distortion. Models that have built-in lighting are also not recommended, as this can reduce the ability of your eyesight to adapt in different conditions (such as low natural light) or make it more difficult for you to find other tools on your desk while wearing them.
Pliers
Pliers are a handy tool for all sorts of scale modeling tasks, from cutting metal or rods to bending wire.
What should I look for in pliers? The most important factor is that the blades be lined up correctly and meet evenly–this ensures you’ll get a clean cut on your materials without having them break apart at the joint. Other features may include non-slip soft grips (either rubberized handles or TPR), making it easier to hold onto objects securely; “needlenose” tips for reaching into small spaces such as those found in jewelry pieces; spring-action jaws that provide more control when using them with delicate workpieces.
How many types of pliers exist? Essentially two: general-purpose and needle-nose. General-purpose pliers have one long blade that is straight or sometimes curved and can come with various other features such as wire cutters; needle-nose models are best suited to working in tight spaces for jewelry making, watch repair work, etc.
What should I avoid? Avoid “vice grip” style pliers–these may be comfortable to hold because they feature soft grips, but the jaws don’t meet evenly (which means you’ll get an uneven cut). Their serrated edge blades provide more opportunities for material breakage when cutting metal or rods. This tool doesn’t give you much control over your cuts because there’s not enough surface area coming into contact with the object being gripped.
What is the difference between diagonal and straight cutters? Diagonal cutters come in various sizes but are typically used to snip the wire, either cleanly or with a “flush” finish. They can also be found on some needle-nose pliers (e.g., some varieties of Swiss Army models). Straight cutters have one long blade that is perpendicular to the tool’s handles; this type of cutter is usually made from stainless steel, and it produces a sharp edge when cutting through objects such as metal rod or tubing because there’s not enough surface area coming into contact with the object being gripped.
What does my choice boil down to then–straight vs. diagonal? Your decision will depend largely on what you’re working on at any given time.
Probes
A lot of scale modeling projects require the use of probes. Depending on what you are working on, many different types can help make your life easier and ensure accuracy while building or painting. Some popular probe tools for modelers include:
- Dressmaker’s Shears (These shears work great for trimming smaller pieces.)
- Pliers with Wire Cutters (This tool is essential when it comes to cutting wire.)
- Tweezers – The tweezers come in handy when trying to grab small objects like wires without puncturing them. They also provide an added level of precision during any delicate work, such as paint jobs and modifications; they’re perfect because they allow you to have a stronger grip on the object and provide more control.
- Bandage Scissors – These are another tool that can be very useful when working with wire, though they might not always work for everyone depending on how precise your cutting needs are. The bandages scissors also come in handy if you need to cut small pieces away from things without damaging or leaving marks behind like other types of wire cutter would.)
Spatula
If you find yourself with glue all over your fingers after cutting out parts from sheet styrene with a knife or scissors, the answer is probably yes! Modelers use them as tools to spread putty and paint thin coats of adhesive onto surfaces when necessary (in place of a brush).
Their sharp point can be used for removing small parts of putty that are too large to use with your fingers, and their wide end is perfect for dealing with big surfaces like wings or fuselages. They’re also good at scraping away excess paint as well!
Types: Here’s where things start getting interesting. There are many different spatulas available when you go shopping – it all depends on what you want them to do. The two main variations in the market are plastic and metal (usually stainless steel). Plastic tends to be cheaper but not quite as durable, whereas metals have a sturdier feel but cost more because they require special care during both production and cleaning up afterward.”
Clamps
Clamps are one of the essential items in any scale modeler’s tool kit. What is a clamp? It’s simply an object that secures or holds things together to keep them from moving or becoming disjointed. The two main types you need for modeling are C-clamps, which use a screw mechanism and can be tightened with your hand, and G clamps, which have two U-shaped pieces at each end that allow you to put pressure on both sides simultaneously to tighten it all around whatever needs securing.
C-clamps
A C-clamp is a great way to hold two items together temporarily that is not going to be glued or screwed down, such as when you need to drill into one of the pieces but don’t want it moving around while you’re working on it. They can also come in handy for clamping something like a canvas onto an easel if you’re doing arts and crafts with kids.
Typically they’re mounted on some sort of surface. Hence, they have somewhere to grip (typically a table), which will either require drilling holes through the piece being clamped or finding another object strong enough to anchor them securely — usually anything from a chair leg, lamp base, coffee cup holder, and more! Clamps sit anywhere from a few dollars to a couple hundred, depending on the size and quality.
G-clamps
These are usually made of metal with two U-shaped pieces at each end that allow you to put pressure on both sides simultaneously to tighten them all around whatever needs securing. They’re typically used for projects where more than one clamp is needed, or something has been glued down and won’t be moved again to keep it from breaking loose (e.g., fixing together large sheets of paper).
G clamps can also come in handy as an additional way to hold small items like screws while they’re being tightened — just place the screw horizontally underneath so gravity doesn’t mess up your hard work!
Razor and Micro Saws
The most common question about Razor and Micro Saws is whether they are interchangeable. The short answer to that question is no, not really. They do share a few characteristics in the ways they work but for different purposes. Both will be used when you need to cut through some material at an angle (somewhat like how a carpenter would use his saw). A razor blade can also be used where there’s access from either side of what needs cutting by running it back and forth while pushing down on the handle with your thumbs. This type of application may include thin pieces of styrofoam or other materials without supports between them so enough pressure can get applied evenly over both surfaces being cut simultaneously. A micro-saw is used when the cut needs to be clean all the way through, such as with a plastic model kit or even some types of soft metal.
A razor blade can also be used where there’s access from either side of what needs cutting by running it back and forth while pushing down on the handle with your thumbs. This type of application may include thin pieces of styrofoam or other materials without supports between them so enough pressure can get applied evenly over both surfaces being cut simultaneously. A micro-saw is used when the cut needs to be clean all the way through, such as with a plastic model kit or even some types of soft metal.
Photo Etch Folding Tool
A photo etches folding tool for scale modeling is a convenient thing to have on hand. This folding tool can be used in craft projects and hobbies, such as model making. Many people make their own models at home, but if you don’t know how to use tools or get your hands dirty with paint, this may not be a hobby for you! If that fits into what you enjoy doing, though, it might be worth looking into some different types of these fold-out kits so that when they come up on eBay from time to time, you will know exactly where to find them (or buy one). I’m going over just a few basic things about various photo-etched folding tools here before I dig deeper into the different types of tools and how they work.
What are photo-etched folding tools?
These are little kits that have instructions for all the pieces to fold out into a detailed model. They’re usually designed for miniature houses, vehicles, or buildings so that you won’t find one with people or animals in it (or at least not as often). There’s some specific information about scale models here:
How do they work?
There’s usually a folding guide on the package with pictures of what you’re supposed to end up with. You’ll need some paper and glue to make it happen, but that’s pretty easy to come by – even if you don’t have any modeling experience! Many people use spray adhesive instead because there isn’t as much mess, so I recommend picking one up for your next project. They typically take between 30 minutes and two hours, depending on how complicated the model is or how detailed it needs to be. It really depends on what kind of photo-etched folding tool you buy, too, since each one has different instructions that will tell you how long it takes (or at least give an estimate).
How do I know whether or not a photo-etched folding tool is right for me?
This really depends on what you plan to use it for. Some people will buy one of these kits just because they’re into the hobby and want to get more out of their experience, so if that’s something you enjoy, then go ahead and research which type fits your needs better (and be sure to watch videos from other buyers too). If you’ve never done this before, though, it might take some trial and error with different models until you find one that feels perfect. There are many instructions online about making things using scale modeling tools if there’s anything specific in mind, such as an animal or castle. It all comes down to preference in the end.
Ways to use a photo-etched folding tool:
- As part of your model making hobby (building, painting)
- To put together a puzzle with instructions and pieces that need to be folded out before they’re set in place
- When constructing scale models from scratch with paper, paint, glue, or other materials. This is for really detailed work like cars or buildings – not people. That’s why you don’t have any faces on certain figures when you buy them because those are just used as guides for where things go but not how many there should be. The only difference between this and using the kit would come down to what kind of material you prefer working with more often since both require some assembly.
- To do a puzzle with instructions and pieces that need to be folded out before they’re set in place.
- For crafts like jewelry making, scrapbooking, cardmaking – anything you can think of, really! You’ll typically find them by looking up the keyword “folding tool,” but if not, then just do an eBay search for some of the other keywords I mentioned earlier, such as “photo-etched folding tools.” People into the model building will have these on hand because it’s what they use most often, so keep your eyes peeled when shopping around online or at craft stores near you.
Cutting Mat for Scale Modeling
For those unfamiliar with the hobby of scale model modeling, a mat is an object used to protect your work surface from damage and scratches. The cutting mat, in particular, is designed for use specifically when using sharp tools like knives or scissors.
What is it?
A cutting mat or board is a surface that you use to cut your materials on. It provides an even, stable and protective layer between the blade of the knife and what you’re cutting through. There are many different types for purposes such as quilting, sewing, painting, crafting, etc. Still, one type in particular that has shown up recently for scale modeling enthusiasts is biodegradable ones made out of plant fibers like bamboo sheets which can be composted at home with other organic materials.
How do I know if I need one?
If you don’t already have another surface to work on when working on your models, then yes – get one!
What are the different types?
Various materials are used to make cutting boards or mats, such as plastic, wood, and cardboard. Some like bamboo sheets can be composted with other organic materials at home, so they’re environmentally friendly!
How do you care for them?
There is no need to wash a cutting mat after every use – just keep it clean by regularly wiping down any dried-on material. It’s best not to store anything wet on top of your mat because that could cause mold over time but if you have one, then place something underneath it first before putting things back in place. If too much moisture is left behind from washing, dry the board completely before storing it to prevent mold and bacteria growth.
What is a biodegradable cutting mat?
Bamboo sheets are made of plant fibers that can be composted at home with other organic materials, making them environmentally friendly! They’re also flexible and durable, so they won’t crack or peel as rubber mats do overtime if you’re using sharp blades when you cut through the surface. Depending on your needs, you have different thickness options, but thinner ones will provide more stability, while thicker ones may last longer without cracking. If you use it a lot, then buy two – one for rough work and another for fine detail work to prolong its lifespan because bamboo boards don’t stay flat after a few years if you use them often.
How do I care for the mat?
You can clean your biodegradable cutting board with warm water and soap or a mild detergent to remove any dried-on material that may be present but doesn’t soak for long periods of time! If there is too much moisture left behind from washing, then dry out the board completely.
Circle Template
A circle template is a useful tool for any scale model maker. There are different circle templates, but the most common one is made from metal punched out and then bent back into shape to create an outline on your work surface.
What does it do?
The circle template helps you get exact measurements so that you can make sure all your circles are uniform in size when working with patterns or fitting parts together. It also ensures that there aren’t too many gaps between objects which would be aesthetically unpleasing.
How much does it cost?
Circle templates should cost around $20-30 USD depending on where you buy them from – some may come with other shapes like hexagons as well! However, if you’re looking for a cheaper option, then you could make one yourself!
How do I use them?
There’s no special technique or skills needed because all you need to know is how to measure. In general, the outside diameter of your circle template will be about twice as long as the inside radius on it. If that seems too large, just remember that other measurements like millimeters and inches can help achieve this more easily.
Where would I find them?
You might find metal ones at hobby stores, but if not – try online retailers or craft stores instead since they have a wider variety available. Keep in mind that prices may vary depending on where you buy from, so shop around before settling with one particular store for convenience’s sake.
Good quality cotton swabs
The model maker’s best friend! A must for any scale modeler, these cotton swabs are perfect to use when you need a quick clean-up. They’re also great for applying glue evenly and with precision without getting your hands dirty in the process.
An airbrush
An airbrush is a modern tool for scale modelers. It’s an easy way to apply paint quickly and can allow you more creativity than traditional methods, but it has some drawbacks that make it not the best choice in all situations. You should read this article if you want to know which one will work best for your needs!
A power drill
With a range of drill bits handy, you can tackle different challenges. A power drill is an essential tool for any modeler to create precise holes or entry points on scale model ships.
RC tools
What are the tools you need to build an RC model? There’s a long list of these, but here is a quick summary: pliers and screwdrivers for assembly; Allen keys, hex wrenches, or Torx drivers for tuning your car; silicone glue (cyanoacrylate) by hobby stores that dries fast, so it doesn’t stick to other parts when you’re building.
Lead pencils
Lead pencils are perfect for marking precise locations before cutting, painting, or scribing. This type of lead is easy to use and can be erased if you want a fresh start on your project later in the process.
Old rags
Scale models are a delicate art, and accidents happen. Keep plenty of old rags near your scale model work so you can clean up any messes that might occur from spills or leaks.
Other household items and materials
When we build models, our creativity can be used to maximize efficiency and ensure a speedy job. Basic household items like tin foil, clothes pegs, rubber bands, or bottle caps are useful for more than just the occasional kitchen duty. Give them new life by using these everyday products in your next model-building session!
Tips On Choosing The Right Tool For Your scale Model
- Check for the right size. Check to see if you’re buying a tool that is too small or too big for what you need it to do.
- Anchor Point: The point of contact between your hand and the object being held by the tool. It’s important to make sure this matches how you grip things in real life because any difference will be amplified when using tools on a scale model.
Tips On Maintenance And Care For Your Tools
- Over time, metal tools will develop a patina. This is the result of oxidation and can be removed with steel wool.
- Handle handles carefully to avoid damaging them or your fingers by catching on to things as you go about your day
- To clean dirty tools that have been used for sanding or carving, use acetone (nail polish remover) followed by soap and water to remove oils from the surface before storing them away in their box.
Maintenance And Storage Tips For Scale Model Tools
- Always store your tools in a dry and cool location. When not in use, keep them out of the sunlight and don’t leave them on top of other items that may damage or corrode the blades. Lighter plastics should be stored separately from heavier metals to avoid warping over time.-
- You could also store them with a light coat of oil on the blades to keep rust at bay, but this shouldn’t be done too frequently as it can cause damage.
- Scale model tools should always have access to air circulation so that they don’t warp or become brittle over time from being stored in tight spaces. Make sure not to stack items piled high and make use of wall hooks when possible.-
- When finished with your project, it is important to remember that not all tools are designed for everyday use. Use a soft cloth or microfiber towel and apply just enough oil to wipe the blades clean. Avoid using water as this will discolor many plastics over time.
You could even take them outdoors if you have room in your backyard or garage so they can get some fresh air without taking up more space indoors. If you’re feeling really ambitious, consider building a small shed outside where storage space doesn’t matter! Extra effort always pays off when it comes to art projects like these, right?
Troubleshooting Guide For Common Problems With Scale Models And Their Corresponding Solutions
- The tool won’t cut: If you are using a blade that is too dull, it will be more difficult to make clean cuts, or the tool may not work at all. Check for any nicks in the blades and replace them if necessary.
- Noise coming from your model when cutting: Sometimes dust can get stuck inside the part while you’re working on it, which causes friction between moving parts; this could also be caused by dirt buildup along joints or pathways inside the plastic. To solve this problem, use cotton swabs dipped in rubbing alcohol to remove debris from inside of small areas before beginning again.-If there’s still an issue with noise happening after following those steps, then try lubricating specific joints with graphite or silicone spray to reduce the friction and noise.
- Plastic crumbles or falls apart when cutting: This could be an issue with your blade not being sharp enough, so replace it if needed.
- Parts feel stuck together or too difficult to separate from each other: Try using a lighter and heating those areas that are sticking together for easier separation.-If you’re still having trouble separating components try adding some oil to them as this will make the plastic more pliable when warm.
- Rough edges on castings: If you notice any rough edges on your model after finishing, apply a light coating of sandpaper along with these problem areas before painting; but don’t forget! You’ll also have to do this again later during the finishing stages.
- Painting is incomplete: If you find that your painting job isn’t complete or looks uneven, try using a dry brush technique for detailing to give it a more natural look after the first coat of paint has dried.
- Sanding rough spots on models and surfaces: To sand away any roughened surface areas start by applying some masking tape around those problem areas before attaching an abrasive material like sandpaper; remember to use gloves when doing this as well! Sand in small circles until smooth and remove all evidence of residue from these parts afterward with water.-If there are still stubborn bubbles lingering on the model once they’ve been removed, try poking them one at a time with something fragile such as a needle or toothpick.
- A model falls apart: If you find that your model is falling apart while cutting, it could be an issue with excessive pressure being applied to the blade and causing these problems; try using a lighter touch when working on this project next time!
Conclusion
In this blog post, we’ve covered all the basic tools you need in your scale model toolbox. But there are plenty more out there to explore! If you want help finding what will work best for your needs and budget, or if you have any questions about our recommendations at all, don’t hesitate to contact me. I am always happy to help fellow builders find their perfect set of tools so they can do whatever it is that scales them up with ease–and without breaking a sweat (or wallet)!

Hey there! I’m Richard Baker, a miniature painter who’s been in the game for a solid decade now. I’ve been painting miniatures for ten years and I’ve got a ton of tips and tricks to share with you all. My website is a treasure trove of knowledge that I’ve gathered from both my own personal experiences and from reading all sorts of books.


Leave a Reply