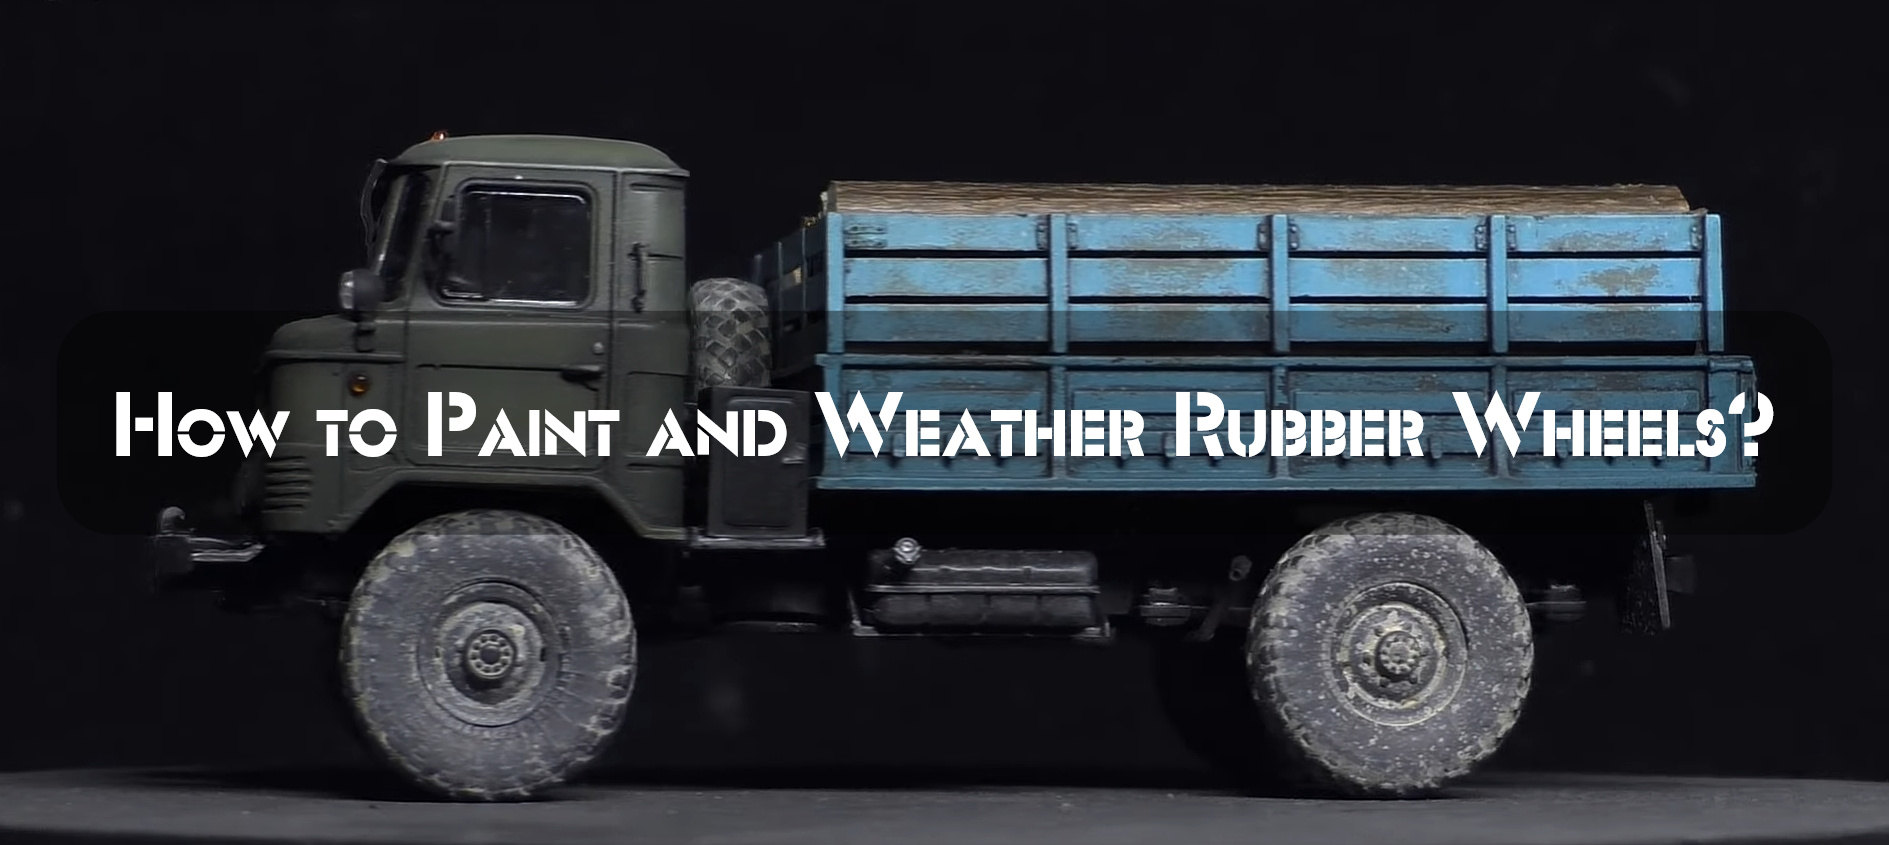
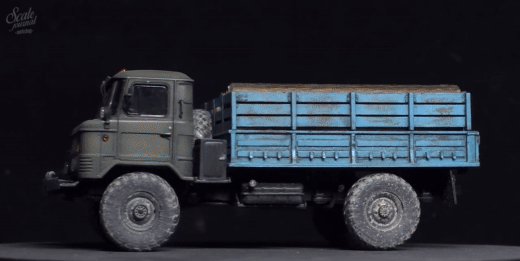
Hey guys, have you ever wanted to make your model cars, trucks, bikes, motorcycles, or tractors look more realistic? Well, I have a solution for you! Let me show you how to paint and weather your own rubber wheels.
First off, you’ll need to gather your supplies. You’ll need some paint, brushes, and weathering tools. I personally like to use a dry brushing technique to add some depth to the tires.
Now, let’s get started!
What is Weathering and Why do I Want it
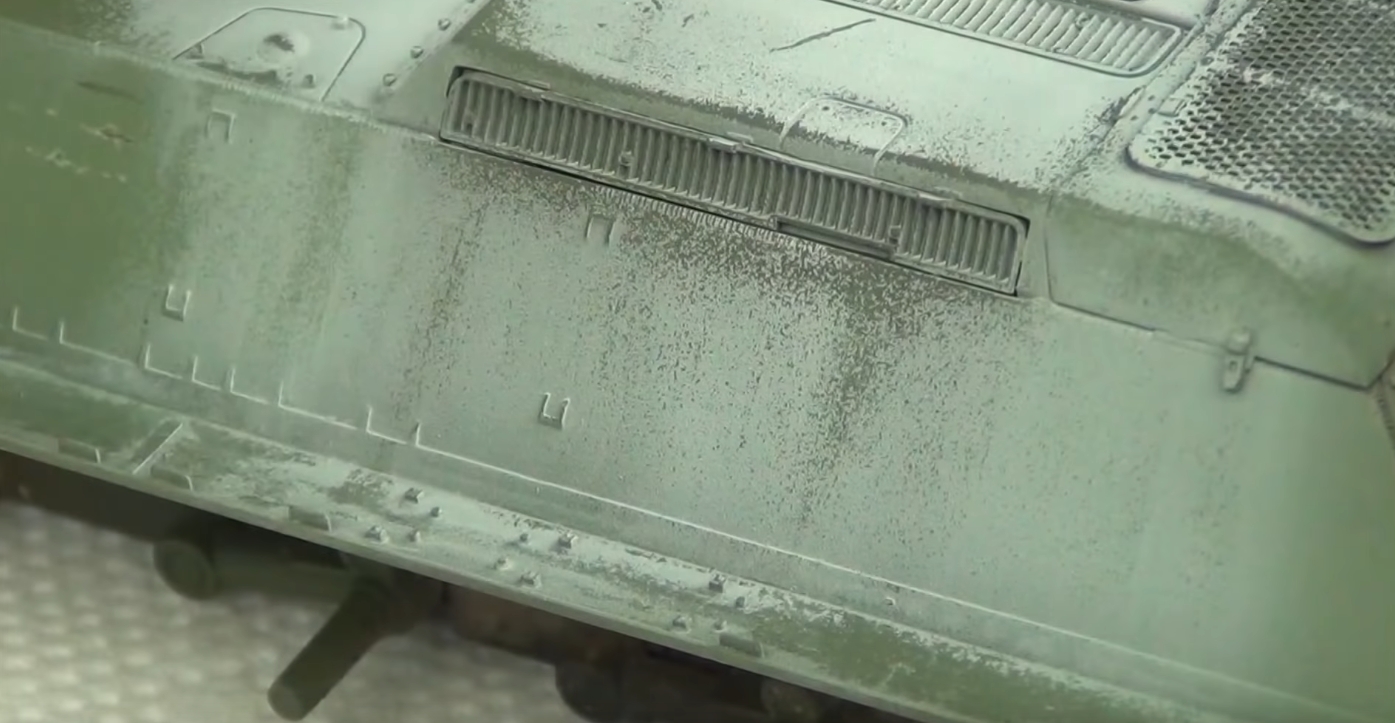
Weathering is a process that simulates the effects of aging and uses it on a model or scale vehicle. It can also refer to a simulation of dirt, dust, and other environmental impacts.
Weathering is not the same as painting; it involves rubbing off paint in places while leaving other parts untouched. This gives an uneven look that enhances realism by suggesting that different elements have been subjected to varying levels of wear over time.
Weathering leaves tracks in the dirt from tires, creates rust from metal surfaces, chips away at paint around edges where friction occurs with other characters such as trees or rocks, and even causes deterioration due to exposure to water or sunlight. The result is a more realistic impression of age and use, which may be desirable for military models, scale models of natural objects, or even imaginary vehicles.
Tools of the Trade
If you are painting rubber wheels, it is crucial to have the right tools. Painting and weathering rubber can be a tricky process that takes patience and skill to get just the look you want. The following list of items will help you create your own custom set for this purpose:
- Rubber wheel paint
- Weathering powders
- Primer spray
- A clear sealant or acrylic varnish
- Paintbrushes in various sizes
- Masking tape or blue painters’ tape
- Newspaper or other disposable surface coverings (such as sheets of old cardboard)
- Cotton cloths for cleaning brushes
- Paper towels for wiping off excess paint from brushes and hands before handling finished work.
Ways to Create Weathering on a Rubber Wheel – Sandpaper, Paint, Ink
There are many ways to create weathering on a rubber wheel. Sandpaper, paint, and ink are all excellent tools for the job. Sandpaper is an option if you want your wheels to be old-looking but not rusty. This will make the surface of the tire look worn down and dirty without leaving any rust marks behind. You can also use paint or ink to stain your tires with various colors that signify different types of wear, like black for dirt or red for brake fluid.
To get more creative with this process, there is another way you can go about it: using color washes over black bases. The end result will be detailed in the design showing up on a new tire while still retaining some texture from the washes. This can be a great way to weather your rubber tires if you want something more subtle and don’t want them to look too new. Experiment with different methods and see what works best for the look you are going for!
Weathering Techniques for Different Surfaces – Rough vs. Smooth, Light vs. Dark Colors
The weathering techniques we’ll be discussing in this article are for different surfaces – rough vs. smooth and light vs. dark.
The basic idea is to make a surface look like it’s been exposed to the elements by painting or scratching into them, but you have to start with a base coat of paint before you do any weathering. The surface should be primed with a color that matches its surroundings if possible, though not all characters lend themselves well to this technique. If the underlying primer shows through after the final coat of paint, scratches will show up more quickly on top of it than on bare plastic or metal. This is why using dark colors over lighter ones helps disguise scratches – they blend in better because there’s already something darker there.
When painting, you can either hand paint or airbrush your weathering techniques. Do the work before any clear coats are added if you use a brush. You should also try to avoid getting paint into places where it doesn’t belong – in there’s no metal showing through on an axle, don’t paint over it with rust effects! For wheels that have spokes painted black (or another dark color), be careful not to scratch too much of the primer off since this will show up as bare plastic and looks terrible even when appropriately weathered.
If possible, apply decals after weathering so they’ll cover some scratches but won’t obscure them completely by being flush with an unweathered surface.
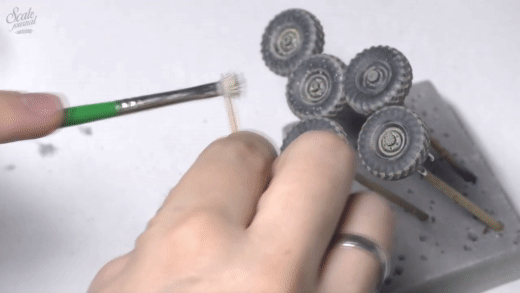
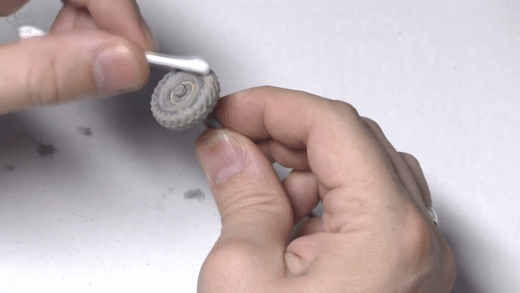
- Tires: Tires are very soft and easy to scratch with the wrong tools. You can use a pin vise or steel needle file (they’re cheap) to make scratches in them, but take care not to cut too deep – it’s actually possible for these wheels to pop off if you gouge out enough; of their support structure!
- Truck/trailer tires: Larger truck tires tend to be more durable than small trailer ones because there’s proportionally less tread per square inch. If they get scratched, though, they will start looking like slicks pretty quickly since all that hard rubber is exposed underneath. Use car modeling paint thinner on your brush so any excess paint won’t dry into an unsightly blob when left alone overnight.
8 Steps to Rubber Wheel Painting and Weathering
You want to do a few things before you start working with paint and weathering. These include:
- clean your workstation, mainly if it’s been used for other projects;
- organize the materials that will be needed for this project;
- And, most importantly, prepare all of your paints and sealers for use.
The last thing you want is to find out halfway through painting or weathering that you’re missing something important. This can be as simple as forgetting about needing an applicator brush or as complicated as not knowing the best way to mix paints together.
Remember: Preparation is Everything!
Rubber tires are often used on vehicles, so it is essential to know how they should be painted and weathered if our creations look authentic. There are lots of ways for us artists out there. Still, I’m going with oil paints mainly because that initially came up when researching military-style wheels on archives and tutorials (which also leads me to my next point).
Step 1: Paint the Tire Matte Black and Conceal the Centre of the Wheel
I found the best way was by masking off my work area with painter’s tape, then painting in small sections until everything was covered but without inadvertently putting any of it on top!
Step 2: Darken the Edges and Highlights With a Dark Grey Color
Highlight the sides with a dark grey color. I used my dedicated Ammo Mig Rubber, and Tyres paint for this job so that it would match up perfectly even if you’re mixing your own shade of greys! Make sure to add just enough orange or red-brown into yours-it’ll make the finish less pale than what’s shown here.
Step 3: Mix Together Paint

Mix a primary dust color, adjusting it to the environment you want. Light colors will usually look better, creating contrast in your setting with rubber – so concentrate effect around the rim where accrues most!
Step 4: Get a Medium Brush and Put Some White Spirit on it.
I used a medium brush moistened with white spirit to blend the paint and added some streaks. It’s best if there are more color variations in your final design, so use different colored muds when possible!
Step 5: Create Some Splashes with a Loaded Brush and a Toothpick
Mix up your palette with a loaded brush and toothpick! This is an easy way to add some variety, mask blending issues from previous steps if needed. A meeting with more paint on it will make bigger speckles.
Step 6: Make Some Contrasting Glossy Stains with a Dedicated Enamel Product
Make some sleek, glossy stains with a dedicated enamel product. I used Ammo Mig Fresh Engine Oil and just enough dark oil paint to make the color more opaque; Concentrate your effect around this area where it will dry last- so useless here for added interest!
Step 7: You Can Dry Brush the Tread with a Black Paint

Dry brush the tire with a matt black color to create depth. I used oil paint again, but any thick and dark hue will do here! You can also dry brush on top of your current work if you want an even more profound effect – just be gentle when applying so as not to scratch or damage it further than necessary (although there isn’t usually much dirt/ dust collected between tracks).
Step 8: Attach the Wheels to Your Model
If you want your wheels to blend in smoothly with the rest of your model, make sure they are attached similarly. Use the same colors and techniques on adjacent areas to look like an extension rather than something different!
How to Clean up Your Workstation After Painting or Weathering Wheels
After a painting or weathering session, cleaning up can be a messy, tedious task. The best way to clean up is to have everything you need at hand before you start work. You’ll want plastic sheeting and paper towels for spills, along with rags and brushes for the actual cleanup process.
Keep your tools where they won’t get stained by paint so that when it’s time to use them again, all you have to do is wipe them off. If you’re going from one color of paint into another color, make sure that the colors are compatible because some stains will react badly with others if mixed together on a surface. Finally, always wear protective gloves during this process and old clothes that can be discarded afterward without worrying about ruining them.
FAQ
What are some tips to avoid making mistakes when painting rubber wheels for models?
- Make sure to clean the surface of the rubber wheel thoroughly before painting. Any dirt or grease on the surface will prevent the paint from sticking properly.
- Use a primer specifically designed for use with plastics or rubbers. This will help create a barrier between the paint and the wheel’s surface, preventing it from peeling or fading over time.
- Apply thin layers of paint instead of one thick layer. This will help avoid any drips or runs and give you a more even finish.
- Let each layer of paint dry completely before applying the next one. Using multiple layers at once can cause them to blend together unevenly, resulting in an ugly finish.
- Weathering your painted rubber wheels can add a bit of extra realism to the effect. Try using different methods such as dry brushing, chipping paint, or adding streaks of rust. This will give your wheels a more aged and weathered look.
- Don’t worry if you make any mistakes while painting your rubber wheels! You can always use an eraser to clean them up or sand down the area to remove the paint. Just be careful not to damage the wheel’s surface in the process.
So there you have it – everything you need to know about painting and weathering rubber wheels for models! Follow these tips, and you’ll be able to create a realistic finish that will really bring your models to life.
How do you clean up after painting and weathering rubber wheels?
Don’t panic if you make a mistake while painting your rubber wheels! There are several methods for removing excess paint and making repairs.
One of the easiest ways to clean up mistakes is with an eraser like this. Just gently rub it over any unwanted areas until they’ve been removed. You can also try using some sandpaper or steel wool if the room isn’t too big; just be careful not to damage the wheel’s surface in the process.
Do I need any other materials to paint and weather rubber tires?
In addition to paint and weathering techniques, you may need some additional materials depending on the effect you’re trying to achieve.
For example, if you want to create streaks of rust on your rubber tires, you’ll need some metallic paint in a rusty color. Or, if you’re going for a worn-down look, try using chalk or pastels to add subtle shading and highlights.
The bottom line is that there is no one “right” way to paint and weather rubber wheels – it all depends on what effect you’re aiming for and what materials you have available. So experiment until you find methods that work best for you!
What if my paints are incompatible with each other?
If you’re using different types of paint on your rubber wheels, there’s a chance they may not be compatible with each other. In this case, the colors may start to peel or fade over time, leading to an ugly finish.
To avoid this from happening, it’s best to use a primer designed explicitly for plastics or rubbers. This will help create a barrier between the paint and the wheel’s surface, preventing it from peeling or fading over time.
How long should I wait before weathering my painted rubber wheels?
It’s best to let each layer of paint dry completely before applying the next one. Using multiple layers at once can cause them to blend together unevenly, resulting in an ugly finish.

Hey there! I’m Richard Baker, a miniature painter who’s been in the game for a solid decade now. I’ve been painting miniatures for ten years and I’ve got a ton of tips and tricks to share with you all. My website is a treasure trove of knowledge that I’ve gathered from both my own personal experiences and from reading all sorts of books.


Leave a Reply