Hey there, art enthusiasts! Today, I’m going to share with you all my tips and tricks on using a wet palette. As an artist on the go, I know how important it is to have all your materials with you at all times. That’s why I always carry my trusty wet palette with me wherever I go.
What Is A Wet Palette, And Why Would I Use It?
A wet palette is a painting accessory that many painters use. It allows you to mix new paints quickly on the go, using little water and without the need for an extra mixing pallet.
This gives you more control over your colors and provides better consistency in color mixes since it doesn’t dry out entirely like paint on paper does after only seconds. Wet Palettes are also helpful for travel because they take up less space than traditional pallets of paint!
Wet Palette Supplies
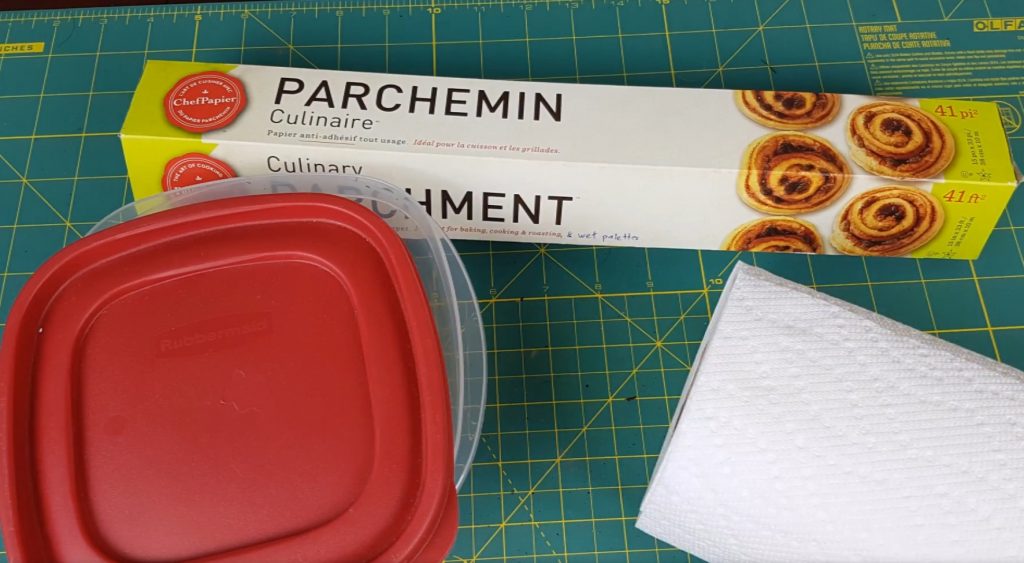
- water
- paper towels
- palette knife to mix paint and apply it onto the canvas
- cloth to clean the palette knife
- paint colors of your choice
How To Set Up The Wet Palette
- Soak the paper towels in the water.
- Squeeze out any excess water, but don’t squeeze them too dry, or they will fall apart when you apply paint to them! Make sure there is still enough moisture so that your colors can mix on it with minimal effort.
- Lay down three sheets of paper towel across the palette area and smooth them flat. You want these layers to be relatively thin to dry quickly after use (since wet palettes are not reusable). This step may take one or two extra pieces of paper towel depending on how large you make your palette section; just keep squeezing until all three fit nicely together without significant gaps between each layer.
- Add more paint colors to your palette section. This step is entirely up to you, but I typically add about four colors, including one white color, since it doesn’t come in tube form (for convenience and cost).
- Let the whole thing dry for a few hours or overnight before using it!
Tips: You can use any type of paper towel you want; however, I recommend using thinner sheets over thicker ones because they will absorb water faster and therefore be ready for painting sooner. Additionally, make sure not to press too hard when applying paint on the wet palette sections—just enough pressure so that there are no significant gaps between layers. If an area does get accidentally squeezed out flat with too much force, don’t worry too much! Just add a little more water to the paper towel and paint over it until you can pick up some pigment again.
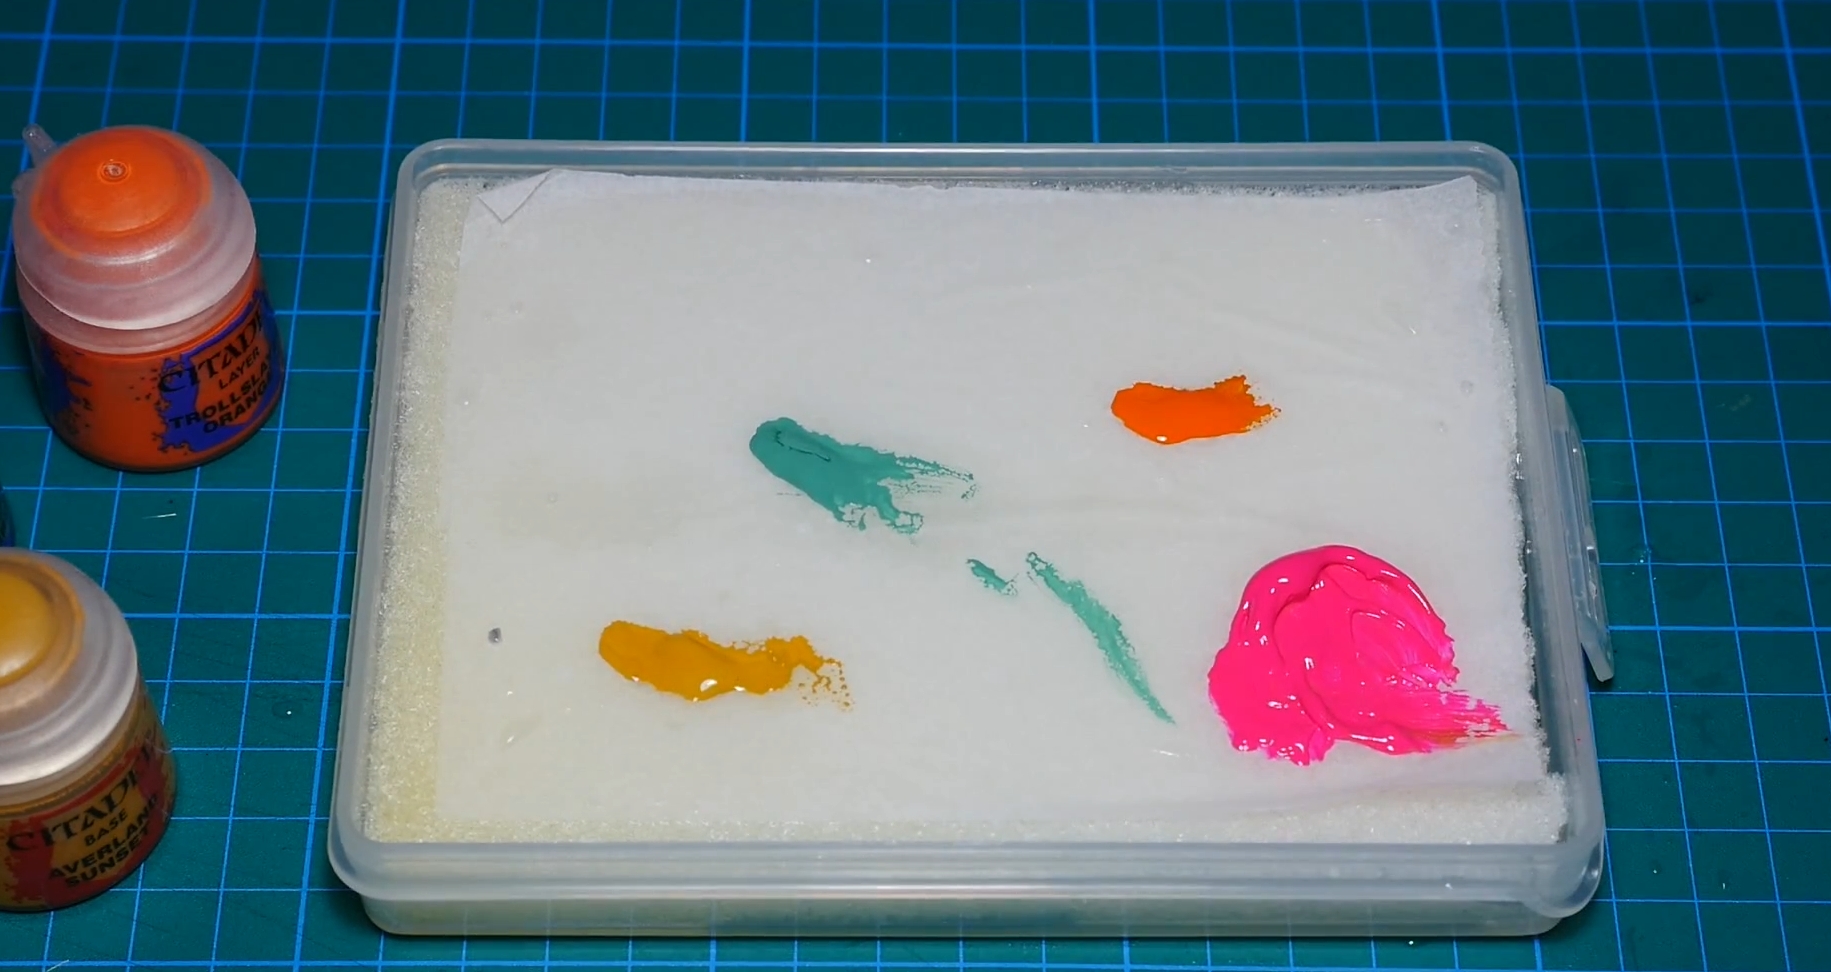
Use Wet Palettes For Miniature Painting
Once your palette is ready, you can move on to the next step: painting! This part of miniature painting seems simple enough, but several tricks and tips make it a lot easier. Let’s cover these in-depth so that nothing stands between you and beautiful miniatures painted well.
There is an article where I wrote about what wet palettes I use.
The Essential Tips And Tricks For Painting Miniatures With A Wet Palette
- Soak paper towels with water for at least 15 minutes before applying paint, or else they will absorb too much color (and therefore take forever to dry).
- Squeeze excess water out from under each layer; don’t squeeze them too hard because doing so may cause unwanted ridges/lines when drying later. Make sure all layers stay moist and without significant gaps between each other. This step only takes a few seconds, so don’t let it stress you out!
- Add your chosen paints to the palette section, but remember that more isn’t necessarily better; adding too many will make mixing colors harder instead of easier. You can always add more later if needed (and trust me, you’ll need some extra eventually). Don’t forget to include white, which is usually the last color added!
- I recommend painting one layer at a time for beginners so that you can quickly identify what colors are where instead of mixing them all together. Once you get more comfortable with this process, feel free to mix and match however you like! This part is totally up to your own preferences since everyone has their own style.
- Don’t press too hard onto the paper towels when applying paint; just enough pressure so that there aren’t any significant gaps between layers but not too much as it may cause unwanted ridges/lines on dried stains later. This “rule” only applies if using thinner paper towel sheets (as opposed to thicker ones); just use common sense and apply as much pressure as necessary so that your colors come out quickly.
- If an area does get accidentally squeezed too hard, add a little more water to the paper towel and paint over it until you can pick up some pigment again (no need to worry since this step is elementary).
Tips: I recommend painting one layer for beginners because of how difficult mixing colors on the wet palettes section may be otherwise; having fewer paints spread out makes them easier to locate without getting mixed in with other colors! Once you get more comfortable, feel free to mix things up however you like, though—the key here is knowing where each color lives when using miniatures graciously donated by others ;). Don’t forget about including white either since it’s usually the last color added to wet palettes!
Benefits of Using a Wet Palette
Using a wet palette is basically the same as using a dry one, except that it’s made to stay damp—which makes all of the difference in how well your paints mix and blend.
Color Mixing On A Wet Palette
Mixing colors on a wet palette isn’t just more accessible because there are fewer steps involved and more control over what happens during each step! For example: if needed, adding water or paint can be done by simply dipping your brush into said substance before gently stippling (patting) across the paper towel until reaching the desired hue. There will still be some limitations since very light/dark shades may not always become exactly like intended; this problem is easily solved with help from other tools, such as a simple pencil.
An added bonus is that you can use your wet palette to thin paints or fix colors later on if needed—very useful for beginners! You should not use metallic colors since they do not always mix well. But you can try this because there are no rules against it.
Using A Wet Palette For Thinned Paints & Fixing Mistakes
Sometimes, when you paint the mini-figures, the parts that are painted get thick. You can use water to thin them down. Then they will be less dense and look more detailed. If this doesn’t work as well as you’d like, try using a wet palette for thinned paints instead—just use your paintbrush to dip into water and splash it onto the paper towel until achieving the desired effect… it’s really that easy!
If your paint comes out too light or thin on a specific spot, you can use another brush to get more color on the surface. Make sure not to press down hard because it may cause some ridges. This method works exceptionally well with shades that are close together but just need an extra addition. Fixing mistakes can be done either way, depending on preference, so I recommend trying both to see which works best for you!
If you make a mistake on your paint, just use some water and paint from the wet part of your palette. Then use this to fix your error. This is a difficult thing to do. You need to know how much paint you need for your project. This will make the painting lighter or darker, depending on what you use. It can be challenging to find out how much paint you need, but if you keep practicing, it should work!
Hooray—you now know how easy it is to use a wet palette!
Disadvantages of Using a Wet Palette
Getting used to using a wet palette can take some time, especially for beginners. The most common problem I’ve seen is that people tend to add too much water or paint onto the paper towel sheet; doing this will cause ridges and make it difficult to mix colors together during miniature painting! This issue usually happens when mixing paints that are already reasonably thin by default since they’re hard to control in such conditions…but just keep practicing and don’t give up because you’ll get the hang of it eventually—that’s what happened with me anyway.
Other than that: there aren’t really any other disadvantages associated with how well your paint mixes while on a wet palette itself, but one must always be mindful not to add too much to avoid significant problems.
Tips For Painting With The Wet Palette
When To Use A Wet Palette?
The best time to use a wet palette is when you are painting watercolor. You can paint with oils, acrylics, and other mediums without one, but it’s recommended because the colors will dry faster, which means they won’t be as vibrant. It also helps keep your paints from drying out too quickly so that you have enough time to mix all of the colors for any given project.
When Not To Use A Wet Palette?
A common mistake among beginners is using their wet palette too early into painting an area. You should wait until your paint starts looking dry before adding more water to your palette! If there are any clumps in it, simply strain out the water with a coffee filter.
When Should I Clean My Wet Palette?
You should clean off your palette or replace the plastic wrap when it starts looking dingy; if there are any clumps in it, simply strain out the water with a coffee filter.
What Kinds of Paper Can I Use for a Wet Palette?
The following are the finest paper choices for wet palettes:
- Baking Parchment – You can use this parchment paper to create a palette. If you are using oil paints, it is best not to buy thick baking paper, as it will absorb too much liquid and could warp.
This type of parchment paper comes in an unbleached or white color, so if you do not want your paint colors showing through the wet palette mixture, then, by all means, go for unbleached!
- Brown Paper Bags – These bags are great because they have no printing on them at all; therefore, there should be little-to-no ink seeping into your painting mixtures. You can also purchase brown craft store drop cloths that work just as well.
- Parchment Paper Sheets – This works fine, but sometimes the sheets are too thin, and you have to put several together. I personally prefer the thicker type of baking parchment paper or brown craft store drop cloths.
- What About Wax Paper? – Please do not try using wax paper for a wet palette! It will melt! If it melts, then what is your paint going to stick to now?!
- Greaseproof Paper – This is an excellent choice for a wet palette, not to be confused with wax paper! It can withstand high temperatures without melting, and it will keep your paint from drying out.
- Sta-Wet Acrylic Paper – This product is specifically made for wet palettes. It comes in various colors, like white and black (which you can use to keep out light); it also comes in three different textures – smooth, medium, or rough! If I were to choose one of the four options above, this would be my first choice.
- Porous Paper – You turn to your old reliable printer paper when you need this. This works well, but it can get soaked quickly, so make sure that you use a dry strip of the paper every once in a while.
- Paper towels are an excellent alternative to using paper, especially when you have little ones around. Although it’s not the most environmentally-friendly choice, this will do just fine sometimes in a pinch!
Just about any paper will work fine if you are mixing paint regularly; however, when painting large paintings, your best bet is using thick baking parchment paper.
What Kinds of Liquids Can I Use?
You can use almost anything that has water in it! You want to avoid oil paints because they have an extremely high pigment load which means the mixture becomes very thick with little liquid added. Plus, all oils contain a certain amount of wax, which is not suitable for your paint mixtures.
The best liquids to use in a wet palette are:
- Water – It’s the most common and most straightforward choice. However, it will evaporate quickly when left overnight on top of your painting surface. If you choose water as one of your liquid mediums, make sure it is distilled or purified. You do NOT want minerals from tap water ruining all the work you have done! I add about 20 drops of glycerin with every two cups of water because this helps retain moisture longer than just plain old H20 does alone.
- Glycerin – This product can be found at any drug store or craft supply shop (I get mine from Hobby Lobby). It is a clear, odorless, and colorless product. Glycerin will prevent your paint mixtures from drying out too quickly.
- Acrylic Medium – This medium can be used to add water to create a thicker mixture that holds up better than just plain old H20. The only drawback about acrylic mediums is that they take longer for the paints to dry on top of them; however, this should not really matter if you are working on more miniature paintings or sketches!
- Other Liquids – Other liquids besides these three may work well in a wet palette, such as alcohol (grain), vodka, propylene glycol, denatured alcohol, etc. Still, I have never tried any of those, so I cannot personally recommend them.
How Do I Clean My Wet Palette?
When it’s time to empty my wet palette, I do the following:
- Remove the paper and recycle it.
- Take out the sponge, run it under running water, wring it out, and hang it to dry.
- You may either wash the jar by hand or put it in the top rack of your dishwasher.
- Allow the container to drain and dry right side up.
First of all, do NOT just throw your used wet palette paper away! You want to remove as much paint from it as possible before throwing it in the trash. To clean a used piece of parchment paper or drop cloth, simply fold it over numerous times until there is no more paint showing through and then tear off small amounts at a time.
Begin wiping down the surface with this new, more miniature sheet until you can see that most (if not all) of the paint has been removed; remember to use only downward strokes when cleaning off dried acrylic paints. If you deal primarily with watercolors, graphite pencils, etc., these products will come right off the parchment paper quickly.
If you deal primarily with oils, getting all of the paint residues off your medium is more challenging. In this case, I would recommend using a product called CitraSolv™ (it can be found at any craft supply store or online).
This handy solution will dissolve dried acrylic paints from nearly any surface in just seconds! If you paint with brushes, put a good amount of color on a clean piece of plastic. Then scrub the wet surface until no more paint is showing. Let dry for about 30 minutes before putting the brush back in the container.
FAQs
How to thin your paint on a wet palette?
The best way to thin your paint on a wet palette is with water. Use the dropper and add just a few drops of water at first, then mix it in thoroughly before adding more.
How long can you keep paints on a wet palette?
You should clean out your palettes every time you use them to not dry up or get moldy. Sometimes painters will keep their favorite color mixes for months! But as soon as one uses this mixture, start over again because once something has been absorbed by the styrofoam, it’s pretty hard to remove it… unless you have some acetone handy (which I do not).
What happens if my colors dry up?
If your colors are no longer painting correctly or are not mixing well, it is probably because they have dried up. Just add a few drops of water to them and see if that helps! If this doesn’t work, you can also mix in some acrylic paint thinner (just make sure there are no oil paints mixed in), but again I would recommend cleaning out your palette every time, so the same problem doesn’t occur.
What is an everlasting wet palette?
Everlasting Wet Palette is a product that can keep your paint wet and ready to use for hours. For those who don’t want to bother with a handmade damp palette, you can buy an Everlasting Wet Palette.

Hey there! I’m Richard Baker, a miniature painter who’s been in the game for a solid decade now. I’ve been painting miniatures for ten years and I’ve got a ton of tips and tricks to share with you all. My website is a treasure trove of knowledge that I’ve gathered from both my own personal experiences and from reading all sorts of books.


Leave a Reply