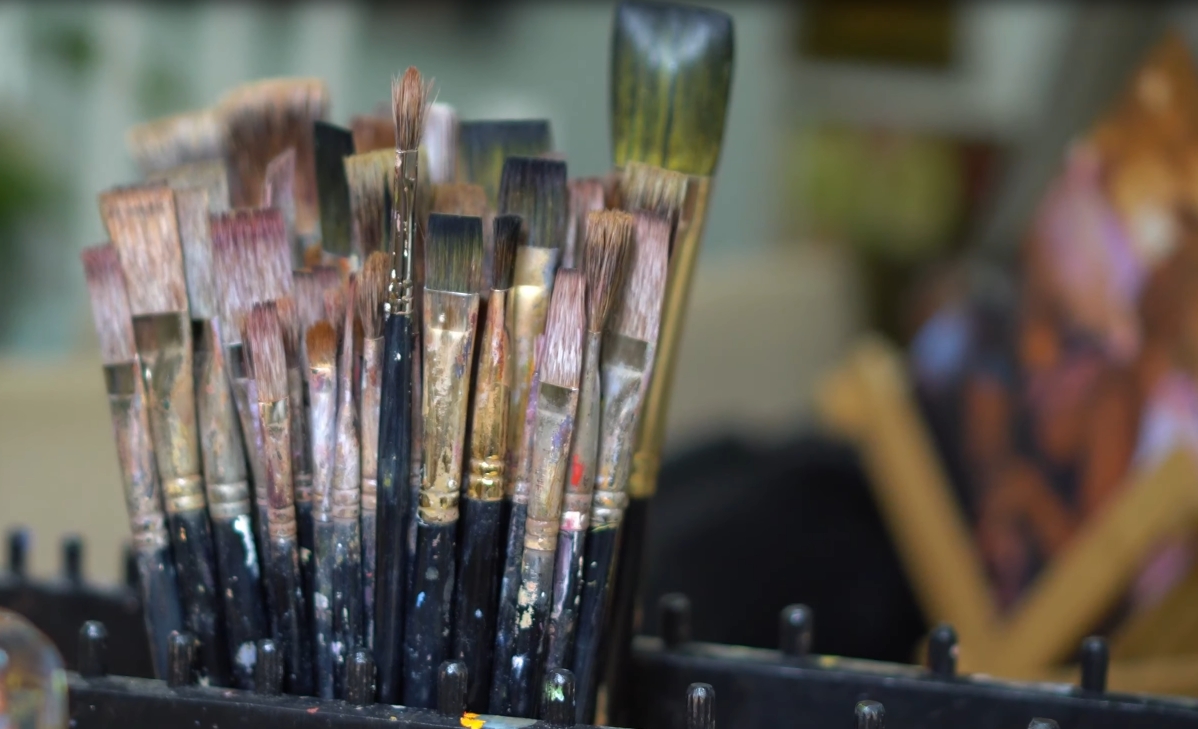
Hey there! So, you’ve got a bunch of paint brushes that are all gross from the last color you used, and you’re wondering what to do. Well, let me tell you, you can’t just use one brush for every color! That’s a big no-no in the painting world. You’ve gotta clean those brushes between each new color so that you don’t end up with a funky color mixture on your surface.
Why Do We Need to Clean our Paintbrushes?
Clean paint brushes are a simple but essential step, especially if you are working on multiple paintings at once. If not cleaned properly, the leftover paints will dry out and harden inside your brush which could ruin it or make it difficult for you to use in future projects. It may also be helpful to design yourself some kind of system that makes cleaning easier. For instance, if you have three different colors going at once, then designate three specific buckets/containers for red, blue and yellow, respectively. This should help keep your work area more organized while keeping all of your supplies handy too!
How To Clean Acrylic Paint Brushes Between Colors!
It’s all about clean brushes! It can be easy to forget that the colors will mix on the brush if you are using acrylic paint. If you want to keep your colors pure and vibrant, it is important to clean your brushes between each color change. I wrote an article a long time ago on restoring dried paint; I suggest you read it.
Removing Excess Paint From The Bristles Of An Acrylic Brush
The first step to cleaning a paint brush is removing the excess paint from the bristles. Excess or “bad” acrylic paint can be extra thick and sticky, as well as dried out.
- Dip your clean brush in water if it’s not yet wet (don’t leave it sitting)
- Add soap and massage into the hair of the brush until you create suds on top of your hand; then rinse under running water while holding onto the tufted end of bristle hairs with one hand and massaging up against palm with fingers of other hands. Repeat this process several times to ensure all bad/excessive paint has been removed from acrylic brushes.
- If there is still some excess paint left over, then repeat the previous steps of adding soap and massaging until you get suds on top of your hand.
Clean Acrylic Paint Brushes With Paper Towel
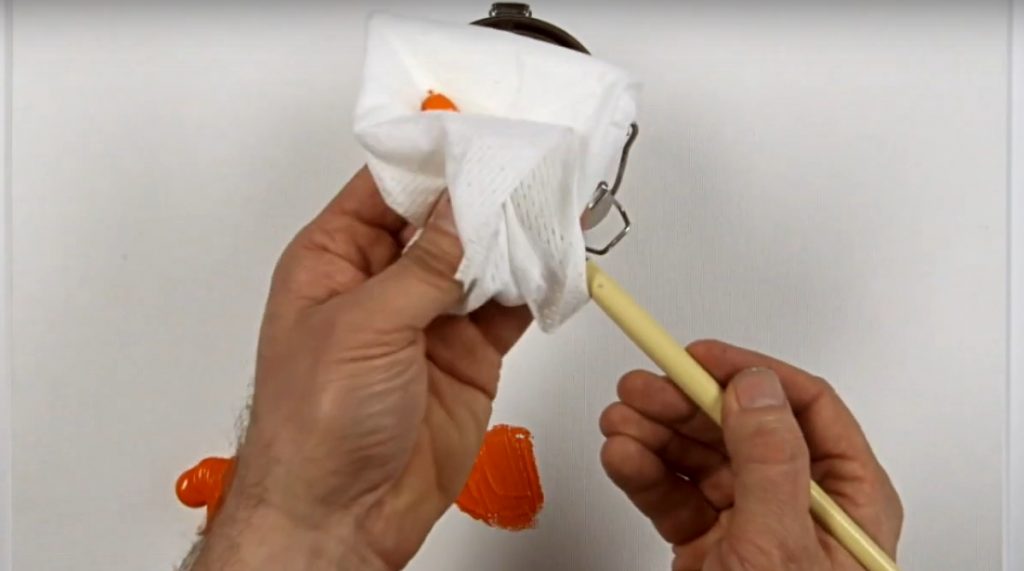
After rinsing your brush thoroughly and removing the excess paint, the next step is to dry it. This can be done by taking a paper towel (or several toilet paper wipes) and squeezing tightly above wet bristles, then quickly pulling down along the length of the hairs to remove water.
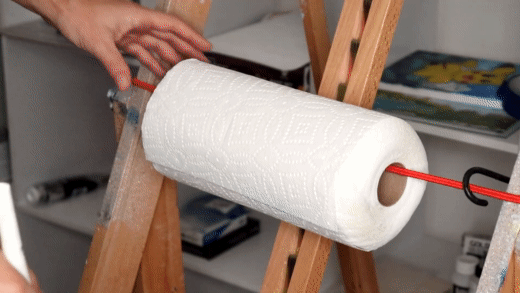
Repeat this process until all of the dripping has stopped or there are no more drops coming out after each squeeze. If necessary, repeat for both sides/lengths of bristle hairs before moving onto another color in between brushes.
Clean Acrylic Paint Brushes With Soap and Water
- Mix soap and water in a bowl until you create suds (soap lather) on top of the mixture; then dip your paint brush into it.
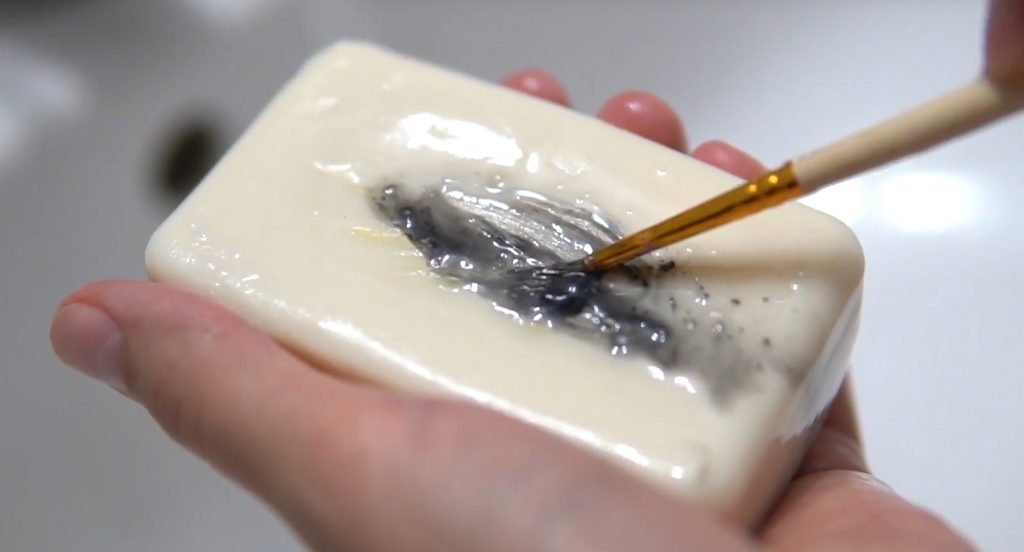
- Massage well against palm to remove any excess or bad acrylic paint from bristles.
- Forcefully push down many times, almost as if you are flicking off chunks of dirt from under your nails, but with an acrylic bristle brush instead!
- Knock off chunks of paint that are stuck on the brush.
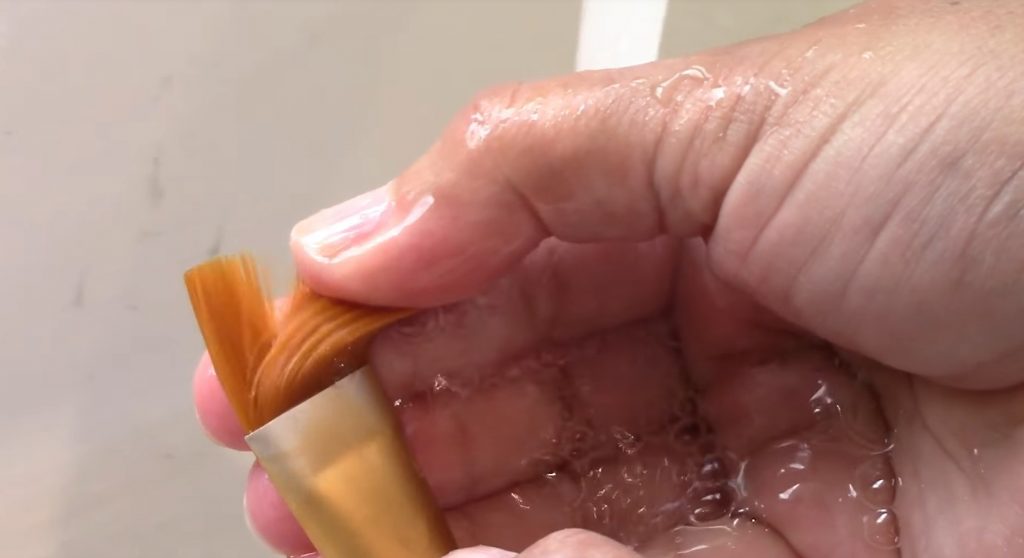
Repeat steps two and three until suds go away or remain clear (meaning no more bad/excessive paint is present).
Rinse under running water! Wash it out well; then gently shake bristles to remove excess water before setting it down with hairs facing up to dry. Avoid leaving your acrylic brushes soaking in a container of dirty soap water because this will promote mildew growth inside of the tufted end if not rinsed thoroughly, which can cause discoloration at some point later on.
Let them air-dry entirely after use by placing them upright with their hairs facing either left or right so they can drip into an empty yogurt cup overnight without getting wet. I recommend reading my article on wet palettes.
How to Clean Oil Paint Brushes Between Colors
Do you have to clean your oil paint brushes between paints? I do. Even with the best of intentions, painting a masterpiece can sometimes look like a hot mess because different areas change colors and textures from one another! This is especially true when trying new techniques or experimenting by using different types of mediums which brings us here today for some tips…
Paint Thinner
When it comes to cleaning oil paint brushes without using a thinner, you have two options: either use water or baby soap. Both methods do the same thing – they help dissolve and remove traces of old paint from your brush tips.
Additionally, both work great on all types of bristles – whether synthetic or natural hair!
However, one type is more suitable for certain types of paints than others.
For example, suppose you’re working with alkyd-based paints (oil-based). In that case, we recommend going with the baby soap instead of water because softeners in regular dishwashing liquid may be detrimental when used against these kinds of paints. With latex (acrylic) paints, the water works great.
Baby Wipes
There’s also an alternative to the two methods mentioned above. You can use baby wipes instead of water or soap!
These are great for regular brushes, but to use them with oil paint, you must rub them on your brush very gentle so as not to leave bristles splayed out when dry (a big “no-no” when it comes to oil painting).
Instead of just letting your paintbrush air dry after cleaning, try inserting a paper towel into the ferrule and gently squeezing it until all excess moisture is removed. Then set aside and let completely dry before using again. This process ensures that no mildew will develop inside the handle, which could be detrimental for later batches of paints used on your brush.
Linseed Oil
Lastly, if you’re looking for a solution to clean oil paint brushes without having the hassle of cleaning them individually between colors or with soap and water, then why not try linseed oil?
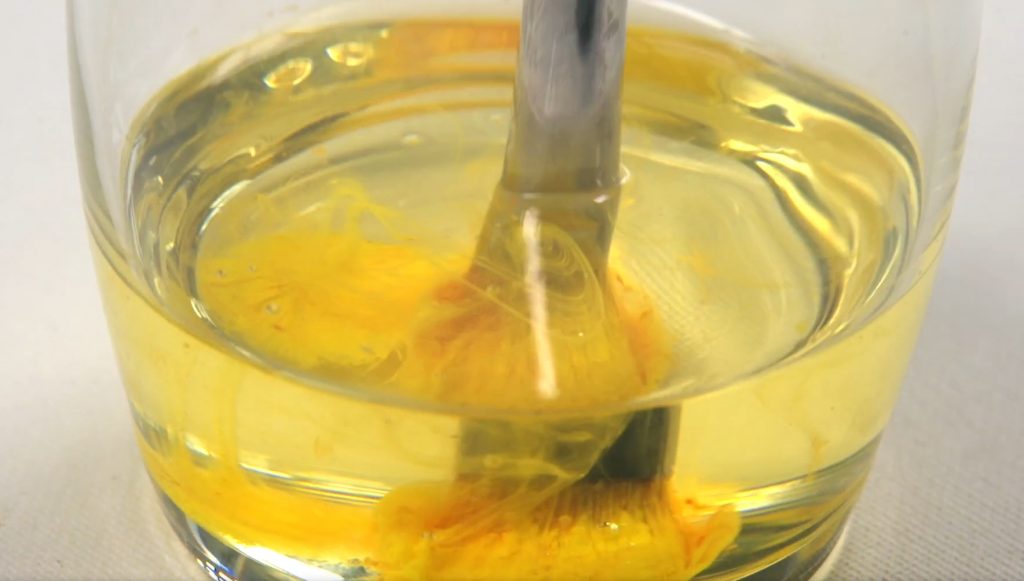
This is great because it provides an excellent conditioning treatment that won’t damage your brush bristles. However, be sure to only use this on new or very well-maintained brushes (i.e., regularly cleaned ones). If misused, some types of bristle can become splayed out after rinsing off in the water! So make sure you read the instruction label carefully before applying any kind of conditioner onto your tools. You don’t want to mess up all your hard work by using the wrong type of cleaner!
Olive Oil
Be aware that you can also use olive oil to clean paint brushes, but only if new. This type of oil works excellent for conditioning the bristles and is safe enough to use all kinds of paints!
After application, though, let your brush dry completely before using it again, or else you might end up ruining the bristles by leaving them splayed out when wet.
Baby Oil
As an alternative to olive oil, you can use baby oil (the kind with no fragrance) instead. Like the linseed variety, this should only be used on new or recently maintained brushes that are still in good condition.
Baby Soap
After using either baby oil or olive oil, you should be able to use soap and water for a thorough clean-up.
As long as your brushes are well-maintained before applying the conditioner (i.e., they were regularly cleansed), then this method will not damage them in any way!
Dish Soap
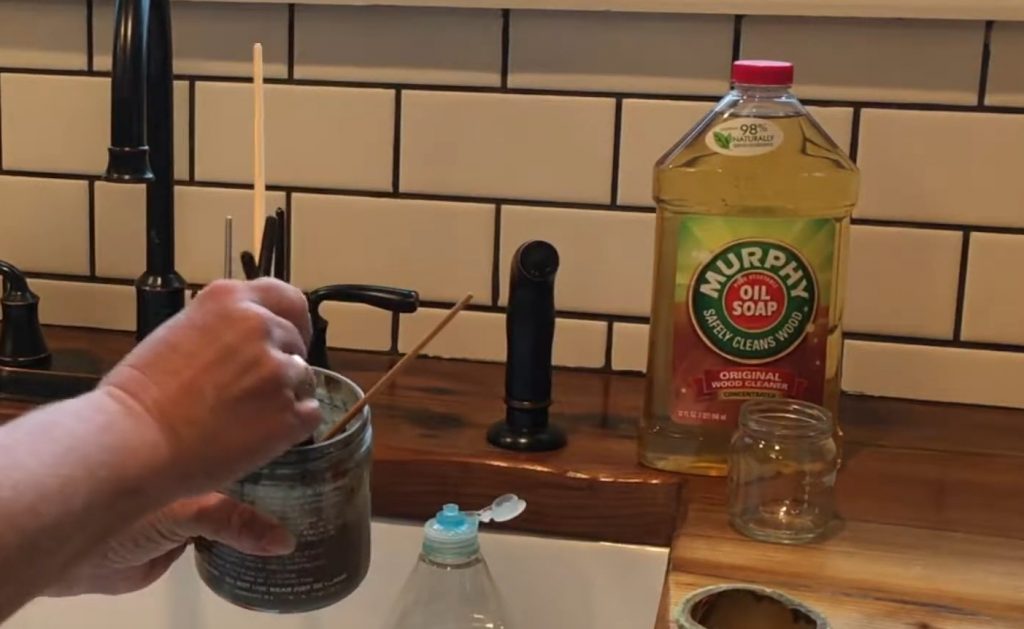
If all else fails and you don’t have any recommended cleaners on hand, just stick with dishwashing liquid like Dawn or Murphy’s Pil Soap. Just remember that each time you switch colors, rinse off entirely until no more paint comes out from under the bristles when rinsing with warm running water after cleaning between types. This ensures that the next color you use doesn’t mix with the previous one and ends up ruining your artwork!
Vegetable Oil
Last but not least, you can also use vegetable oil to clean your paintbrushes between colors. This is a great way to go if you’re feeling very lazy or just don’t have access to anything else at the time!
However, be aware that this type of cleanser will do more than just clean the paintbrush. It might also strip away any protective coating on the brush. That means it could make the next batch of paint less resistant. So only use this method after lots of heavy usages! I already wrote an article about how long does acrylic paint take to dry?
How Often You Should Clean Your Brushes?
You should try to clean your paintbrushes every time you switch colors. This ensures that the previous color doesn’t mix with what you have already painted and ruin your artwork!
In general, it is also a good idea to give them a thorough cleaning after painting for several days straight or applying any type of primer coat.
The last rule of thumb when caring for oil and acrylic paint brushes is that they must be thoroughly cleaned before putting them away at the end of each session. Leaving old paints stuck on bristles will cause mildew to develop, which can turn into an unsightly black spot if not taken care of properly! So make sure all excess oils are completely wiped off from both ends (i.e., the tip and bottom) before you put them away for storage after your painting session is over.
Conclusion
Wrap your brush in paper towels or store it in an old tin can when you are done painting for the day. This helps to absorb any oil residue that might have been left on your tools after cleaning them before putting them away!
Don’t forget, if you ever find yourself in a pinch and don’t have any of these cleaners available during clean-up time, then just stick with dish soap like Dawn or Joy instead. It is better than using nothing at all! But always remember not to use it more often than recommended to avoid ruining your brushes over time.

Hey there! I’m Richard Baker, a miniature painter who’s been in the game for a solid decade now. I’ve been painting miniatures for ten years and I’ve got a ton of tips and tricks to share with you all. My website is a treasure trove of knowledge that I’ve gathered from both my own personal experiences and from reading all sorts of books.


Leave a Reply