I have learned the basics of priming miniatures with an airbrush. Priming is a crucial step in the painting process as it provides a smooth base for painting and prevents any unwanted marks from appearing on the miniature’s surface. One can find various types of primers at hobby stores, and in this blog post, I’ll be sharing my knowledge on priming with an airbrush.
Priming Your Miniature Figures – Airbrush Set Up
An airbrush is an essential tool when it comes to priming miniature figures. I have the option to purchase a pre-set-up kit that includes all the necessary items, or I can set it up myself. To start, the following items are required:
- A large container (or two if working with multiple figures)
- A container for the airbrush
- An airbrush holder or stand
- Spray paint labeled as “primer”
Once I have all the necessary items, I proceed to fill the spray can with paint. It is important to use a light coat of paint to ensure an even and smooth application. If I’m working with multiple figures, I divide the priming process between different containers and use separate airbrush holders or stands for each container.
How To Keep Your Airbrush Clean
As a professional modelist, I have experience with keeping my airbrush clean. To maintain the quality of my work, it’s crucial to keep the airbrush in good condition, free from clogged nozzles and residue from primer spray. Here’s my process for ensuring the cleanliness of my airbrush:
Materials:
- Airbrush cleaner
- Paint thinner
- Clean container
- Clean cloth
- Pour paint thinner into the clean container and immerse the airbrush.
- Either spray a light coat of cleaner or soak the airbrush for 5 minutes in the paint thinner to remove any leftover primer. This step should be done every couple of months.
- Use the clean cloth to wipe the airbrush.
- For thorough cleaning, spray a light coat of cleaner on the nozzle or soak it in paint thinner for 5 minutes, then rinse off any remaining primer.
By following these steps, I ensure that my airbrush is ready for use and that no clogs occur while I’m using it to prime my miniature figures.
Tips for Painting Your Miniatures with an Airbrush
As a miniature painter, I have found that airbrushing can greatly enhance the final result of my models. Here are my tips for a successful airbrushing experience:
- Gather the necessary materials: paint color of your choice, airbrush and air compressor or other compressed gas source, and a variety of brushes for small details. Foam rollers can also be useful for painting large surfaces without leaving brush strokes.
- Set up your workspace: Place your model on a table, either upright or horizontally, with enough space between models to avoid cross-contamination. Cover your workspace with newspaper or paper towels to catch any excess primer spray.
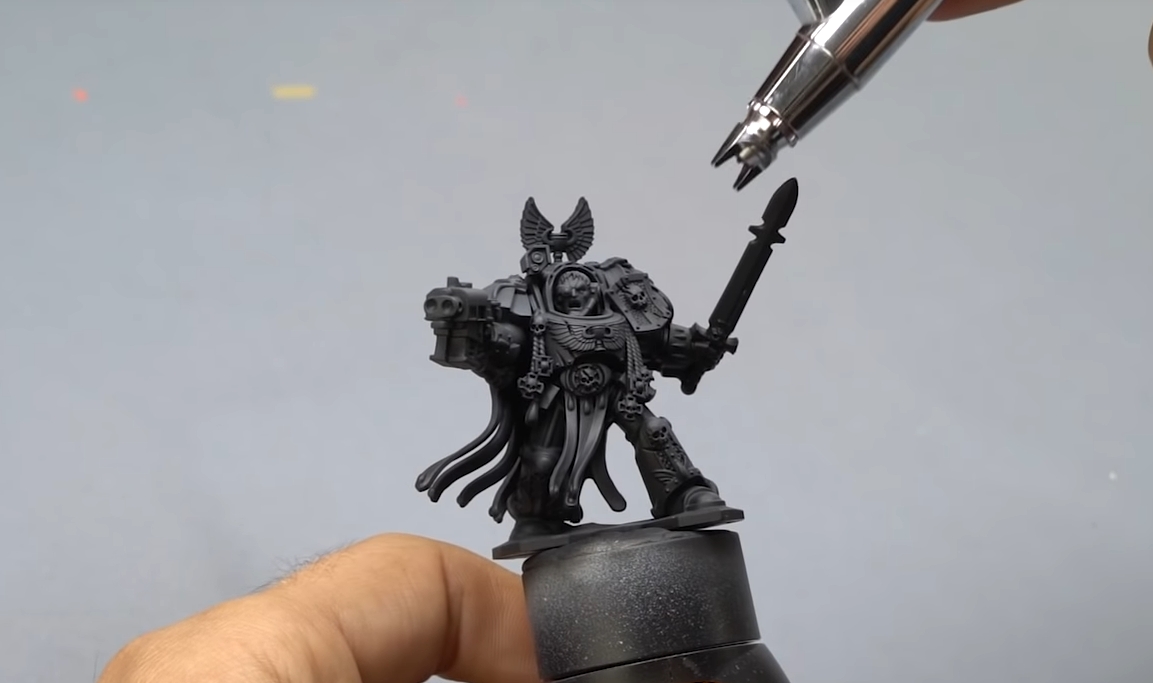
- Start airbrushing: Hold the airbrush about three inches away from the surface of the miniature and use small, circular motions to apply a thin layer of primer. Allow each layer to dry for about an hour before applying the next. Avoid applying too much primer at once to prevent excessive coverage.
- Repeat until all surfaces are primed: This includes small details, so don’t forget to reach every nook and cranny. Once your model is fully primed, you can put the airbrush away and start painting as usual. Enjoy the process!
FAQ
Can You Prime Minis With An Airbrush?
Yes, absolutely. Priming a miniature is the process of painting it to create a uniform base for color and texture to be applied on top of later. Primers are usually made up of gesso or another type of acrylic paint, so they have some grit and can stick better onto your mini’s plastic, metal, resin, etc., surface. Some primers also contain UV coatings which help protect the painted area from further damage from the sunlight without changing how the color goes over the top.
The question then becomes, what kind of primer should I use? That largely depends on what material you’re using as well as where you intend to take this project after finishing:
- If you’re using metal or resin, a light gray primer is usually recommended. This idea is to create a surface that will be less noticeable on the finished product and provide more contrast for darker colors to show through later.
- For plastic models – which are probably most common these days – many people prefer an “off white” color because it won’t change how the final paint job looks and provides enough texture for things like battle damage and rust effects to stick well. It’s worth noting that not everyone has success with this approach as some plastics can react strangely to primers, so make sure you test your chosen type first before going all-in if possible!
Do I Need To Prime Before Airbrushing?
Yes, but it depends on what you’re going for and the material your mini is made of. If you want a really smooth finish with a minimal texture that will react well to light coats of paint, then priming first would be essential! But if you plan on painting something more detailed or using chipping techniques where there are rougher patches in areas like metal armor plates or textured surfaces – such as leaves on an old tree – then this isn’t necessary because those textures won’t show up once the final coat has been applied.
That’s not to say, though, that all miniatures have different types of surfaces: many models still come pre-primed in their factory box, so it’s worth checking before you buy. If that doesn’t work for you, it might be easiest to start with a light coat of primer on your mini and see how they react in the next few steps!
What Do You Use To Prime Miniatures?
It really depends on the surface of your model and what you’re trying to do. Primers come in various varieties for various materials, including acrylics with varying degrees of texture or even pre-mixed paints designed specifically to create a rough or sleek finish before applying paint. The most important thing is making sure whatever you use leaves plenty of time to dry if it contains acrylics, so they don’t build up on top – something which can happen quite easily when airbrushing due to how thin the layers need; to be!
When priming plastic models, we recommend using an off-white color because this will not change the final look but still provides enough texture for battle damage effects without being too noticeable. Metal miniatures should have a light gray primer to make the surface less noticeable and provide more contrast for darker colors to show through later.
Primers also come in varieties with UV coatings which help protect painted areas from further damage from the sunlight without changing how the paint goes over the top. However, this can sometimes change the color of your final product depending on what it looks like before being airbrushed. It’s worth noting that not all plastics react well to priming materials, so make sure you test any type beforehand if possible!
For metal or resin miniatures – which are usually best primed with acrylics due to their texture – many prefer a “light gray” shade because this provides an opaque base for dark-colored paints while still allowing some details to show through. It’s worth noting that not everyone has success with this approach as some types of metal can react strangely to priming agents, so make sure you test your chosen type extensively before going all-in if possible!
A note about “off white” – for most models, we recommend using a color like off white or light gray because it won’t change the final look but provides enough texture for battle damage effects without being too noticeable. But there is one exception: when primed first, plastics and other similar materials will sometimes appear less glossy than normal (though still more shiny than bare plastic). If you are looking to create something where the miniatures appear dirty or grimy, then using a slightly darker primer might be a good idea so that the surface will show more dirt and grime when applying paint.
Do You Need To Thin Primer For Miniatures?
This really depends on what sort of primer you’re using and whether or not it’s acrylic. Acrylic primers typically don’t need to be thinned, but some people prefer this, especially when airbrushing for the paint to flow better from the nozzle. If your chosen type is water-based, make sure that any mixes are sprayed onto a test piece before going all-in because they may have different drying times than normal!
- A note about “water-based” – if your priming material is water-based like tinted varnish (another common choice), there will likely be no need to thin it with anything else as these types can already react poorly with other substances like alcohol which could ruin them altogether. These primers are typically sprayed onto a test piece before going all-in and should dry in about 20 minutes.
- A note about “acrylic” – for most models, acrylic priming material will not need to be thinned with anything else (but some prefer this, especially when airbrushing). If you’re using an acrylic primer that’s been tinted, make sure it dries for at least 24 hours; otherwise, you may end up applying paint too soon after, which can cause uneven coverage or other problems depending on what sort of substance is being used!
Make Sure Your Priming Material Is Safe For Miniatures?
Acrylics have become very popular because they make painting so much easier, but there are a few types of “primers” that you should avoid, like the plague. If your chosen product is water-based, then make sure it’s scorched before spraying on any other products, or else you may risk ruining them. If they’re oil-based (the most common example), this will likely not work for miniatures because these materials are incompatible with each other!
- A note about “Oil Primer” – while some people prefer to use an oil primer as their first coat for metal models, this won’t be compatible with miniature painting, which means you’ll need to choose another material type instead. Acrylic priming agents have become popular due to how easy they make painting so long as it dries within 24 hours. It would help if you also avoided using water-based primers as these may not work well for metal miniatures depending on the type you choose or how they’ve been tinted.
- A note about “Varnish” – if your chosen primer is an acrylic varnish, then make sure that it completely dries before applying anything else. Otherwise, this will likely lead to uneven coverage and other problems when painting with another substance (like oil paints). Water-based types are less common, but partially due to their tendency of being too thin or running out quickly!
Does priming material need a 24-hour wait between coats?
Some people prefer waiting even longer to allow the paint time to dry properly, especially if it’s acrylic-based. But this really depends on the type of primer you’re using and what sort of substance it is being mixed with. If your chosen material dries within 24 hours, then this may not be necessary, but if it doesn’t, then wait at least an hour might be enough to ensure that both layers have fully dried before applying paint!
Can You Spray Clear Coat With An Airbrush?
I have experience using an airbrush to spray clear coat, but not all clear coats are compatible with airbrushing. I make sure to test any water-based clear coat mixes on a test piece before applying it to my work, as they may have different drying times.
When using an acrylic primer that has been tinted, I allow it to dry for at least 24 hours. If I don’t, the paint may not fully adhere and can result in uneven coverage or other issues, depending on the substance used.
Clear Coat – I have learned that clearcoat primers react poorly to alcohols found in substances such as nail polish remover, thinner/solvents, cleaners, and degreasers. Before spraying clear coat primer onto miniatures, I always test it to avoid ruining them.
Clear coats are made from liquids that dry into a plastic-like substance. Alcohols in substances such as nail polish remover, thinner/solvents, cleaners, and degreasers can cause peeling. I test clear coats on a piece first to avoid damaging my work. Acrylic primers work well with airbrushing but need at least 24 hours to dry for best results, while other materials may only take an hour. Water-based primers may not work well with metal miniatures, depending on the type chosen and if they have been tinted.
Oil Primer – Oil-based primers are compatible with miniature painting as they don’t react negatively with each other. I still wait at least an hour for it to dry before applying paint, unless it is a water-based acrylic primer, which needs 24 hours. I allow acrylic varnishes 24 hours to dry between coats instead of only 30 minutes to ensure full drying. I avoid using water-based acrylics as they may run out quickly and don’t provide good coverage without a protective layer from an oil-based material.
Is Flow Improver The Same As Thinner?
As a large modelist, I often get asked if Flow Improver and Thinner are the same thing. The answer is no. Although both can enhance your airbrush performance, they have different properties that should be taken into consideration before deciding which to use with your paints or spray gun conditioner.
I always emphasize the importance of priming miniatures before painting, even though it’s not a requirement. Priming protects the model from corrosion and rust and fills in small cracks for better paint adherence. It also creates an even surface finish without any bumps.
Before I start painting, I make sure to clean my model to remove any oils or debris. I use soap and water with an old toothbrush and rinse it thoroughly with cold water before drying it off completely.
Next, I assemble my airbrush by screwing the needle into the nozzle, adding paint to the cup if necessary, and tightening everything to prevent any fluid leakage. I then fill any remaining space with either Flow Improver or Thinner.
When airbrushing, I recommend using multiple light coats rather than a heavy one to avoid drips and runs. I usually start in an area with fewer details, such as flat surfaces of buildings.
Once I finish priming all areas, I move on to painting. I make sure not to overwork the surface and add some thinners or Flow Improver if needed for smoother paint application.
After painting, I let the primer dry completely before applying any other coats of paint. I also keep in mind that a second coat may be necessary in areas with many nooks and crannies, like door hinges or engine compartments. And that’s it!
What About The Compressor Noise?
As a professional airbrush artist, I’ve had my share of experiences with compressor noise. Many people ask me if the noise can be distracting or annoying, which is a valid concern given the sensitivity of airbrushes. However, I can assure you that it doesn’t have to be an issue.
Some airbrushes come equipped with an inbuilt fan that helps to eliminate particles that might clog the paint flow or affect the quality of your application. Alternatively, wearing earplugs while using the airbrush can also make for a more comfortable experience.
When it comes to comfort, the most important thing you can do is research the noise level of your desired model before making a purchase. It takes just a few seconds on Google to find out all the information you need about the compressor noise for the model you’re interested in.
How Much Space Does A Compressor Need?
I need to store my compressor in an area that provides enough space, including a few feet of open space on the sides. Placing it next to my airbrush could result in overheating or other issues due to its sensitivity.
The necessary measurements vary depending on the type of compressor. I suggest referring to an article that offers more information on selecting the best compressor for individual needs.
Do I need extra equipment besides my airbrush?
As a professional, I would recommend considering additional equipment beyond just an airbrush. In order to achieve the best results, it’s important to have a complete set of tools, including paint cups, spray guns, masks, and more. These items can be purchased separately or as a kit, allowing for a personalized airbrush experience.
Are Citadel Sprays Primers?
As a seasoned miniature painter, I can tell you that Citadel sprays are not primers. While they can be used to prime miniatures, they are actually a type of paint. To prime effectively, you will want to use an acrylic primer or a spray specifically designed for use with a clear coat. This will help avoid any issues that may arise from using a single product for both priming and painting.
In some cases, Citadel paints can be used for the entire miniature painting process, but this is not ideal. The process will take longer, as each layer will need to fully dry before moving on to the next.
For beginner miniature painters, the easiest way to prime with an airbrush is to use a dedicated primer. This takes care of all the basics and makes the process much easier. As you become more comfortable, you can start experimenting with other options such as Citadel paints or clear coats, which may require additional equipment.
How Do You Use Tamiya Surface Primer?
I use Tamiya Surface Primer on my models with clear plastic parts or molded details, such as weapons, tanks, and other items. The primer provides these pieces with a glossy finish, enhancing the visibility of colors under certain lighting conditions.
It’s important to note that Tamiya spray cans do not come pre-primed and require the addition of an acrylic sealer before use. The process is simple: shake the can well, mix thoroughly as instructed, and apply directly from the nozzle, wearing eye protection, until desired color coverage is achieved.
This article also highlights the recommended number of paint layers for a durable finish.
For optimal results, I use an airbrush and prime my miniatures with acrylic spray paints or Tamiya Surface Primers, which are available on Amazon.
Conclusion
I hope that this post has given you some insights into prime your miniature figures and airbrush them. If there are any other questions about priming or painting miniatures with an airbrush, please feel free to ask us in the comments below!

Hey there! I’m Richard Baker, a miniature painter who’s been in the game for a solid decade now. I’ve been painting miniatures for ten years and I’ve got a ton of tips and tricks to share with you all. My website is a treasure trove of knowledge that I’ve gathered from both my own personal experiences and from reading all sorts of books.


Leave a Reply