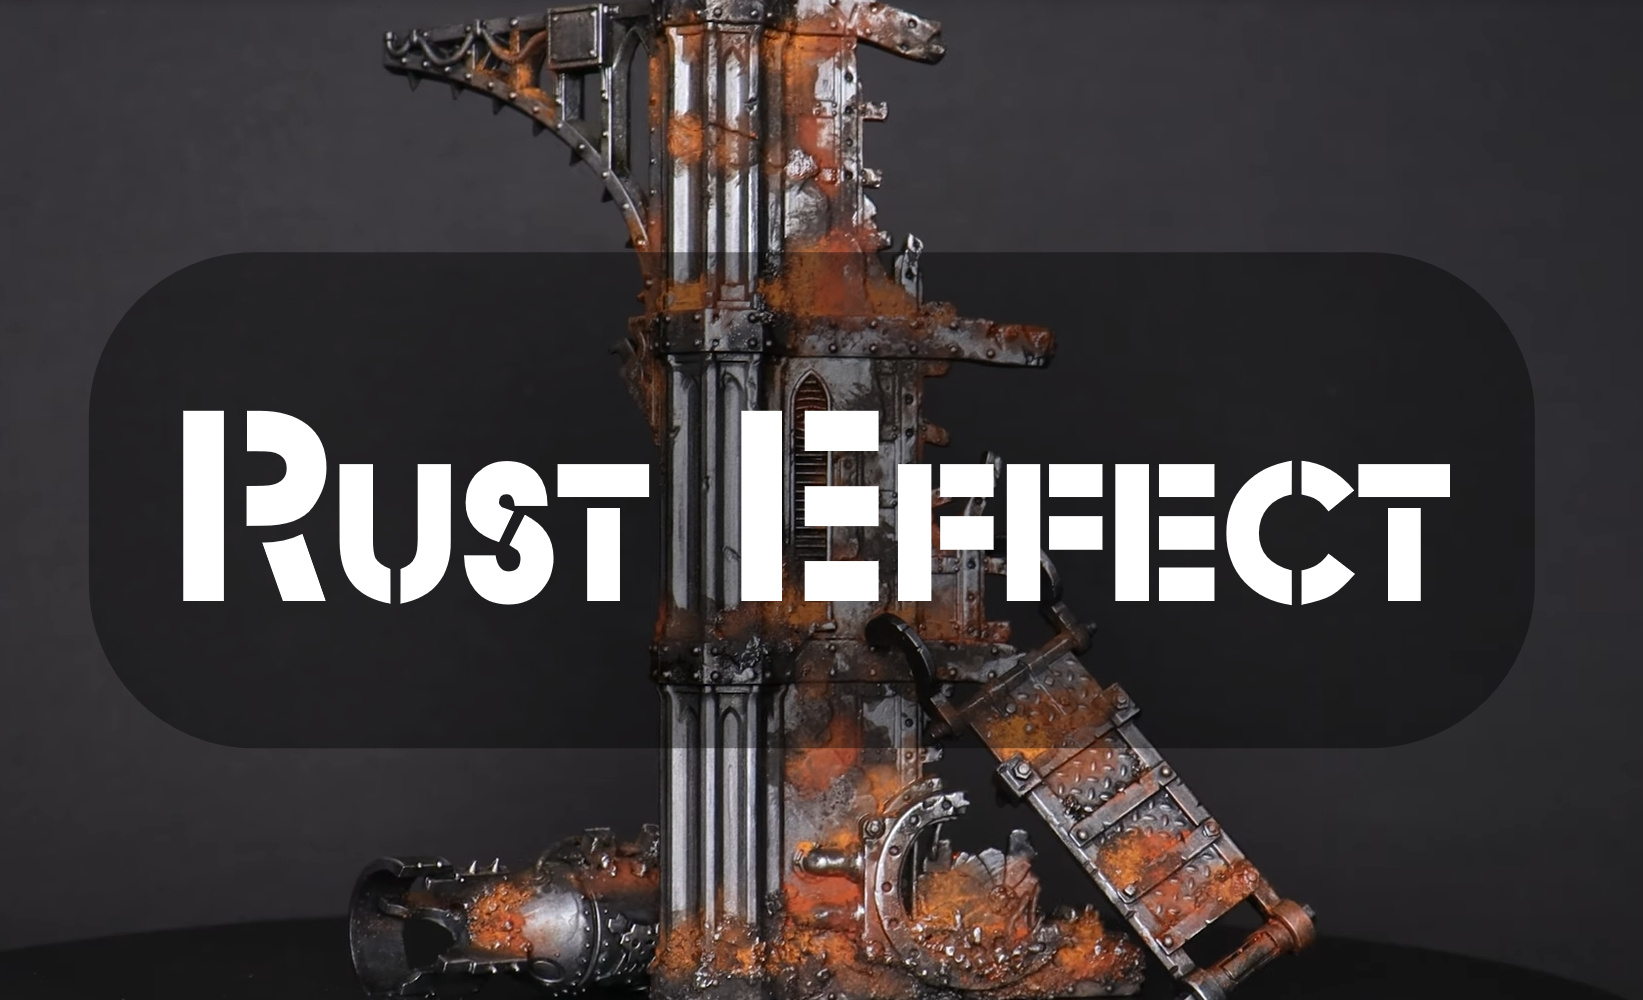
Hey there, miniatures enthusiasts! Today, I wanted to share with you my favorite way to add some rustic charm to your models. Now, I know there are a ton of faux rust products out there, but let’s be real, who wants to spend a fortune and hours upon hours of their time on that?
That’s why I’m here to share my secret with you on how to achieve rust effects with just a few simple household items.
I promise, even if you’re not the best at painting, this method is easy peasy! So, grab your brushes and let’s get started on bringing some character to your models. And who knows, maybe you’ll even impress your friends with your newfound rustic expertise. 😉
Tools:
- Paintbrush
- Rust paint
- Acrylic paint
- Light color paint
- Dark color paint
- White paint
- Paper towel or old rag
- Sandpaper
- Wire brush
Optional:
- An airbrush (this will make things go much faster but are not necessary)
- A rust pigment (I like MIG “Rust” #P038)
You’ll need:
- Rust-colored paint (I like Americana “Lamp Black” #1300)
- A light color paint (I like Americana “Bleached Sand” #1311)
- A dark color paint (I like Americana “Burnt Umber” #13064)
- White paint (I like Americana “Titanium White” #1350)
- A rust medium (I like Liquitex “Gloss Gel Medium” #12216)
- A cheap brush
- A paper towel or old rag
Or you can use Games Workshop/Citadel paints:
- Citadel “Mournfang Brown” #2419
- Citadel “Typhus Corrosion” #2420
- Citadel “Dryad Bark” #2421
- Citadel “Eshin Grey” #8028
- Citadel “White Scar” #7086
- GW rust paint set
I’ve found that the rust effect paints from Games Workshop/Citadel work just as well as the more expensive products on the market, and they’re much cheaper. Paint rust on miniatures using one of the following methods.
There are different types of rust:
- flaking rust
- pitted rust
- oxidized rust
- loose rust
You’ll need to mix different types of rust on your model to get realistic rust. I like to use three paint colors to represent different types of rust:
- Light color for flaking rust
- A dark color for pitted rust
- Rusty-colored paint for oxidized rust
Rust Effect Tutorial
Follow the steps in the tutorial below to make your models look rusty in no time!
Step 1: The first thing you’ll need to do is prime your model
I like to use black primer, but any color will work. Once the primer is dry, you’ll want to paint the entire model with light rust-colored paint. I like Americana “Lamp Black” #1300 for this. You don’t need to be perfect, as we’ll cover most of this color with washes and faux rust effects later.
Step 2: Next, we will apply a light wash of our dark color paint over the entire model.
This will help create depth and shadow in the rust that we’ll add later. I like to use Americana “Burnt Umber” #13064 for this. Again, you don’t need to be perfect. Some of the light rust colors should still be visible through the wash.
Step 3: Now we’re going to start adding the rusted metal effect
There are many ways to do this, but I’m going to show you a few simple techniques I like to use. First, we will add some corrosion around all of the edges and recessed areas of the model. To do this, I like to use Liquitex “Gloss Gel Medium” #12216 mixed with a little bit of our rust-colored paint. You can also use other rust mediums or pigments for this step, but I find that the gel medium is easy to work with and gives a nice, consistent faux rust effect.
Step 4: Apply the gel medium
To apply the gel medium, I like to use a cheap brush and just dab it around all of the edges and recessed areas of the model. You don’t need to be perfect, as rust forms in random patterns. Once you’re happy with the amount of corrosion you’ve added, set the model aside to dry.
Step 5: Add some rust streaks down the sides of the model
While the corrosion is drying, we will add some rust streaks down the sides of the model. To do this, I like to use Americana “Titanium White” #1350 mixed with a little bit of our rust-colored paint. Again, you can use other rust mediums or pigments for this step, but I find that the titanium white gives nice bright rust.
Step 6: Apply the white titanium mixture
To apply the white titanium mixture, I like to use a cheap brush and just dab it on in streaks down the sides of the model. You can also use an airbrush for this step, making things go much faster. Once you’re happy with the amount of rust conversion streaks you’ve added, set the model aside to dry.
Step 7: Add some rusty metal spots to the model
Now we’re going to add some rust spots to the model. To do this, I like to use Americana “Bleached Sand” #1311 mixed with a little bit of our rust-colored paint. Again, you can use other rust mediums or pigments for this step, but I find that the bleached sand gives nice subtle rust.
Step 8: Apply the bleached sand mixture
I like to use a cheap brush to apply the bleached sand mixture and just dab it on in small spots around the model. You can also use an airbrush for this step, making things go much faster. Once you’re happy with the number of rust spots you’ve added, set the model aside to dry.
Step 9: Add some rust streaks to the base
Finally, we’re going to add some rust streaks to the base. To do this, I like to use Americana “Raw Sienna” #1324 mixed with a little bit of our rust-colored paint. Again, you can use other rust mediums or pigments for this step, but I find that the raw sienna gives a nice, deep faux rust.
Step 10: Apply the clear varnish
I use an airbrush or spray can apply the clear varnish. If using an airbrush, thin the varnish with water before applying it to the model. Once you’re happy with the amount of texture you’ve added, set the model aside to dry.
Step 11: Add some final details for a realistic rust effect
Now we’re going to add some final details to the model. To do this, I like to use Americana “Deco Art Metallic Paint” in “Bronze” #1369. This is optional, but I think it really makes the rust pop.
Step 12: Apply the bronze metallic paint
To apply the bronze metallic paint, I like to use a small brush and just dab it on in small spots around the model. You can also use an airbrush for this step, making things go much faster. Once you’re happy with the amount of bronze you’ve added, set the model aside to dry.
And that’s it! You now have a beautifully rusted miniature that impresses your friends and family.
Troubleshooting the Painting of Corrosion (Rust) on The Miniatures
If you find that the rust is not turning out the way you want them to, there are a few things you can try:
- You can use a different color for the base coat of paint. Try using a light grey or beige instead of white.
- Try using a different color of paint for the washes. Instead of burnt umber, try using a dark brown or black.
- You could try using a different paint color to cover the rust streaks. Some good options are red, orange, or yellow. Just be sure to use a color that will contrast well with the titanium white paint you have already used.
- If your home has rust spots, you can try painting them differently. A brown or black color might work better than bleached sand.
- Using spray paint is a better way to get an even coat of paint. This will help to avoid any brush strokes.
- Use an airbrush to apply washes, rust streaks, and rust spots. This will help you to get even coverage and avoid any brush strokes.
- To create rust effects, you can use different mediums or pigments.
- You can use a texture medium or clear varnish to add texture to the surface of your model. This will help to create more realistic rust.
- Adding a reddish-brown color will help to create realistic rust.
- Adding rust to your models can be easy. All you need is weathering effects paint and a few simple steps.
- Remove loose rust by brushing it off with a toothbrush. Then, apply paint. Make sure each layer of paint dries completely before adding the next.
- Add different drawing techniques to your thumbnail; click here.
If all else fails, you can always buy a pre-painted model! Many companies sell models that have already been painted with rust. Just do a quick search on the internet, and you’ll find plenty of options.
Final Thoughts
In terms of embellishing your miniature models, rust is a prime resource that could add an air of authenticity to your creations. It’s an art that could be honed to perfection with some persistent practice, enabling you to craft rust that will effortlessly propel your models to the echelon of aesthetic beauty. The plethora of methodologies that you can exploit to create rust is endless, so don’t hesitate to venture out and discover the techniques that are most suitable to your proclivities. However, if your endeavors should fall short of your expectations, do keep in mind that you could always resort to the trusty practice of painting!
FAQ
What are the different types of rust?
There are three types of rust: superficial, intermediate, and deep. Superficial rust forms on the surface of a metal object and is easily removed. Intermediate rust is more severe and forms beneath the superficial layer. Deep rust can cause significant damage to the metal object.
How to paint rust in Warhammer?
There is no one definitive way to paint rust on a Warhammer figurine. However, there are a few methods that will give you good results. One way is to use a sponge to apply brown or black paint in light layers, then add highlights of copper or gold. Another method is to use metallic paint to create the effect of rust streaks on your miniature.
How can I make my miniatures look aged?
One way to make your miniatures look aged is to paint rust on them. This can be done with a few basic supplies and a little practice.
Which miniature brands are compatible with rust paint?
There are a variety of brands that can be used with rust paint. Some popular brands include Reaper, Games Workshop, and Warhammer. However, many other brands can be used as well.
What are the best paints to use for rust?
There is no one-size-fits-all answer to this question, as the best paints to use for rust will vary depending on the type of miniature you are painting and the brand of paint you are using. However, some good options include browns, oranges, and yellows mixed with a little black or green to create a realistic rusty hue. If you want a metallic finish, try adding silver or gold paint to your mix.

Hey there! I’m Richard Baker, a miniature painter who’s been in the game for a solid decade now. I’ve been painting miniatures for ten years and I’ve got a ton of tips and tricks to share with you all. My website is a treasure trove of knowledge that I’ve gathered from both my own personal experiences and from reading all sorts of books.


Leave a Reply