Alrighty, let’s spruce up this tutorial a bit! So, you wanna know how to apply water slide decals to your minis, eh? Well, buckle up because I’m about to drop some serious knowledge on ya!
Waterslide decals are the bee’s knees, let me tell you. They’re like tattoos for your hard surfaces. You can put them on mugs, tumblers, plates, and all sorts of fun stuff. You just print them out with your trusty laser or inkjet printer, soak them in water, slide ’em on, and bam! You’ve got yourself a fancy new accessory. And don’t forget to seal that decal with a top coat!
Now, I personally used my Cricut Explore Air 2 and Design Space to make my decals for my minis. Let me tell you, Design Space is a thing of beauty. You’ve got a ton of fonts to choose from, and they even have a library of pre-made images you can use. It’s like a candy store for scale modeling enthusiasts like myself.
Water slide decals are my favorite type of decals to work with. So much so that I base some of my kit purchasing decisions on the availability of the kit’s water slide decals!
Waterslide Decals – Attaching to the model.
- Cut around the design, close to the printed line. Make sure only one layer of paper is cut through. If you cut through two layers, you will damage the design. I recommend cutting with scissors or a craft knife and ruler, but be careful not to damage the model.
- Place the design in warm water (approximately 40 degrees celsius) for about 30 seconds until it easily slides off its backing paper. Try not to follow instructions on other websites, which say to leave it for 10-20 minutes; this will cause problems later when trying to remove excess water from under the decal (see below).
I would also recommend using distilled water if possible as this removes impurities from tap water which could cause issues later on if left on
Tutorial: How to Apply Water Slide Decals
Water slide decals are a great way to add an extra flair to your products. They can be used on various surfaces, including glass, metal, and even plastic. Applying water slide decals is a relatively simple process, but there are a few things you’ll need to do to ensure that your decals look their best.
First, you’ll need to ensure that the surface you’re applying the decal to is clean and dry. Any dirt or moisture will prevent the decal from adhering properly. Next, cut out the design you want to use from the sheet of water slide decal paper. Make sure there is no white border around the plan – if there is, the decal will not look professional.
Once your design is cut out, it’s time to apply it to the surface.
- Start by lightly spraying the back of the invention with water. This will make it easier to slide into place.
- Then, position the design on the surface and gently press down.
- Once it’s in place, use a soft cloth to smooth out any bubbles or wrinkles.
Applying water slide decals can be significant if you’re careful and take your time.
If you’re careful and take your time, applying water slide decals can be a great way to add some personal flair to your belongings. Water slide decals are thin pieces of paper that have been printed with a design, and they can be used to decorate just about anything.
To apply them, you’ll need to start by cutting out the design you want to use.
Then, carefully place the decal in water and wait for it to become saturated.
Once it’s soaked, you can gently slide the decal off the paper backing and onto your desired surface.
If you’re unhappy with the first try, don’t worry – you can constantly reposition the decal before it dries. Just be sure to work quickly, so the decal doesn’t dry before you’re ready.
- Paper Towel
- Decal sheet
Types of Waterslide Paper
There are two types of waterslide paper: clear and white. Clear waterslide paper is used for printing images that are meant to be seen on a light-colored surface. White waterslide paper is used for printing images that are intended to be seen on a dark-colored surface.
- Submerge your decal in the water for 30-60 seconds.
- Grab the decal with your tweezers.
- Wait 5 minutes after printing your waterslide decal paper to allow it to dry before moving on to the next step.
- In a well-ventilated place, spray acrylic sealer over the entire surface of your now-dry printed sheet.
- Waterslide decals are incredibly delicate and require care. If not appropriately applied, the decal may scratch, rip or tear during application. It is suggested that you do testing before you use your purchased product.
- Once the second solution has been applied, the decal may appear to wrinkle and look dreadful.
- If you haven’t had the chance to use water slides yet, I hope this tutorial will encourage you to try it.
- You can use your paintbrush for this step. Then use a paper towel to push the water out and dry it up. Start in the middle and work your way to each edge, drying up the water.
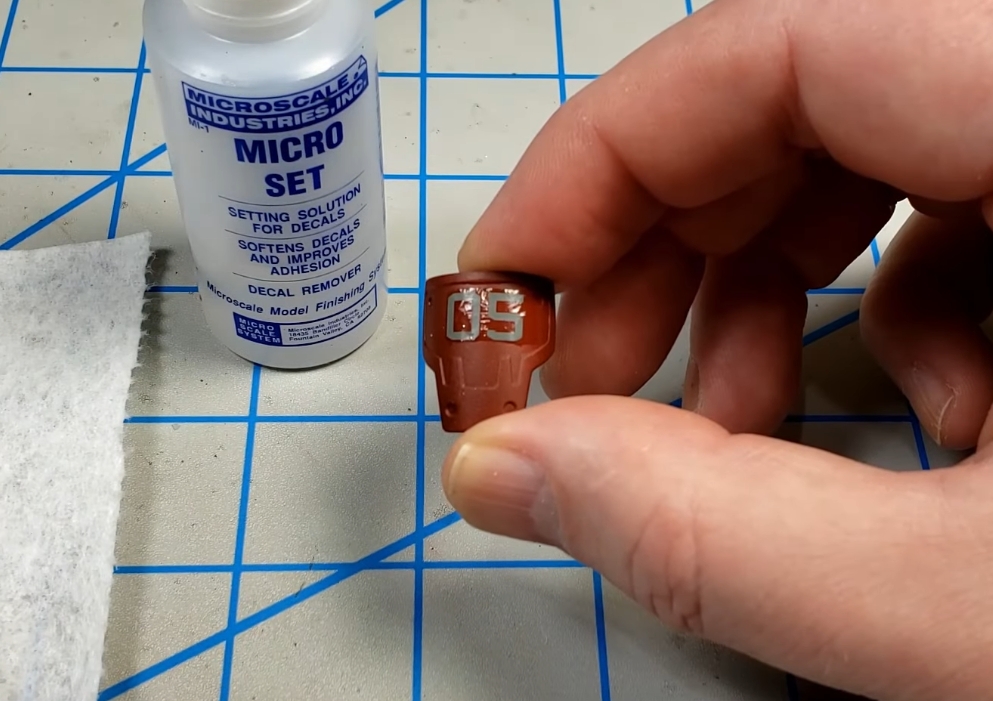
- I used to build models when I was a kid. When applying a waterslide decal, make sure it sits in the water until it just begins to curl at the ends. Once you have “slid” the decal onto the headstock, use your wet finger or a piece of paper towel to remove any air bubbles from the decal.
Waterslide Decal Application Instructions
- To apply your waterslide decal, first trim the decal as close to the image as possible. Next, soak the decal in water for 30 seconds. While the decal is soaking, prepare your surface by cleaning it with rubbing alcohol or mild dish soap. Once the decal has soaked enough, slide it off the backing paper and onto your surface. Use a credit card or other squeegee to smooth out air bubbles and ensure that the decal fully adheres to your surface. Allow the decal to dry for 24 hours before moving on to the next step.
- After your decal has had time to dry, you will need to seal it to protect it from wear and tear. For this step, you can use either a clear spray sealant or a brush-on sealant. Simply follow the instructions on your chosen product and apply it evenly over the entire decal. Once the sealant is dry, your waterslide decal is ready to use!
- After you bake your projects, allow them to sit for 3 days to let the colors completely come out. Once it has been set, you are ready to use your mug or wine glass. You might just want to do some additional projects as I did!
- First, apply nail polish to the base of your nail art. There are two types of water decals available in the market; one can be applied to any base nail polish color, and the other should be on a white base color only. I am using those that can be applied to any base.
- To seal a tumbler, do another coat of epoxy. You do not have to seal it again before putting on the epoxy, but you could if you wanted. I did not.
- You may moisten the application surface with water first to assist you in decal placement after application. Carefully slide the backing paper underneath the decal film, leaving the film on the application surface. You may use a small soft brush or your fingers to assist you in holding the film in place.
- I’m not sure what Mr. Mark Softer is, but its smell reminds me of the stuff I had to put on a planters wart when I was a kid.So I’m guessing it’s a fragile type of acid. Mark Softer ‘melts’ the decal to the part and helps to hide the borders. The overall effect is that the decal looks ‘painted’ onto the kit.
- Maybe the problem was that you kept decals too long in the water, and all the glue at the back of the decal dissolved. Then later, when you applied the decal to the model, there was nothing to hold the decal in place. I do not think the micro set solution alone can hold the decal independently.
- Before we get too deep talking about waterslide decals, I want to note that they are not dishwasher safe.
- I just tried this with the waterslide paper you recommended, but it disintegrated on me. I tried both 30 seconds soak and a 60-second soak. What do you think caused this?
- You may speed up this process using a hair dryer, do not use a heat gun. If any moisture is present when you apply your clear coat, you risk damaging the decal.
- Some modelers will only varnish those parts of the model where decals are to be placed, but there is a danger of producing a ridge at the edge of the varnish. Most modelers will varnish the entire model because this is needed for decal application and makes it easier to apply filters and washes to the model.
- But if you have a Cricut, here’s how you do it. Go back to Cricut Design Space and click Browse All Materials; search on
- Scottish Plaid style full nail water decal nail art with 3D white decals and China Glaze Autumn collection
- If you don’t thin out the first coat, it will dissolve the decal. Once the first coat has dried, you may apply a standard coat. Please make sure to request a test decal sheet and apply and test on scrap surfaces.
- You may use a small soft brush or your fingers to assist you in holding the film in place. Smooth out the decal using a damp paper towel or soft brush. Using a paper towel or soft brush, carefully dab away excess water.
- Just lightly brush the solution over the decal to apply the mark softer.
- My project is to print on waterslide paper and apply it to an enamel coffee mug.
- If you use enamel, clear acrylic coat, urethane, or lacquer, you must first use a thinned-out coat.
- If you plan to clear coat the decal, it is recommended that you first apply a clear coat over the application surface and allow the coating to dry. This will ensure that the application surface is smooth and that any previous pores are sealed.
- I did mention above that these are not dishwasher safe, so they would be hand washed only.
- There is also a new offset feature in Cricut Design Space that will help with this. You can see more about the exact steps to take with your Cricut in the video above. If you are having issues with print, then cut.
- Do laser-printed decals need to be sealed before being applied?
- One of the following clear coat sprays; Testors Glosscote* or Testors Dullcote* (many other clear coat sprays will work as well)
2 Step-by-step Video Tutorial

Hey there! I’m Richard Baker, a miniature painter who’s been in the game for a solid decade now. I’ve been painting miniatures for ten years and I’ve got a ton of tips and tricks to share with you all. My website is a treasure trove of knowledge that I’ve gathered from both my own personal experiences and from reading all sorts of books.


Leave a Reply